Sunday, December 29, 2013

Roster Addtions

As a final blog entry for 2013, I have put two new locomotives in service, which will help round out the roster for operating sessions.  Both are factory-painted models to which I added details, weathering, and decoders.  First up is Conrail 6345, a nice model of an EMD SD40.  I added lift rings, the cab roof antenna, grab irons, numerous warning decals, a snowplow, and weathering to this unit.  Here's the 3/4 view:


And, a broadside:


Finally, for the 6345, a cab-level shot showing some of the details and a closer look at the weathering:


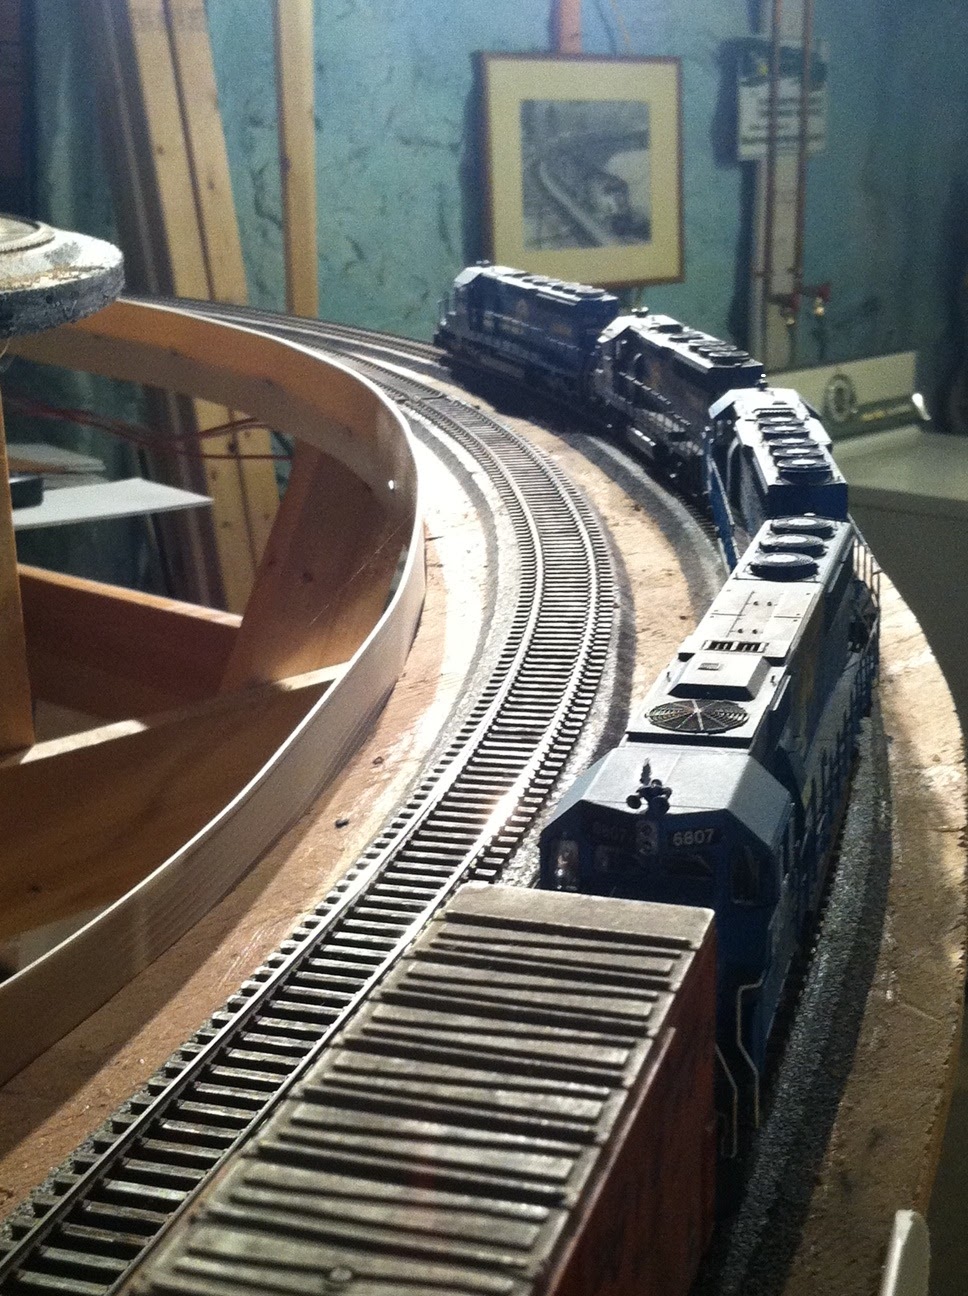
Also, at the request of several regular operators, I went ahead and put another run-through unit in service, the first SP locomotive I've ever finished.  SP 7427, a model of EMD's SD45, is ready for service!  SP power was relatively common on the Chicago Line in the early 1990's, especially on certain trains:  TV-556, TV-79, and SLSE.  This will be a nice compliment to the various D&RGW units I already have in service.  We will start with a 3/4 view:


This is an Athearn model in their 'RTR' series, and boy, I am impressed with the details right out of the box.  All I added were a few extra grab irons per the prototype, drop steps, windshield wipers, and lift rings; the rest was pre-applied at the factory.  This was also an opportunity for me to extensively use pastels for weathering, and that was how I obtained the look of the worn paint underneath the dynamic brake blister.  A broadside shows this better:


On SP and D&RGW, long, steep grades necessitated extensive use of the dynamic brakes, which created a lot of heat.  That heat was blown out through the grids above the lettering, and over the coarse of years and  years, and thousands of trips on steep hills, paint would fade and blister.  In many cases, you would see the base coat of red beneath the gray, which is what I modeled here.  Further, SP of the 90's was a cash-strapped company, and their image suffered as a result.  Their power was filthy unless it was brand new!  To capture that look, I airbrushed the unit with various washes and made heavy use of pastel chalks.  A cab-level view:


Just to show how much weathering was done, take a look at the photo below - this was how the unit looked straight out of the box:


With that, I close the blog out for 2013, with excitement for 2014 and years to come.  2013 has been a fantastic year for me personally and for the Onondaga Cutoff, too.  I am thankful for my family, and especially my patient, strong wife, and for our beautiful, happy little girl.  It's a blessing to be able to make this kind of progress on a model railroad, and to share that with you here and also through regular operating sessions.  This model railroad brings people together and is a lot of fun to build.  For me, this is what the hobby is about.  

Best wishes for a healthy, happy 2014 to you all!  

~RGDave


Thursday, December 5, 2013

Coming Together

With some downtime ahead of the holidays and before the last signal bridges arrive, I decided to get the last of the local control panels (LCP's) in place.  The last two to go in were at CP294 and CP295, and to install those, I needed to install the permanent fascia board at the same time.

This took more thought than I had planned on - it was difficult to visualize how it would come together, as I did not make the original stringers long enough.  After quite a bit of time staring, beer in hand, at the issue,  I came up with an idea to build a new 'backbone' for the edge of the layout.  To do that, I needed to hang some timber girders to provide direction and support for the LCP's and the fascia.  I built L-girders out of 1X3 lumber, and fastened those girders to the existing stub-end stringers; with some careful measuring and fitting, I had my finished product.  Here's another view:

The fascia provides a nice, hard, definite edge to the layout, and finally defines the area that needs scenery.  We are approaching a stage of construction that will be primarily devoted to scenery, and I am looking forward to that.  That's where the magic really comes to full view!

Merry Christmas, Happy Hanukkah, Happy Holidays to all!

~RGDave

Friday, November 15, 2013

A Fresh Look

Model railroading is a life-long hobby for those that choose to make it so.  I would argue that, compared to other hobbies, model railroading offers enjoyment at various levels, which is one angle that makes this hobby so great.  When you are a beginner, just starting out, the hobby is entertaining.  As you grow in the hobby, your skills and vision become more refined, and you can take it as far as you want to take it.

One example of that is my 3279.  This is a classic engine that I purchased in 1989, manufactured by Athearn Inc. in Compton, California.  This was part of their regular lineup and was painted at the factory in the Conrail livery.   Even at that time, I was interested in detailing locomotives and so I added several parts to the model to more closely represent the 'real' Conrail 3279, formerly a Reading Company GP40-2.  This meant that I needed to change the size of the fuel tank, add a cab-signal control box, snowplow, lift bars, and MU hoses, paint & decal the number boards and handrails, and weather the engine.

As my skills improved over the years, the 3279 started to look shabby in comparison to models I had finished more recently.  Other parts became available.  My research showed me ways in which I could further improve the model.  And finally, the conversion to DCC several years ago presented a great opportunity to take another hard look at the old 3279, and bring it up to modern standards.  Here's the result:


Without much doubt, this is the best this model has ever appeared.  Details make the model, and the correct fuel tank, the angled 'rain gutter' on the roof, smaller decals on the frame and nose lettering, and additional weathering all combine to create a more plausible model.

This hobby will grow with you.  There remains much to learn, of course; still, it is satisfying to see that, with some work, a model that stood out as being an early effort can be upgraded to fit better with the rest of the fleet.

~RGDave

Tuesday, November 5, 2013

Car-Forwarding & Freight Movement

After the Train Plan, the other central piece of paperwork in any operating session on the Onondaga Cutoff is the car-forwarding plan, as designed by Jack T. and Rich W.  Based on my research and layout space, I had come up with several industries loosely based on prototype facilities on the Chicago Line.  While not exact replicas, these industries are built to approximate the feel of some of the online industries that Conrail (and Syracuse-area shortlines) served.  This worked as we got sessions started two years ago.

However, yard traffic naturally ebbs and flows and due to the yard’s capacity of approximately 75 cars, and we realized quickly that things can get rather unmanageable for the Yardmaster as there was no set plan that allowed operators to plan ahead.  Nor was there any consistency to when the setouts and pickups were made.  Jack and Rich therefore took the loose plan a step further, devising a full interchange plan to accommodate where these cars would have come from and how they would be forwarded back. 

This plan has become the network behind the operation, assigning each and every move through Onondaga Yard a specific set of orders that are incorporated into switch lists and interchange manifests.  All trains that work the yard are on this sheet, as well as every industry, and the time the train arrives and leaves.  In the matrix are the car counts and types, helping operators keep track of their moves.  It appears complicated, and it was to create; however, operating with it is actually much simpler than it looks, and the entire operation is smoother now.

Now, it’s the key to the whole operation, and we’re learning more about it with each session!

Finally, an update for you on the signal progress:  the final 3 signal bridges are under construction this month, and should arrive before the end of 2013.  That will complete my order with Integrated Signal Systems.  With all the remaining hardware on hand, the completion of the signal system is just a few months away, and a dream of a fully-signaled, dispatcher-controlled mainline will be a reality.  These are exciting times!

~RGDave

Monday, October 14, 2013

The PLAN

Realistic operation on a model railroad requires more than just running trains on a nice-looking layout with realistic locomotives and cars. While those parts are components, and certainly add to the experience, the operation aspect is based on a plan. Since real railroads move freight and people according to a plan, we need a plan to model that operation.

Just as in reality, the plan is the basis for the trains that run in any given session. Therefore, here is our master plan - the master schedule that has been created to best represent a full 24-hour period of traffic that would have run on the Onondaga Cutoff (i.e., traffic that did not work Dewitt Yard), in 1994.

There's a lot that went into this - a base list of trains that I provided, hours of research by Jack using Conrail schedules from 1993, 1994, and 1996 to determine what time those trains would have been scheduled through my railroad, and - perhaps most importantly - experience running trains on the layout.

This is the key to all the other paperwork we use. Next time, we'll take a look at the other vital piece - the car-forwarding system.

In the mean time, enjoy the autumn! Lots of projects coming up soon on the Onondaga Cutoff.

~RGDave

Friday, September 20, 2013

On Operating Sessions...

A photo for you all:  It’s 4:25 a.m. on September 14, 1994, well before dawn, at CP 277 on Conrail’s Onondaga Cutoff.  The Mohawk Dispatcher has lined TV-8W, an eastbound stack train from Chicago to Worchester, Massachusetts, on Track 2 around WADE-30 (stopped at left) and SEEL, whose headlight is visible in the distance.  TV-8W's approaching headlight illuminates the signal bridge for just a few seconds.


One thing that has surprised me over the course of the development of the Onondaga Cutoff is how much satisfaction I take from hosting an operating session.  In the past, I’ve always enjoyed the building part of the hobby.  Operations was something that came later, largely thanks to my interest in prototype operations, and the steady influence of Jack, my longtime friend and partner in all things railroad.  During the design phase of this layout, it was apparent that this project would be much larger than any I had constructed before, and therefore could be fun with multiple operators.  Still, I generally imagined running trains myself more than I thought about any organized operations.  That changed in a hurry after the tracks were in place and operational!   It was quickly apparent that some sort of organization was needed to avoid chaos.  Paperwork was part of the operation from the beginning, but has taken on a critical role for each session now.  Thanks to the fact that the track design is as prototypical as the space would allow, operations really came very naturally to the layout. 

Over the next few blog entries, I plan to present some of the paperwork we use to make it all happen.  Once a month, the Onondaga Cutoff comes to life, and for a few hours, it feels like 1994 all over again.

~RGDave

Monday, August 26, 2013

CP 280 is Online!


As hoped, the cut-in for CP 280 went smoothly, and despite there being 15 heads and 5 turnout combinations to program and wire up, all of those tasks were completed in one evening.  Below is a photo of the eastbound home signals at CP 280, including those on the bridge for the main tracks as well as dwarf signals beyond, protecting the North and South Running Tracks.


The Local Control Panel was installed in the several days after the cut-in.  As of this week, the interlocking is complete except for scenery.  Exciting progress!


We are aiming to make more progress in the signal department over the next month, before the next operating session.  Much of the hardware and signals are on-hand to complete the remaining work; all that remains to be delivered are the final 3 signal bridges for CP 282 and the automatic signals in Camillus.  Integrated Signal Systems will be delivering those to me within the next few months as well.

Step by step, we are getting there!

~RGDave

Tuesday, August 20, 2013

Major Signal Progress


The signal gangs have been working steadily on the Onondaga Cutoff, generally from east to west, installing signals as they arrive from the manufacturer.  The latest batch to be installed include all signals protecting CP280, adjacent to the Onondaga Engine Terminal.  Here's a view of the bridge protecting CP280 eastbound, modeled after the westbound home signals at CP286 in East Syracuse, NY:


And, the unique bracket mast design protecting CP 280 westbound, with a backdrop of the engine terminal:


As we had discussed several months ago, this signal is modeled after the prototype westbound home signal at CP293 in Solvay, NY.  The Track 2 signals are mounted higher than the Track 1 signals, allowing trains running west on 2 to more easily see their aspects over a train on Track 1 due to the curve on the approach. 

All of these signals, along with the dwarf signals protecting moves onto and off of the North and South Runners and East Lead, will be activated this week.  If all goes well, by the end of the week, CP280 will be fully on-line and ready for service at the next operating session!

So, despite a busy summer schedule and a happy, excited baby daughter, we are still able to keep pushing forward on the 'O-C.'  Stay tuned, more to come!

~RGDave

Wednesday, August 7, 2013

Ready to Go!

The remaining signals needed for CP280 are now in the mail, which is exciting news!  The current plan is to cut-in CP280 later this month.  As we saw last time, the time spent waiting for those signals to arrive was used to work on my latest locomotive project.  I'm happy to be able to present the latest addition to the fleet!  After a set of decals, dullcoat, and some weathering, the 5050 is finally ready to go!  Here's a few views of the 3rd B36-7 to join the roster.  First, a 3/4 front, cab-height angle:


 And, a broadside:


This unit will soon be MU'ed with several others pulling intermodal trains around the railroad, with occasional appearances on manifest freights as well. 

Thanks for looking!  Next time, perhaps I'll have a few new signal shots for you!

~RGDave

Thursday, July 25, 2013

A Coat of Paint

A quick update for you from the workbench - the B36-7 is now painted, awaiting decals.  This unit will become Conrail 5050 in the next few weeks.  It is interesting how much darker Conrail blue appears without the decals. 


To ensure a more uniform coverage, I paint Atlas and Kato shells while they are disassembled.  This model was painted as a cab, body, and frame/sill assembly, and will be reassembled after decaling and dullcoat.  I have found the 'Scalecoat' enamel-based paint system, made by Weaver Models, to be an excellent product.  A few more Conrail units like this one and we will be set for a while, allowing me to work on some more of the rainbow of foreign units that appeared on the Chicago Line in the 1990's.

Hard to believe August is right around the corner!  Enjoy these summer days and evenings, and I'll be working to bring you a few more updates as the Autumn approaches.

~RGDave

Friday, July 12, 2013

Little Here, Little There

The dog days of summer have arrived early here in northwestern NJ; long, hot & humid days with the occasional thunderstorm.  Actually, it's been one of the wettest summers on record so far this year.  Dodging showers offers some time to be in the basement working on the railroad, so here's a July update with some progress.

The first is a sneak peak at a builder's photo of the next signal on its way to the Onondaga Cutoff - the bracket mast that will guard the eastern entrance to CP280.  This is another of the magnificent custom signals that are being built and supplied by Integrated Signal Systems.  The offset heads are a unique feature required here due to the curve on the approach - the higher heads for Track 2 will allow crews of trains on Track 2 to view their aspects over the top of a train passing on Track 1 (Photo credit Tim Maslyn):


This signal was modeled after the prototype installation at CP293 on the Chicago Line, with the difference being that CP280 is a yard entrance and therefore needs 3 heads to display the proper diverging aspects.  Compare below (Photo credit Nick Anshant):


As always, while waiting for new signals to arrive and for work-nights to be scheduled, I am working on other projects to fill time and keep the progress moving.  Currently, another B36-7 project is occupying the work bench, and is seen here ready for painting.  Creating an HO scale B36-7 is a chore, since there are none available in plastic.  The best starting location is the Atlas B30-7, as most of the details are correct.  I needed to rearrange the air intakes at the radiator section, modify several doors, replace the cab, remove the nose headlight mount, and add numerous details including an anticlimber, cab-signal box, several antennae, etc. 

And, most importantly, Susie has turned one!  It is truly hard to believe that she was born more than a year ago already.  She continues to be a happy, healthy little girl, and her presence has brightened my world.  Happy Birthday, Susie! 


Enjoy the long, peaceful evenings on these summer days!  Thanks for reading, please check back soon for more updates as the projects continue!

~RGDave

Friday, June 21, 2013

Backdrop Experiments

With a bit of downtime awaiting the delivery of the next batch of signals, I decided it was time to take a first shot at painting some of the backdrop that I had installed last year.  It had been painted a light, sky blue color, to suggest a mild, humid late summer day in Central New York.  First, I selected a light grayish blue green for the distant hills in the Finger Lakes.  Here we are at Nine Mile Creek, looking west, with that part completed:

What a major change to the feel of the space!  Suddenly, there is a sense of distance, and the whole space to me feels much larger from this one simple change.

After painting the distant hills around the whole layout, I selected a medium green for the base coat of the closer hills, in the places on the layout that will need closer hills - namely, the M&E.  This green is too consistent to stand alone.  It will just be the first coat, intended to suggest the shaded leaves in the forest canopy.  At least one more pass will come soon with a lighter, more yellow green color, applied unevenly, to suggest highlights and leaves on the surface of the canopy.  I also plan to paint clear areas with rows, to suggest distant farm fields.


Even with that said, however, when viewed from a distance, I am still excited with the illusion that the backdrop now provides, even with just these simple shapes painted onto the backdrop.  Here's a quick snapshot looking west at CP280, with the new signal bridge being test-fit as well.  The backdrop in view here is the same as the area above:


I'm excited with that view, and it will only get better once I find time to paint the highlights on the closer hills!  I am just a beginner with artistic painting like this - in fact, I haven't done any of it for decades.  I will be experimenting with techniques I have read about and am always open to any suggestions.

Enjoy the start of the summer - more progress coming soon!

~RGDave

Friday, June 14, 2013

Another Finished Product...

One challenging thing about the construction of a model railroad is that the time available to dedicate to construction is limited.  For me, my life is centered around my baby daughter and my wife, as well as a full-time career; all of that is in front of commitments to family and friends.  Then comes the model railroad, which splits time with activities that involve 'real' trains.  And even time allotted to the layout is split between operating sessions and actual, physical construction of the layout or of equipment.

Because of the limited time available to dedicate to progress on the model railroad, there is no current part of the layout that is finished.  It has been about 6 years in construction, including preparation of the space itself, and yet there are years more to pass before much of the layout will have any finished scenery.  Therefore, when I am able to install something that will be visible on the finished product, I am excited to be working on something 'final.'  The track and signals atop the railroad fall into that category, and so do the local control panels (LCP's) that allow for local control of the interlockings.


This week, after much preparation and wiring, I was finally able to fully install the LCP's for both CP277 and for CP274.  Each of them includes the proper momentary push-button switches to throw the turnouts, as well as indicator lights for the turnouts, all mounted on 1/8" aluminum that was printed professionally by a local sign shop.  Green lights indicate normal, red indicates reverse (crossing over).


The master toggle switch at top left allows the each panel to normally be kept 'off' which disconnects the push buttons to avoid operators inadvertently pressing buttons.  The indicator lamps work regardless of the position of the toggle.   After much discussion with operators, I decided on a plan for the indication lights.  Here again, green is normal and red is reverse, but since staging is more complicated than simply 'normal' or 'reverse,' I installed LEDs that light to show which route is clear - if the yellow light is on, the switch is thrown to that route. 

Two down, 4 more to go!  More signals are scheduled to arrive in late June, and we are hoping to have CP280 cut in before the end of August.  Enjoy the start of the summer!

~RGDave


Thursday, May 30, 2013

Rolling Into Summer

The weather here in NJ is finally beginning to feel like summer, and there's lots going on - house renovations, family get-togethers, and trips here and there, all on the horizon.  But, I filled the spring with lots of progress on the Onondaga Cutoff, and this post should bring you up to speed.

First, I have brought another locomotive on-line, this time detailing, weathering, and adding DCC to SD45-2 #6666.  It joined the fleet last week.  These locomotives were purchased by Erie Lackawanna, a Conrail predecessor, and were therefore always fun to see in real life.  They spent most of the Conrail careers around Cresson, PA, as helpers and coal train power.  However, there was a period in the mid-90's when they were leased to Canadian National Railway for several months, and therefore I can plausibly say this one is spending time on the Chicago Line as part of the CR/CN pool power agreement on trains CNSE and SECN, to and from Selkirk Yard near Albany, NY.

The mechanical department is also working to fill the roster with freight cars to serve industries on the railroad as part of a larger freight car forwarding plan that is currently under development.  Such a plan would organize car movements and help to manage yard capacity during operating sessions - stay tuned for more news on this as it comes to fruition.  Here we see a string of tank cars fresh from the work bench, ready for service.

And, while working on locomotives and cars, the signal project continues as well. I spent an evening with Rick this week, using his drill press to create the holes that will be used to mount the push-button switches and the indicator lights in each Local Control Panel. 

And, our little Susie is doing wonderfully - she is growing each day and is one of the happiest babies that I have met!  She's crawling, smiling, beginning to talk - every day is exciting with her and her mom is just the best mother I could have hoped for.  Good times.  :-)


Summertime will certainly bring along many activities that do not include the Onondaga Cutoff, but I will fit in progress where I can - and bring you updates here as they happen.  Enjoy the season!

~RGDave

Friday, May 24, 2013

The Next Cut-In

Tuesday of this week, thanks again to Nick and this time, Jack as well, we have another major step forward on the Onondaga Cutoff - the second of 6 interlockings is cut-in and fully computer controlled!  Tuesday, May 21, just before midnight, manual signals were removed from service and new, fully functional interlocking signals were placed in service at CP274, the easternmost interlocking on the railroad.

Here, we see the eastbound home signals for CP274, looking east with the Island East Lead coming in from the left, then Track 1, then Track 2 to the right.   The LEDs are nice and bright, and when seen in person, they appear considerably more red than these photos would suggest.  The brightness will be important, since as you can see, this is the lower level and will be covered by scenery above in the future.  Crews will be able to view their trains on the lower level from the side at this spot. 

Next, we move to the westbound home signals for CP274, all of which are visible in this image looking west out of staging.  Tracks here are S5 in the immediate foreground to the left, then S4, S3, S2, and finally S1 all the way to the far right.  

Single-head dwarfs guard the entrances to CP274 off S5, S4, and S3, due to the fact that the best aspect a crew can get out of staging is a slow clear (green) from these tracks.  Since all three of those tracks must pass through the #5 switch, which is a diverging move, that is the best aspect.

However, since on S2 and S1 trains do not necessarily need to diverge, a better signal aspect can be displayed, which requires another head on the dwarf signals.  Green over Green allows for a 'clear' aspect.  Seen here, S2 west is displaying green over flashing red, 'Medium Clear' for a westbound move from S2 to Track 1 west.

While we were able to get CP274 cut in in just one night, just like CP277, this belies the amount of work that was completed - CP274 is significantly larger than CP277, and so required much more work with both signals and switches.  While I worked to wire signals and Nick entered data into the CATS software and JMRI in the computer, Jack worked on the other side simultaneously, and wired switches to the SE8c.  This extra effort was absolutely essential to finish the work in one night.

As you can see, another major step forward was to receive the final LCP's from the print shop - now that we are doing cut-ins for the real interlockings and signals, it is time to begin to install the LCPs to compliment that effort!  The only work remaining for me to do is to finish up the wiring in the local control panel (LCP) for CP274 as well as the first cut-in, CP277.  That said, Nick's design worked perfectly for the panels!  A blog post on this process is coming soon, but I wanted to show you what they look like - I'm very happy with how these are turning out.

Summer is slow to arrive this year in New Jersey, but progress on the Onondaga Cutoff is benefiting from that!

~RGDave

Thursday, May 2, 2013

What a Difference!


On the tail end of downtime while we wait for more signals to arrive, I decided to put a little ballast down and set up a handful of trees that have been sitting around for years under the layout on the recently-applied hardshell terrain on the M&E.  All of this is temporary, since I have more painting to do on the backdrop and more ground cover to apply as well.  But, what a difference it makes!


This is the area just north of Skaneateles Creek, and it really does look nice, especially when viewed along the tracks like this.  Nice to have one spot with some scenery in place.  It offers an immediate taste of just how much more fun it will be to run trains during an operating session over a railroad with scenery!  Signals first, scenery follows. 

This is the 100th post in this blog - I'm excited about that, and happy to be bringing you the next 100 as we continue to build the railroad.

~RGDave


Sunday, April 28, 2013

Hardshell, and a Visit!

Now that the cardboard web 'skeleton' for the hardshell scenery on the M&E was in place, I found a bit of time over the weekend to apply some plaster-infused gauze for the actual surface of the hardshell.  This was the first time I'd tried anything with hardshell scenery, and while the rumors of the general messy application process can be true, the results are worth it.  It is a very durable surface once cured, and it can be done with no filing or cutting down of foam, so it works very well for non-cliff surfaces.  Here's the area just north of Skaneateles Creek on the M&E, with fresh hardshell curing.


Next will come some scenery for this location, although much of that will be a trial and will be temporary, pending some additional painting on the backdrop and the final construction of the cliffs at Skaneateles Creek.

A separate, and more significant, note is that this weekend was the annual meeting of ProRail (http://njprorail.org/), an organization of layout owners and modelers that work to replicate prototypical operations on their model railroads.  This year's meeting happened to be in New Jersey.  Thanks to my friend Rich W., I was introduced to one of the members of ProRail several weeks ago, and he was able to attend a recent operating session on the Onondaga Cutoff.  He then invited me to visit during the ProRail operating session, which I did.  What a great experience!  His railroad ran very well, and it was a pleasure meeting so many serious modelers (and operators).  Most exciting for me, several of the guys took an interest in what they heard of my railroad, and about 15 gentlemen from ProRail made a quick stop that afternoon to see the Onondaga Cutoff!  It was an honor to give them a quick tour of the layout and the operation, and to run a few trains around the railroad for them.  I hope to be part of that organization some day and, as always, it was a pleasure to share the railroad with visitors!

Summer is around the corner, so layout time will decrease as it usually does this time of year, but these are exciting times for my layout.  All the time ahead that I am able to spend on it will yield significant results!

~RGDave

Friday, April 26, 2013

For A Change of Pace...

Signal construction has occupied most of my thought and effort over the last few months on the Onondaga Cutoff, as you can see from the last few months of posts here.  While most of the components are now on hand, we are waiting for delivery of more signals and of the local control panels - both key items that need to be on hand before we proceed.  And, signals will come before scenery, since working beneath the roadbed is easier before everything is hidden by scenery!

In the mean time, however, I decided to begin some scenery construction on the M&E, since it will not have signals.  I have never done open-grid scenery construction, so I read up on techniques and settled on the hardshell method in some spots, and the foam board method in others.

Here, we see the Skaneateles Creek bridge on the M&E, which has been in place for more than a year.  However, it was temporarily supported, so I began my scenery work by installing the abutments for the bridge.  Once those were in place, I cut cardboard strips into appropriate lengths and used hot glue to secure them on what will be a wooded hillside.  Foam will be cut to represent shale cliffs, and rock castings will also be installed to model a cliff alongside the creek, which will be the final step.

Maybe it's the springtime, but it sure is nice to be working towards some scenery at least at one spot on the Onondaga Cutoff!

~RGDave

Tuesday, April 16, 2013

The Finer Points

One of the real pleasures of building a model railroad for prototypical operation is sharing the layout with others during operating sessions.  The Onondaga Cutoff is built to represent traffic on Conrail's 'Chicago Line,' their double-track, former New York Central route through Central New York, and with that vision in mind, several guys have been a big help with some of the finer points of the progress on the layout and operation.

Much of that assistance has been mentioned here before, including Jack's invaluable help with route design and operations planning, Rich's help with paperwork and locomotive manipulations, and Nick's help with signal design and construction.   Those are all cornerstones of the model railroad.  For some of the details, Al T. has been quietly contributing since he has first been part of the crew. 

In fact, so quiet have the contributions been that the operating crew now looks forward to seeing what might pop up next.  At one operating session, we suddenly found 'blue flags' for protection of standing equipment, used on the prototype to protect employees working on standing equipment.

For locomotives in Onondaga Engine Terminal like U23B 2795 here, blue flags now protect mechanical department employees who may be servicing locomotives.  Before moving equipment with a blue flag, the engineer must use the radio to make sure crews are clear of the equipment.

Another sudden arrival was a full set of the classic New York Central concrete milepost markers, nicely represented in HO scale and appropriately placed around the railroad at just the spots I would have placed them - but Al got to it first!  This sort of assistance really adds to the prototype feel of the layout, even before scenery is started. 

At one session, out of the blue, a talking defect detector began to announce the safe passage of trains through Camillus, NY, over the radio - Al had put together a quick recording that sounded much like the Conrail voices sounded, and using his radio for one session, we had those sounds on the air.

Then, this past winter, Al was operating a train over the railroad and called the dispatcher to report some 'kids near the tracks.'  Turns out those kids were trying to light up the approach-lit signals with some copper cable to check if any trains were coming.  Jack and I can't imagine where Al got that idea.  Thankfully, there were no further issues. 


These sorts of details bring a layout to life, even one that has yet to see any significant scenery construction.  Model railroading is a social hobby, and the Onondaga Cutoff is better for it!

~RGDave

Thursday, March 28, 2013

Details Make the Model

While signal construction and adjustment has dominated recent work efforts on the Onondaga Cutoff, I am again making time between signal work to build a few kits and work on other, smaller projects on the railroad.  One of those has recently been to assemble and install the fuel pad kit I had purchased years ago.  After working on it here and there, the 'final' fuel pad has been installed where the wooden mock-up used to sit. 

I'm happy with the look of this facility - I painted the components, and then weathered the slab, collection grates, and office after assembly.  A few figures and details top off the scene.  Now that this is installed, I can assemble the sand tower and finally install the full engine yard surface.  There will be 'concrete' aprons around the facility itself and well-weathered ballast everywhere else.

Details make the model.  On a big layout, details take time, but are worth the effort!

~RGDave

Friday, March 22, 2013

Major Step Forward

I'm happy to provide some of the most significant news to date regarding the Onondaga Cutoff:  on Wednesday, March 20, the home signals at CP277 were cut in, and are now fully under computerized dispatcher control.  Here's a telephoto view of the new eastbound home signals:


And, enjoy this video of the first test run, an eastbound manifest freight, knocking down the eastbound 'clear' aspect on Track 2:


These are the first of many beautiful, custom signals I have ordered from Integrated Signal Systems in Florida.  ISS builds signals to your specifications, and I have found they are much more to scale than others on the market.  CP277 is the first of 6 interlockings and 3 intermediate signal locations to be cut in.  As the budget progresses and allows more signals to arrive, more cut-ins will follow.  It's a long term project - I am working to have the full railroad under computerized control, with manual options, by the end of 2013.

This project would simply not be possible if not for the help and guidance of those assisting me.  Like Rick helped so much with bench work 4 and 5 years ago, Alex, Jack, and Nick have been instrumental in operation and signal system design, and Nick deserves special mention for signals, as he has stepped in with this new layer of signal construction and installation.  There is plenty of work to come, and their help and enthusiasm is invaluable.

In a society that increasingly is obsessed with immediate satisfaction and quick rewards, I believe there is something to be said for grand visions and for the continual progress required to accomplish all that the vision defines.  Smaller steps over time perhaps call back to 'old hobbies' or a more simple society, but there is something natural about that:  Long-term projects involving numerous people working together over years, like the construction of the Onondaga Cutoff or that of a real railroad, hold a special energy.  Further, operating a railroad builds even more upon that same chord.  There is a sense of community that is only developed when people come together, working towards a common goal in construction, or in an efficient operation. In reflection, that energy is one of many reasons why I have always loved the railroad.  It's a journey.

Thanks for joining me on the journey!
~RGDave

Monday, March 18, 2013

Signal Progress!

As a belated birthday present, Jack arrived at my home last weekend with an arm full of model railroad signals, and a full evening of time to install them on the Onondaga Cutoff.  These are off-the-shelf, generic signals made by Model Power, but Jack's idea is that since it will still be many months until the 'real' signals are up and running, this way things can look better in the mean time, and we get a head start during operating sessions deal with actual signal aspects.

Here's a 'medium clear' on Track 2, east at CP280, with the temporary signals standing guard:
Note the dwarf signals to the left, guarding yard track entrances to the interlocking. 

The new signals were located at the entrances to each interlocking across the whole railroad, and will allow the dispatcher to use manual controls under each signal to display aspects for train crews.  These signals are not linked to the detection or the computer, but still will allow for a much more prototypical look than my original system of cardboard and sprue!  I think we can agree this is a huge improvement over the old system.

Jack is working on a signal aspect card for the temporary system to get operators used to what the different colors and patterns mean for the train approaching them.  Railroad signals are more than a traffic light for trains - while traffic lights tell drivers to stop, slow down, or proceed, railroad signals do that plus tell trains which route they will be taking as well as what maximum speed to use when passing the signal.  It's a fascinating part of railroading, and an even more fascinating part of model railroading.

A big thanks to Jack for taking on the expense and donating his time to the railroad.  It only gets better from here!

~RGDave

Monday, February 25, 2013

Block Detection - Fully On-Line!

In another major milestone, this one thanks largely to the help of Nick, I can announce that all 33 detected blocks on the Onondaga Cutoff are fully linked to the computer and the dispatcher's screen.  While work remains to equip each car on the railroad with the resistive wheelsets necessary for the detection to trip, the system itself is where it needs to be.  Take a look!


Nick built all the signals in to the CATS software, which runs with JMRI to control the signals in a CTC fashion.  The software is now essentially ready to be linked to the signals themselves, but first we need to get the interlockings converted from their current analog control boards to digital controllers, which are stationary DCC decoders designed to control 8 turnouts or pairs of turnouts each.  The interlockings are the next major project, but for now, it's fun to see trains 'routed' (green lines) across the railroad on the screen, and more fun to watch the track occupation lights (TOL's, the red lines) flash in as the system detects the train on the track. 

Exciting progress!

~RGDave

Tuesday, February 19, 2013

Success!

We're back up and running after replacement and rewiring of the circuit breakers for the railroad!


The first move to test our new breakers was a 52-car ELSE.  Here that train is in photos, coming and going at milepost 293, climbing towards the summit at CP 282.  Thanks to sound construction techniques, labeled terminals, and the patience to have done it right the first time, I was able to quickly replace the 6 breakers with the issues by simply substituting the new ones, which all work as intended.  This time I remembered to ensure that the 'SETUP' jumpers were not left on the boards!

One thing I did change as part of this process was the bus wire that ran to the breakers from the command station.  All of this was originally solid 12-gauge wire, which is very stiff and therefore puts some strain on the fine soldered joints on the printed-circuit boards of the EB-1 breakers.  I changed all of it to 14-gauge stranded wire, which is much more flexible.  The track bus all remains the original solid 12-gage copper wire.

So, we're back in business on the Onondaga Cutoff!  Later this week, we hope to begin running wire from the BD-20 detectors (see the January 2013 blog entries) back to the command station, which will enable the computer to 'see' the entire railroad from a block detection standpoint.  Exciting developments coming soon!

~RGDave

Tuesday, February 12, 2013

Sometimes you Win, Sometimes...

...you have to fix what you lost!

Most of you who follow the blog know that I'm running a PowerPro 5-amp system with a second booster unit for my HO scale railroad. I have 6 EB-1 circuit breakers, three on each booster unit, that until this weekend were working perfectly. Since all 6 need the same settings, I never changed the factory-set stationary decoder address of 2044 (which, by the way, is not an address I use on the model railroad for any locomotive).

This weekend during an operating session, the EB-1's all stopped tripping, and therefore the boosters themselves would trip when there was a short.

In troubleshooting, I realized that I had never removed the 'SETUP' shunt on any of the EB-1's, which is explicitly mentioned in the directions.  For two years, it was no problem, due to simple programming that did not affect the CV's that control EB-1's.  Recently, however, I have installed the JMRI software to assist in programming and to control the detection and signal system.  JMRI allows speed matching of locomotives as well, a huge asset with a locomotive fleet as varied as mine.  While it is simple to do this on the computer in JMRI, the computer is actually doing quite a bit of CV programming in the background...including several that affect the EB-1's when the SETUP jumper is left installed.  In effect, I had reprogrammed my EB-1's, and they no longer worked!

I did attempt to follow the directions and do a factory reset per the instructions, which had no effect.  I even called NCE and asked for advice, and even their advice to enable the manual reset had no effect.   It was time to bite the bullet and order 6 new EB-1's for the railroad.

Long story short - FOLLOW THE DIRECTIONS!  Some days are diamonds, and some days...well, they're rocks.

~RGDave

Monday, January 14, 2013

Major Step Forward


On January 14, a Monday evening, I installed the thirty-third block detector on the railroad.  Upon testing its functionality, I had finished the installation of blocks and block detection - the foundation upon which the signal system will be built.  It was a nine-month program to install all the detectors around the layout, along with several months of planning before I got started.  As it happened, both Kristen and Susie walked downstairs to say hello, and so the whole family was present for the moment!


This is just the first part of the signal installation project on the railroad, but it's a significant one - involving the rewiring of the power bus on one of the main tracks and several of the controlled yard tracks, and all associated feeders.  I'm thankful to be done with cutting into existing wiring!  Next up is wiring each BD20 block detector to the DCC system, via a separate card that is linked to the command bus.  Once that's completed, we move to interlockings - installing the final local displays and the stationary decoders that drive the switch machines and signal heads.


So, as Susie turned 6 months old, I also was able to get through the detection process.  Monday night was a night that I could stand back for a moment and reflect on completing a major part of the remaining work on the Onondaga Cutoff. 

~RGDave

Wednesday, January 9, 2013

Snowfighting on the Cutoff

Modeling Central New York means that the Onondaga Cutoff needs some snowfighting equipment on the railroad year-round.  Just as Conrail based a host of plows, spreaders, and snowblowers at Dewitt Yard, there would also have been a few plows and such based in Onondaga Yard.


Here, we see an older-model Jordan Spreader and a Russell Plow, both of which are getting a once-over by mechanical forces.  Even though I will likely not model deep snow on the railroad, it is interesting to have the plows displayed, and even to operate them on days when the prototype would.  I have an additional Russell plow kit that has yet to be built, and I also have a beautiful Overland Models modern Jordan Spreader that needs paint and finishing.  All yet to come on the OC.

Further, I have finished block detection now within CP 282, and all that remains is 8 more blocks down the hill to CP294 and 295 - slowly but surely, we're getting there with the signal system!

Happy New Year!

~RGDave