
Preparation and construction of a basement-sized, HO-scale model railroad based on Conrail's operations through Central New York on the Chicago Line in 1994.
Saturday, December 25, 2010
Tuesday, December 21, 2010
Modifying Switches for DCC
In this post, I want to cover a step-by-step process for modifying older 'electrofrog' or 'insulfrog' turnouts for DCC. It is my opinion that this topic has received little, if any, relevant press. Some sources say that you simply need to 'isolate the frog from the point and stock rails, and isolate the points from each other.' Some say 'be careful' or even 'buy new turnouts.' None of these offer a how-to solution on converting existing turnouts.
This project will save money for all of us building a DCC system who can find older turnouts used, or that matter, have old turnouts lying around, but not yet laid. For example, I got my 50 Shinohara electrofrog turnouts for $5 each, albeit heavily used. Regardless, this is much more cost-effective than the $25-$35 you pay for these new!
When you really sit and think about it, however, this process seems trickier than it sounds at first. I went ahead and experimented. I destroyed two turnouts in the process, but figured out a way to spend about 20 minutes work per turnout and have a good-looking, DCC-friendly machine in the end.
Turnout Basics
Frog number - anyone know how this works? There is a precise trigonometric calculation (cosecants and cotangent angles) used by American railroads, but for our modeling purposes, we can treat it like a ratio of 'rise over run' as European railroad engineers do. The 'rise' is how far the divergent track diverges per the unit length - so, therefore, the frog number is a geometric ratio of distance-to-offset. A #4 frog (or #4 turnout) therefore measures four units along the straight route, while moving one unit along the diverging route. Similarly, a #6 turnout measures 6 units along the straight for every unit diverging. So, the larger the number, the more gentle the offset, and the more gradual the turnout.
For example, a #6 turnout that is 12 inches from the points to the end of the straight route will have the diverging route be 2 inches away [(1/6)*12=2] from the straight route by the end of the turnout.
Electrically, it is no secret that 2-rail model railroads generally run on DC power, with each rail an opposite polarity. For DC railroads, then, with conventional non-DCC power, reversing the polarity reverses the current, and therefore the direction the motor spins. Turnouts complicate things because rails of opposite polarity cross at the frog. Therefore, there are two choices: a permanently-isolated frog, or a frog that changes polarity to match the direction for which the turnout is lined, with that electronic conductivity provided by the point rails closing against the stock rails. Frogs that are powered by the point rail contacts can cause problems with DCC, as a simple derailment (or out-of-gauge metal wheelset) can cause momentary contact across opposite polarity rails, which can cause quick damage to the sensitive DCC decoders. Additionally, many manufacturers made turnouts with both opposite points connected by soldered crossbars, riveted in the center to ties or the throwbar, increasing further the chance of a short.
Frog Modification
In many older turnouts, the frog is powered by way of point contact. This includes older Atlas, Peco, Shinohara (Walthers), and Micro-Engineering designs. As you can see below, there are no gaps to insulate the rails in the frog from each other - the entire frog and point rails all share the same polarity by way of point contact.


Point Modification
The key here is that the point rails need power, especially if you have insulated frogs as described above, so that there are no stalls. In some many older turnouts, the points are soldered together by means of metal crossbars, which are in turn riveted to the plastic ties or throwbar. See the photo below.

How does one isolate each rail if, by design, they are soldered together and riveted as one to the ties?
First, keeping the general alignment of the points is crucial for throw machines to align the points correctly after modification. (I screwed this up, but was able to work around it). My method was to carefully cut strips of .15" thick styrene from a sheet to fit between the ties, perpendicular to the points, and to secure these from below with small dabs of Walthers GOO adhesive on each point rail. I put two on the points, one on each end, mounting them from below, several ties from the rivets.

Once that cures overnight, I used my Dremel tool and cutting disc to cut vertically through the metal connection bars and their copper contacts beneath. This caused a mess, but thanks to the styrene strips, the points held their gauge. I used an x-acto knife to clean up the burrs caused by the cutting disc. In the photo below, see the slice in the heel-point connector bar.

Once that is complete, the addition of several more styrene strips beneath the points and two on top of the point assembly over the old connections stiffens up the modification and improves the overall look as well. Again, an overnight cure will allow all to set up well.

I test the isolation by hooking the turnout to a conventional transformer, throwing the turnout, and then checking for shorts if I bridge a point rail with the adjacent stock rail. If there are no shorts, then my isolation is complete!
Electrical Continuity
Finally, we need to make a modification to connect the now-isolated point rails to the stock rails to match their polarity, which in turn will be soldered to feeders and the bus. Since each point rail only needs to be connected to the adjacent stock rail, small 1/4" pieces of scrap brass or copper can be soldered, creating an electrical bridge (e-bridge) to the points.
Early on in this process, I invested in a resistance soldering machine, which has been nothing short of a Godsend for wiring. While a regular pencil iron works best for bus/feeder connections, the resistance machine is CRUCIAL for small, neat joints between feeders and rail, and in this case between e-bridges and point rails.
To install the e-bridges, I place the turnout upside down the work bench, then use a razor saw to remove the plastic webbing between ties. With the rail bottoms exposed, buff the nickel-silver bottom of the rails with a wire disc on your Dremel, apply a dab of flux and 1/4" piece of brass wire, then resistance-solder the wire in place. Work quickly to avoid melting and warping the nearby ties. If they do melt, use the x-acto blade or any tool to straighten them while they are soft. You can see on mine that the ties did warp a bit, but to me, that looks prototypical for a yard switch anyway. The final soldered connections are visible in the photo above with the tube of Goo above the turnout.
Paint
The bright-white styrene strips between the points will disappear if painted rail brown, and actually do a plausible job of approximating some styles of prototype throw bar. In my case, I think they even look better than the big, ugly round rivet in the turnouts as they were manufactured! Here a modified curved turnout in Onondaga Yard has been laid in place, weathered, and linked to a Caboose Industries Inc. ground throw.

All for now. Good luck, and my sincere best wishes to all through the Holidays and for a happy, healthy 2011!
~RGDave
This project will save money for all of us building a DCC system who can find older turnouts used, or that matter, have old turnouts lying around, but not yet laid. For example, I got my 50 Shinohara electrofrog turnouts for $5 each, albeit heavily used. Regardless, this is much more cost-effective than the $25-$35 you pay for these new!
When you really sit and think about it, however, this process seems trickier than it sounds at first. I went ahead and experimented. I destroyed two turnouts in the process, but figured out a way to spend about 20 minutes work per turnout and have a good-looking, DCC-friendly machine in the end.
Turnout Basics
Frog number - anyone know how this works? There is a precise trigonometric calculation (cosecants and cotangent angles) used by American railroads, but for our modeling purposes, we can treat it like a ratio of 'rise over run' as European railroad engineers do. The 'rise' is how far the divergent track diverges per the unit length - so, therefore, the frog number is a geometric ratio of distance-to-offset. A #4 frog (or #4 turnout) therefore measures four units along the straight route, while moving one unit along the diverging route. Similarly, a #6 turnout measures 6 units along the straight for every unit diverging. So, the larger the number, the more gentle the offset, and the more gradual the turnout.
For example, a #6 turnout that is 12 inches from the points to the end of the straight route will have the diverging route be 2 inches away [(1/6)*12=2] from the straight route by the end of the turnout.
Electrically, it is no secret that 2-rail model railroads generally run on DC power, with each rail an opposite polarity. For DC railroads, then, with conventional non-DCC power, reversing the polarity reverses the current, and therefore the direction the motor spins. Turnouts complicate things because rails of opposite polarity cross at the frog. Therefore, there are two choices: a permanently-isolated frog, or a frog that changes polarity to match the direction for which the turnout is lined, with that electronic conductivity provided by the point rails closing against the stock rails. Frogs that are powered by the point rail contacts can cause problems with DCC, as a simple derailment (or out-of-gauge metal wheelset) can cause momentary contact across opposite polarity rails, which can cause quick damage to the sensitive DCC decoders. Additionally, many manufacturers made turnouts with both opposite points connected by soldered crossbars, riveted in the center to ties or the throwbar, increasing further the chance of a short.
Frog Modification
In many older turnouts, the frog is powered by way of point contact. This includes older Atlas, Peco, Shinohara (Walthers), and Micro-Engineering designs. As you can see below, there are no gaps to insulate the rails in the frog from each other - the entire frog and point rails all share the same polarity by way of point contact.

To isolate the frog in any switch where the frog is not isolated, a simple cutting disc in a rotary tool (such as a Dremel) will suffice. A quick 4000-rpm slice through the 4 approach rails about 1/4" from the ends of the frog will isolate the frog.

You can then fill these gaps with styrene secured with Cyanoacrylate Adhesive, and file to the profile of the rails, or you can leave them as air gaps.
In most cases, insulated frogs do not adversely affect operation. For some extremely small-wheelbase locomotives, such as an 0-4-0 steam switcher or an industrial diesel 'critter', there may be a stall issue in higher-number (i.e., longer) frogs (#6, #8, #10, etc.), but everything else should be able to bridge the gap. In any event, most modern turnout machines (including the Circuitron (r) Tortiose machines I am using) have a power-routing double-pole, double-throw switch internal to the machine that allows for automatic power routing to the frog.
Point Modification
The key here is that the point rails need power, especially if you have insulated frogs as described above, so that there are no stalls. In some many older turnouts, the points are soldered together by means of metal crossbars, which are in turn riveted to the plastic ties or throwbar. See the photo below.

How does one isolate each rail if, by design, they are soldered together and riveted as one to the ties?
First, keeping the general alignment of the points is crucial for throw machines to align the points correctly after modification. (I screwed this up, but was able to work around it). My method was to carefully cut strips of .15" thick styrene from a sheet to fit between the ties, perpendicular to the points, and to secure these from below with small dabs of Walthers GOO adhesive on each point rail. I put two on the points, one on each end, mounting them from below, several ties from the rivets.

Once that cures overnight, I used my Dremel tool and cutting disc to cut vertically through the metal connection bars and their copper contacts beneath. This caused a mess, but thanks to the styrene strips, the points held their gauge. I used an x-acto knife to clean up the burrs caused by the cutting disc. In the photo below, see the slice in the heel-point connector bar.

Once that is complete, the addition of several more styrene strips beneath the points and two on top of the point assembly over the old connections stiffens up the modification and improves the overall look as well. Again, an overnight cure will allow all to set up well.

I test the isolation by hooking the turnout to a conventional transformer, throwing the turnout, and then checking for shorts if I bridge a point rail with the adjacent stock rail. If there are no shorts, then my isolation is complete!
Electrical Continuity
Finally, we need to make a modification to connect the now-isolated point rails to the stock rails to match their polarity, which in turn will be soldered to feeders and the bus. Since each point rail only needs to be connected to the adjacent stock rail, small 1/4" pieces of scrap brass or copper can be soldered, creating an electrical bridge (e-bridge) to the points.
Early on in this process, I invested in a resistance soldering machine, which has been nothing short of a Godsend for wiring. While a regular pencil iron works best for bus/feeder connections, the resistance machine is CRUCIAL for small, neat joints between feeders and rail, and in this case between e-bridges and point rails.
To install the e-bridges, I place the turnout upside down the work bench, then use a razor saw to remove the plastic webbing between ties. With the rail bottoms exposed, buff the nickel-silver bottom of the rails with a wire disc on your Dremel, apply a dab of flux and 1/4" piece of brass wire, then resistance-solder the wire in place. Work quickly to avoid melting and warping the nearby ties. If they do melt, use the x-acto blade or any tool to straighten them while they are soft. You can see on mine that the ties did warp a bit, but to me, that looks prototypical for a yard switch anyway. The final soldered connections are visible in the photo above with the tube of Goo above the turnout.
Paint
The bright-white styrene strips between the points will disappear if painted rail brown, and actually do a plausible job of approximating some styles of prototype throw bar. In my case, I think they even look better than the big, ugly round rivet in the turnouts as they were manufactured! Here a modified curved turnout in Onondaga Yard has been laid in place, weathered, and linked to a Caboose Industries Inc. ground throw.

All for now. Good luck, and my sincere best wishes to all through the Holidays and for a happy, healthy 2011!
~RGDave
Monday, December 20, 2010
Merry Christmas, Happy Holidays and Happy New Year!
A quick update to say that yes, I'm still alive, and all is well - the usual holiday activities are keeping me very busy and more thankful than ever for all things good in my life.
I am working on a big post regarding my turnout modification process and will have that up later this week. Best wishes to all; thanks for your patience as we come to the start of the new year!
~RGDave
I am working on a big post regarding my turnout modification process and will have that up later this week. Best wishes to all; thanks for your patience as we come to the start of the new year!
~RGDave
Wednesday, November 24, 2010
Happy Thanksgiving
To all of you, Happy Thanksgiving to your and your families - may it be peaceful and safe!
Tuesday, November 9, 2010
A Push to Finish the Yard
With the new DCC system awaiting installation, I am pushing hard to get the yard in service. Over the weekend, I finished installing the body of the yard including both ladders, all the yard tracks, and the North Runner. The last few evenings have been spent wiring it, more than 70 feeder wires so far. That's a lot of rail joints and worse, lots of joints at the back of the layout that require quite a stretch to reach! But, at long last, all that remains is to wire the feeders to the bus below the layout.
Then it is on to the engine yard, which will be its own challenge, but is considerably smaller than the yard itself.
Here is the newly-laid East End of Ononodaga Yard, with the yard tracks stretching into the distance. The main line is to the left, then continuing to the right are the south yard, north yard, and finally the North Runner. The turnout to the future engine facility is at extreme right.
 It won't be this empty for long. But it will be again a few months from now, when Kristen and I hang the backdrops. With the yard in service, I will finally be able to put more cars on the railroad too, so I can start to build kits that I've had for years - which will be fun later this winter as a break from layout work!
The view of the yard from the West End is also much more enjoyable now with the yard all in place:
 In the middle left of this view, you can see the unique 3-way turnout I am using to allow the North Runner to rejoin the North Yard Ladder. This saves an important amount of space, as you can see. If I needed another separate turnout for that, I would loose a track in the North Yard.
It is important to test all this trackwork before going for DCC - derailments now are a hassle but don't fry decoders! I can fine-tune all the joints, turnouts, and gaps to ensure when I plug in DCC and run the first train into the yard I don't end up with constant problems. For this purpose, I put together a train of varied cars, and run it through the yard as tracks become 'live' with feeders. This is a 25-car train, a good length for a future operation that would terminate and originate at Onondaga Yard. I took the liberty of calling this SEON, Selkirk (Albany), NY to Onondaga Yard. SD40-2 6495 leads a C30-7A into the North Runner:

Lots of fun. It will be great to populate the yard once it is all wired, and even more fun to switch the yard with a radio-controlled DCC throttle and train, while mainline trains pass at speed. Good times coming on the Onondaga Cutoff!
Then it is on to the engine yard, which will be its own challenge, but is considerably smaller than the yard itself.
Here is the newly-laid East End of Ononodaga Yard, with the yard tracks stretching into the distance. The main line is to the left, then continuing to the right are the south yard, north yard, and finally the North Runner. The turnout to the future engine facility is at extreme right.

The view of the yard from the West End is also much more enjoyable now with the yard all in place:

It is important to test all this trackwork before going for DCC - derailments now are a hassle but don't fry decoders! I can fine-tune all the joints, turnouts, and gaps to ensure when I plug in DCC and run the first train into the yard I don't end up with constant problems. For this purpose, I put together a train of varied cars, and run it through the yard as tracks become 'live' with feeders. This is a 25-car train, a good length for a future operation that would terminate and originate at Onondaga Yard. I took the liberty of calling this SEON, Selkirk (Albany), NY to Onondaga Yard. SD40-2 6495 leads a C30-7A into the North Runner:

Lots of fun. It will be great to populate the yard once it is all wired, and even more fun to switch the yard with a radio-controlled DCC throttle and train, while mainline trains pass at speed. Good times coming on the Onondaga Cutoff!
Friday, October 22, 2010
Digital Command Control
Last night, I pulled the trigger, and finally ordered the new control system for the Onondaga Cutoff: a North Coast Engineering (NCE) PowerPro 5-amp radio-control system, with an additional 5-amp booster unit, and the associated hardware. I also ordered 6 breakers designed for this system, one for each of my power districts.
Main Unit: Visible Main Line
Short Line (not yet installed)
Booster Unit: Onondaga Yards/Engine Facility
Staging and hidden mainlines
This arrangement should keep my current draw below the 5-amp maximum, even with up to 4 or 5 units pulling long trains. Both mainline tracks are wired to the same bus. A basic 'blue box' Athearn unit that is in good shape draws about 0.6 to 0.7 amps at full throttle, and most other motors (Atlas, Kato, newer Athearn) are lower, so I can run about 6-8 units at full throttle at once on any power district - even with two big trains on the main line, I should have some spare capacity.
Spending hundreds on a one-shot deal with this hobby is unsettling, but Kristen supports it and at the least this should be the last time I do this for quite a while. My first task will be to install a decoder in a few engines, then make the big switch and hook up the new control system - and a new era will begin!
Wednesday, October 20, 2010
Fall Colors...
...give me lots of reasons to be outdoors this time of year, hence the slow updates to the blog! While I will not be modeling peak fall colors, it is without question my favorite time of year and a beautiful time to be outdoors. For instance, last weekend was spent up along the Southern Tier of New York, in the valley of the Delaware River. I was able to capture a few images of the Stourbridge Railroad's excursion, with their ex-Bangor & Aroostook BL-2. As proof, here's one! :-)

Layout progress has continued, little by little, as I align the east end yard ladder tracks with the mainline turnouts at CP 280. After putting in the west end of the yard, I did not lay more than a few feet of yard track, as the alignment of the turnouts on the east end will dictate spacing of the yard tracks as they approach the east end. Once the turnouts are in, I can line everything up and secure it.
Enjoy the fall (and fall beers!) while it lasts! Plenty of time for model railroading coming soon.
Wednesday, October 6, 2010
Layin' the Yard
The yard is growing...last week the west end ladder of the South Yard was installed including the first few feet of track on each of the yard tracks. Last night, I finished some switch modification for the north ladder, and laid that. Here's a view of the south ladder, crossovers, and weights atop the freshly-laid north ladder:
 The sharpest curves in the yard are about 24 inches, though that is an estimate. Using flextrack, it would have been a good idea to invest in some of the metal guides you can buy for handlaying track that would set the radius definitively. I'm confident that an estimate will work for yard tracks.
Then, to test my kitbashed 'insulated' (i.e. DCC-friendly) switches, I wired the entire west end of the yard to its own bus wire, just to be sure that an engine would run through the trackwork and not short out. (A post about how I modified the switches is forthcoming.) Later this fall, the yard bus will be powered by a separate DCC booster than the mainline, and will have its own power-breaker, so as not to short the whole railroad when there is a minor yard derailment. So far, so good.
Here is the west end area as it looks now, glued in place and fully wired. All that remains for new track now is the eventual shortline connection (far back left in this view) and the trackage for Niagara Mohawk Propane (the switch at far right, on the North Runner).
 In this view, from left to right: Track #2, Track #1, South Runner, North Runner. I'm excited how this whole interlocking turned out - it captures the 'look' of a major interlocking at the end of a yard, and I think it flows nicely. There are a few rough transition joints that I will use my Dremel to smooth out, but it should work well. The big curved turnout in the bottom right hand corner there is the #1 Track-to-South Runner connection, and will be wired to throw with the mainline turnout just beyond. They will function as a crossover.
I will have some time for more yard progress tonight - a few more pieces of track for tracklaying, and then wiring what I put in last night. Little by little!

Then, to test my kitbashed 'insulated' (i.e. DCC-friendly) switches, I wired the entire west end of the yard to its own bus wire, just to be sure that an engine would run through the trackwork and not short out. (A post about how I modified the switches is forthcoming.) Later this fall, the yard bus will be powered by a separate DCC booster than the mainline, and will have its own power-breaker, so as not to short the whole railroad when there is a minor yard derailment. So far, so good.
Here is the west end area as it looks now, glued in place and fully wired. All that remains for new track now is the eventual shortline connection (far back left in this view) and the trackage for Niagara Mohawk Propane (the switch at far right, on the North Runner).

I will have some time for more yard progress tonight - a few more pieces of track for tracklaying, and then wiring what I put in last night. Little by little!
Monday, September 27, 2010
Foreign Power
There aren't too many model railroaders that don't love locomotives. Each of us has different favorites, of course, but there is something about locomotives that we all enjoy. My good friend Mark, who is a big fan of railroading in New England and Eastern Canada, has built a neat collection of custom-painted and kitbashed power from that region. He doesn't have a large layout, and I figured he would get a kick out of seeing his engines on a long train. So, I invited him down with some of his power to run a few trains on the Onondaga Cutoff before I begin the change over to DCC.
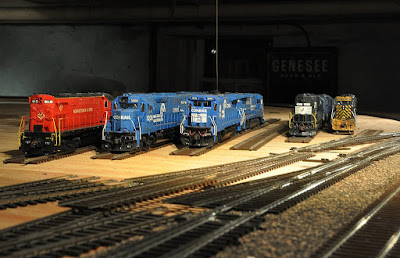
First we put together a lashup of 1980's/90's Guilford power - an ex-N&W SD45, an ex-AT&SF SD26, and an ex-Illinois Terminal SD39. Three specific designs of locomotive that never wore Conrail paint cross the Nine-Mile Creek bridge eastbound on what we called a 'WAME' (Waterville, Maine to Mechanicville Yard, NY):

Following that, Mark pulled out a few units that he'd painted up in Boston & Maine schemes, and we built lashup of those for the same train:
 GP38-2, GP40-2, GP38-2, GP-9. The units are eastbound through CP277 in this photo. Conrail had all of these, but they wore a different shade of blue :-)
Sharing model experiences like this is always fun, and I hope to continue the trend from time to time even after DCC!
First we put together a lashup of 1980's/90's Guilford power - an ex-N&W SD45, an ex-AT&SF SD26, and an ex-Illinois Terminal SD39. Three specific designs of locomotive that never wore Conrail paint cross the Nine-Mile Creek bridge eastbound on what we called a 'WAME' (Waterville, Maine to Mechanicville Yard, NY):

Following that, Mark pulled out a few units that he'd painted up in Boston & Maine schemes, and we built lashup of those for the same train:

Sharing model experiences like this is always fun, and I hope to continue the trend from time to time even after DCC!
Thursday, September 23, 2010
Slow...But Still, Progress
With some major capital improments on our home - major foundation work on our stand-alone garage, fieldstone wall reconstruction and repointing, and finally pouring a concrete floor in the garage basment, and a structural slab and apron outside - coming to fruition this weekend, time has been cramped for major work sessions on the Onondaga Cutoff, even cramped for sitting down with Photoshop for the next photo update to the blog!
However, when I have 20 mintues or so to spare, I can get in the basement and lay a few feet of yard track, or solder a few feeder cables. Every little bit counts. I think that one of the keys with modeling like this is to make the most of whatever time you can get, and to try and do at least one little thing each day. Currently that is all work in the yard. I now have the west end, south yard ladder in place, and even installed the Caboose Industries ground throws that came with my box of used track and switches.
Upcoming updates: a New England 'operating session' with my friend Mark's B&M and Guilford power, an update on modifying old non-DCC friendly switches to DCC, and yard ladder design.
It is amazing that this time last year, I was still laying track in staging, and could not even run a train around the layout. So, this year has been a year of progress - even though it feels slow sometimes.
Wednesday, September 8, 2010
Yard Design - II
As we touched on before, yard design is a crucial part of a functional model railroad. Especially when your mainline is more than one track, this extends to interlocking design at each end as well as the design of the yard itself - how can a train from either track access the yard and its 'ladder' tracks (the lines of switches for the yard tracks)? How can a train switch and drill the yard without fouling the main line? How many trains will work the yard at once? If more than one, how will that be managed?
My givens were the double-track main and the possibility of two trains working at once. Therefore, out at CP282 on the west end, I needed a universal interlocking, and I needed two yard leads that were both accessible from both directions. Here we see how that ended up looking, with weights holding down the first of the yard to be glued in place - the west end of the 'north runner':
 Since the yard is on the geotextile filter 'fiber cloth' it is at a lower elevation than the main lines, which are up on foam roadbed. Therefore, there needs to be a ramp of sorts between the yard and the switches on the main, which I accomplished using my table saw and carefully cutting beveled ramps using some scrap pine I had in the train room. With some trial and error, this worked out well. Everything will be secured with latex adhesive caulk.


My givens were the double-track main and the possibility of two trains working at once. Therefore, out at CP282 on the west end, I needed a universal interlocking, and I needed two yard leads that were both accessible from both directions. Here we see how that ended up looking, with weights holding down the first of the yard to be glued in place - the west end of the 'north runner':


Some of you have asked about the fiber cloth I am using for my yard base - so far, so good! I staple it in place, being careful to set the first staple and pull the cloth snugly away from that first anchor before setting the next. I work around the perimeter and it seems to work well. The cloth also readily accepts the adhesive caulk, though it requires more than the roadbed did. The track is held fast after drying under weight, and the cloth effectively kills all sound beneath it.
This brings us to another aspect of yard design - different areas of the same yard. For example, since my yard serves a multiple-track mainline in both directions, and since two trains will need to work at once, I need two separate areas next to one another, each with its own ladders and leads. You can see how this is starting to come together below, looking east towards CP280. There is a back and front area to the yard, both of which will eventually have nicknames. Here we see the southernmost yard and its west ladder next to the mainline on the right, and the northernmost yard and ladder on the left:

Each part of the yard will have 4 storage tracks. The lead to the far left is the 'north runner' out to CP282, and allows a train to work the west end of the back yard without fouling another move on the 'south runner' which leads to the front yard. The crossover between the two leads allows a train access to either yard from the south runner, or access to either main track in a west direction at CP282 - an important item for operational flexibility.
The next entry will include some photos of my first guest operator's locomotives and some more design issues. I will miss the summer, but as the days get shorter, there's more time for the railroad downstairs!
Tuesday, September 7, 2010
The Seasons Turn
...and I am trying to do 10 things at once! Some new work responsibilities are rolling in, outdoor chores are pulling me one way while indoor repairs keep me going in another direction...and what sits is the layout and the photos I have lined up for you.
I am aiming to get another update in this week, and will cover some of the recent decisions of yard design, roadbed selection, and switch modification for DCC safety, and will also have a few photos from my first guest operator - a long-time friend brought over a few of his B&M and Guilford units for an evening, and we put together a train for him and had a few beers. Model railroading is a community hobby!
More to come soon!
Friday, August 20, 2010
Mainline Switches
This week, I completed the installation of the control switches and temporary model boards for all the mainline switches on the entire Cutoff. Several machines still need to be installed, but these are all off the mainline tracks and also need to wait until the yard ladders are installed.
And, that brings us to the next point: the yard.
 Here is the west end of the yard as I picture it on my master plan. CP282 defines the actual yard limit, and provides for yard leads for switching without fouling the main line. This is a crucial point for all you who are planning yards - as much as it seems like a waste of space, you really do need a yard lead that is just about as long as your longest storage track. Otherwise, when switching, you will need to foul the main line with your yard move, and that will interrupt mainline ops on a continuous basis - no good.

And, that brings us to the next point: the yard.

On my east end at CP280, for example, I don't have room for a full integrated yard lead - so I planned for a stub lead. It's not as optimal as the west end's lead but it is much better than using the main line for each drill. The mainline is the two tracks on the left, and the lead is the right-most track at the bottom of this diagram. It continues for about 6 feet off this diagram, on a curve away from the mainline. (Locomotive servicing is at the far bottom right.)

I laid a sample piece of track on the fibercloth to test the cloth's suitability as a subroadbed. I will let you know how that works out. Putting the yard down, or at least getting the ladders in place, will be the next step. In about one month I will also make the big investment in a DCC system.
Stay tuned!
Monday, August 9, 2010
Dog Days
While it's been a hot summer so far, now we've really reached the 'dog days' of the year when temps in the 90's don't even cause any news! I just returned from an annual summer pilgrimage to Cresson, PA, along Norfolk Southern's Pittsburgh Line. I know, I know, for an NYC fan and someone who is modeling the former NYC lines, it's ironic that I end up on PRR each summer like this, but then again, there's no place like the Station Inn. Anyone who has been there will understand.
I now have all the Tortoise machines in hand, and have only a few more to install. I will rig up the temporary model boards as well, before it will be time to either lay the yard tracks or order and install the DCC system.
Major changes coming soon!
I now have all the Tortoise machines in hand, and have only a few more to install. I will rig up the temporary model boards as well, before it will be time to either lay the yard tracks or order and install the DCC system.
Major changes coming soon!
Wednesday, July 21, 2010
Action Photos
One thing that helps me though some of the more mundane tasks and production work on the layout, like wiring and switch machine installation, is running some trains. Slowly, my equipment is being dusted off, tuned up, and added to the active roster.


Athearn, as part of their Genesis line, did a nice version of the Conrail SD70 some years ago. I have two of them for my fleet, even though they are on the modern side of the period I will be modeling. Everything you see here is out-of-the-box besides the weathering, coupler lift bar, upgraded plow from Details West, and MU hoses. Here, 2572 leads a TV24 train near CP277:

Here's part of his 38-car intermodal train passing at speed above the temporary interlocking panel at CP 277. The panel will eventually be plexiglas.

I'm also having a blast running two trains, as mentioned a few posts ago. Here I have Morristown & Erie #19, an Alco C424, working a local train and being passed by TV24. The 19 will be one of the mainstays on my shortline.

As a side note, our cat, Clarence, is also a big fan of 'guy time' in the basement with the trains. He's quite a character, very social, and generally gets himself in trouble raiding the garbage at some point during the day, which means he is banished to the basement with me at night :-) He usually demands some attention from me while I'm fiddling with the layout unless he finds some spider crickets to hunt.

My latest big manifest is running with a recently-upgraded leader and a freight consist that I am labeling INSE (Avon Yard in Indianapolis, IN to Selkirk Yard (near Albany), NY). Here, the head end has crested the grade at CP282, but is still dragging its 50 cars of manifest over the summit:

The freight consist includes boxcars full of recycled, shredded cardboard and paper for the paper mills of New England, empties for eastern chemical facilities, scrap loads, and empty covered hoppers headed for pellet manufacturing plants in New Jersey. Empty CN family boxcars and NS loads round the big curve east of CP282:

Following the train east, we see it about to enter CP280 at the other end of the yard. In the background are some loose tracks that will soon be permanently laid. After some good advice from many of you, I settled on the idea of using a gardening fabric as a base for the yard. It is 1/8" deep, and tightly woven, which eliminates sound, allows for a lower profile than the mainline, and gives a nice separation between track and plywood. INSE at CP280:

Today's power includes a recently-upgraded Conrail 6569, a C30-7A, along with SD40-2 6524 and CSX C30-7 7003, a former Family Lines unit. Here is a profile of 6569, a 1993 kitbash I built and painted.

We turn and look east as the head end rolls into the 'rising sun' (and my nice Genesee beer blackboard :-)

Finally, the units round a curve over towards CP277 as they begin to slide downgrade.

Enjoy! The next few weeks are busy as summers are, but keep an eye out for updates. Thanks for reading!
Tuesday, July 20, 2010
Slow Progress
WELL, all, progress on the Onondaga Cutoff is always slower in the summertime, with plenty of other outside activities going on. This post is overdue but I hope you'll find it informative; there will be another one shortly with some fresh 'action' photos of some of the recent train operations.


First, though, I have been spending any layout time on switch machines and track feeders. Here is the underside of CP 280, the east end of Onondaga Yard. Tortoise machines are all installed for the mainline switches on this interlocking. My design guru, Jack, also worked with me to advise that the switches on the first track in the yard that lead to CP280 will ALSO need to be interlocked, and therefore will need machines. That's $28 I didn't want to spend, but after thinking about it with Jack, that's the way it needs to be for operation. The same will go for CP282, so another order for Tortoises will be forthcoming! Anyway, here's a pic of the recently installed (and not yet wired) machines:

Once those were in, I began to install the machines for CP282, the other end of the yard. 282 is a 6-foot long monster of an interlocking, and so it was inevitable that some of the machine installations would be tight. One thing that is nice about the Tortoise (can you tell I love these things??) is that it is reversable, so long as you reverse the wiring too. This was a close call but it works perfectly with the machine turned backwards:
Also visible here are the mainline track bus wires, 12-gauge solid-core copper wire with 16-gauge feeders. This little feeder setup gets much more complicated - this takes some time, but again, if done right I won't have to worry about stalled trains or 'dead' sections of track. Here's a crappy, blurry photo of a major feeder junction on the back stretch. You get the idea. :-)

Action photos coming soon!
Monday, June 28, 2010
Summer Heat
Summer has arrived in full force here in the Northeast, with August-like temperatures and humidity to boot. That means less time inside and working on the railroad, but there is some news - namely that both mainlines are in-place and operational. I can run two trains at once, but in the same direction and only with about 4 units total - the amount that my old MRC Tech II DC transformer can handle! Because I wired for DCC, the mainlines are on the same power source, and so everything is on or off.
Also, CP 277 is fully installed and operational. Just two more interlockings to wire! At this rate, I think that a DCC system will be purchased later this summer, before yard tracks are installed. The jury is still out on that one. :-)
Photos to come soon include two trains at once, and shots of CP 277!
Wednesday, June 16, 2010
Track 1 In Place
Track 1 is now in place, and curing overnight. Once the weights are removed, a full through route will be available on both main line tracks, and switch machine installtion and the wiring for track power and switch machine power and control will begin.
A few photos: more locomotives are being upgraded. It's nice to see some of these again, for the first time in several years! This is a model I detailed and painted to represent Conrail's last SD40-2 as ordered from EMD. 6524 was the last as-delivered SD40-2 on the roster, and today is CSX 8868:
 And an overview of the future engine facility at Onondaga Yard:
A few photos: more locomotives are being upgraded. It's nice to see some of these again, for the first time in several years! This is a model I detailed and painted to represent Conrail's last SD40-2 as ordered from EMD. 6524 was the last as-delivered SD40-2 on the roster, and today is CSX 8868:


Monday, June 14, 2010
A Mainline Route is Open!
As mentioned in the last post, Track 2 is now complete, allowing for trains to run around the whole circuit of the main line! Here, Conrail C39-8 #6000 leads two other units and a train that represents Conrail's SEEL (Selkirk, NY to Elkhart, IN) upgrade crossing over from Track 1 to Track 2 at CP 277. The unit is a kitbash I did a few years after college: Here, the train comes west across the newly installed 9 Mile Creek through truss.
 Here, the train comes west across the newly installed 9 Mile Creek through truss.
 And a going-away shot of the same train at the bridge:
 It's fun watch the train cross the bridge, with shadows from the truss moving over the rolling stock and locomotives!
The bridge was finished by painting it silver, and then weathering it with an airbrush and also hand-painted rust and grime. Then I applied a coat of dullcoat to take away any remaining shine. The bridge track was weathered separately, using a neat product by Floquil - weathering pens. These are paint pens that allow you to just weather rails or ties, which can then be oversprayed to create good-looking weathered track. An overall view:


In the mean time, I have been continuing to replace wheels on locomotives - a few images of that will be along soon.
Tuesday, June 1, 2010
Track 2...
...was completed over the weekend, just in time to run a few trains Sunday evening! This required that the bridge be painted and weathered. The final product turned out very well. Photos to come soon.
In testing, I tried a train of 30 cars and had no issue, and a train of 51 cars, which had a few issues for lighter cars at the front of the train. Once those cars were moved towards the rear of the train, I was able to run a 3-unit lashup with 51 cars with no issues at all. That is longer than most of my trains will be, but it's nice to know I can do it! The sound of that many metal wheels was neat!
I will be laying Track 1 around the remainder of the mainline, and upgrading locomotives as time allows. Next comes the full wiring of the main, and then the installation of switch machines and their wiring.
Wednesday, May 26, 2010
'The Light at the End of the Tunnel'
All interlocking switches are now in place - we're getting closer and closer to having the mainline track complete.
 Working east around the big curve, I thought an overview would be helpful for you to see where things stand now. Track 2, the closer mainline track, is in place around the majority of the curve now, with staging below:
 On the other current 'end of track', working west, is CP 277, freshly laid in place as a basic universal crossover. This will allow trains to work around each other when the local is out on the line, or when a big freight is tying up a main track while working Onondaga Yard. Tracks to the left and right are staging leads and will not be visible once scenery is in place:
 One of the things that having the mainline complete will allow is operating 6-axle power for the first time in years. In advance of that, I have started to change out all the old Athearn sintered iron wheelsets to nickel-plated brass wheels, made by Northwest Short Line. Here is Conrail SD50 6789 with her new shoes:
 The track looks pretty toy-like, right? I put a bit of old ballast down to see how that looked. It's too white, and still, the track needs weathering. All those things in good time :-) For now, here's 6789 positioned westbound approaching CP 277 with some ballast down:

And, finally, a shot of 6789 again, this time positioned on the big, superelevated curve westbound coming into CP 280: Before long, it will be time to weather the 9-Mile Creek bridge and install the bridge track to complete the main line. Then I can run big trains while working on wiring, yard tracks, backdrop, and upgrading locomotives...but at least there will be trains running!
Here is a view of all mainline track at CP 280, east end of Onondaga Yard, looking east. Yard tracks to the left are not laid yet. I have placed them there there as space holders:

I built west from CP 280 and am now laying Track 2 around the final big curve towards the 9-Mile Creek bridge, and simultaneously I put in CP 277 and am working west towards the same location. But there won't be a 'golden spike' ceremony when east meets west - that will wait for the new control system, backdrop, and a small section of finished scenery to host the 'official' event.
Looking back west, with the mainline to the left and preliminary yard tracks to the right, and CP 280 in the foreground:
Working east around the big curve, I thought an overview would be helpful for you to see where things stand now. Track 2, the closer mainline track, is in place around the majority of the curve now, with staging below: On the other current 'end of track', working west, is CP 277, freshly laid in place as a basic universal crossover. This will allow trains to work around each other when the local is out on the line, or when a big freight is tying up a main track while working Onondaga Yard. Tracks to the left and right are staging leads and will not be visible once scenery is in place: One of the things that having the mainline complete will allow is operating 6-axle power for the first time in years. In advance of that, I have started to change out all the old Athearn sintered iron wheelsets to nickel-plated brass wheels, made by Northwest Short Line. Here is Conrail SD50 6789 with her new shoes:The track looks pretty toy-like, right? I put a bit of old ballast down to see how that looked. It's too white, and still, the track needs weathering. All those things in good time :-) For now, here's 6789 positioned westbound approaching CP 277 with some ballast down:And, finally, a shot of 6789 again, this time positioned on the big, superelevated curve westbound coming into CP 280:
Before long, it will be time to weather the 9-Mile Creek bridge and install the bridge track to complete the main line. Then I can run big trains while working on wiring, yard tracks, backdrop, and upgrading locomotives...but at least there will be trains running!Monday, May 17, 2010
More Tracklaying...
This weekend, I finished installing the second-to-last interlocking for the main line. CP280 went in and cured overnight - tonight I will remove the weights, and begin laying track around the big turn 'east' from Onondaga Yard, around past the industries of Hampton and BPA, and across the 9-mile creek bridge. The truss for 9-mile Creek will be painted silver and heavily weathered to represent a mid-90's look of other ex-NYC through truss bridges in Central New York.
We can see here some other minor plan adjustments as the work continues - the proposed lengthening of the short line, as well as an angle to the engine yard, etc. Actual yard layout will be modified to use what track I have access to.
More photos will come soon as I near the completion of the main line!
Monday, April 26, 2010
CP 282 - Track is In!
Over the course of a week or two of evenings, I have been able to align all the switches for CP 282, the west end of Onondaga Yard and the junction with the Minoa & Euclid Railroad, which will eventually be built to interchange with Conrail's Onondaga Cutoff.
 Interlockings take a long while to install, because it needs to be right the first time, and it involves everything at once: both tracks, sidings, switch machines, and eventually, signals. Everything, including predrilled holes for switch machines, has to be located exactly before any piece of track can be permanently fixed in place. I like this view of the new infrastructure:
 A recent article in Model Railroader was written by a modeler who never used commercial flex track or switches, preferring to have the realism offered by hand-laying. Recently he needed to finish a new addition to his layout quickly and had to use commercial products, and wrote an article on how he made them work with his design. One idea of his that I used over the weekend was to modify commercial switches to flow better with my design at the east end of CP 282 - this is a Shinohara (Walthers) #8 frog, left-hand switch. I cut the long ties on the far side of the frog with a razor saw, used a utility knife to remove the tie spacers beneath the rails, and then gently and patiently curved the main route and diverging route to match the adjacent curves. I am very happy with the results - subtle, but crucial to the future alignment.
 On the far side of CP 282, along what will be Onondaga Yard, the mainline makes a sweeping curve. I use masking tape, layered and staggered by several inches on each end to 'step up' to the full superelevation gradually at both ends of the curve. Pictured here, Track 1 has the tape installed, while Track 2 to the left is waiting for tape.
 So, the interlocking at CP 282 is now in place, though not yet operational. Here is the overview for an eastbound train. The North Runner for Onondaga Yard comes off on the left in this view, and the connector to the M&E is on the right in the middle distance:

Pictured below is the west end of the interlocking, the point at which the mainline will curve to the right, pass beneath a highway bridge, and begin the 2% drop down to staging.
 Interlockings take a long while to install, because it needs to be right the first time, and it involves everything at once: both tracks, sidings, switch machines, and eventually, signals. Everything, including predrilled holes for switch machines, has to be located exactly before any piece of track can be permanently fixed in place. I like this view of the new infrastructure: A recent article in Model Railroader was written by a modeler who never used commercial flex track or switches, preferring to have the realism offered by hand-laying. Recently he needed to finish a new addition to his layout quickly and had to use commercial products, and wrote an article on how he made them work with his design. One idea of his that I used over the weekend was to modify commercial switches to flow better with my design at the east end of CP 282 - this is a Shinohara (Walthers) #8 frog, left-hand switch. I cut the long ties on the far side of the frog with a razor saw, used a utility knife to remove the tie spacers beneath the rails, and then gently and patiently curved the main route and diverging route to match the adjacent curves. I am very happy with the results - subtle, but crucial to the future alignment. On the far side of CP 282, along what will be Onondaga Yard, the mainline makes a sweeping curve. I use masking tape, layered and staggered by several inches on each end to 'step up' to the full superelevation gradually at both ends of the curve. Pictured here, Track 1 has the tape installed, while Track 2 to the left is waiting for tape. So, the interlocking at CP 282 is now in place, though not yet operational. Here is the overview for an eastbound train. The North Runner for Onondaga Yard comes off on the left in this view, and the connector to the M&E is on the right in the middle distance:
And, finally, the view a westbound will have of the whole plant at CP 282, with the South Runner for the yard coming in at the bottom right. This view allows one to readily see the route that M&E trains will take to interchange.
 As always, more to come - each rainy weekend allows some time to make some progress!
As always, more to come - each rainy weekend allows some time to make some progress!
Subscribe to:
Posts (Atom)