Showing posts with label Static Grass. Show all posts

Wednesday, March 13, 2024

Finally filling in at 294

It has taken nearly 15 years to decide how to add scenery at CP294, and we are finally making great headway.  While the railroad around it and above it was clear, and while the top area is fully covered with scenery in that location, it took a lot to visualize how the lower level would work out.  Tracks were added and moved and all of that required a redo on the vision for scenery.  

Finally after 12 years of operations, it was clear this configuration worked.  And so I got to work.  This will be the location of the former tower, now field office, scratchbuilt by Perry Squier and detailed and installed by me here.  


It will do the dual purpose of belonging to the front tracks at CP294 and visually representing the prototype SJ tower (formerly SS#4 tower) at Solvay.  It also makes visual use of the rear tracks.  On the Onondaga Cutoff, those are the far eastern end of the railroad.  But at Solvay, the visual is a strong reminder of the old West Shore mainline, which was built parallel to the NYC at that spot.  SS#4, and SJ the followed, were between the NYC mainline that they served and the West Shore immediately to the north: exactly the configuration here.

That decided, it was time to get started from back to front with ballast and base scenery.  It is always hard to see a mainline flooded with diluted glue!


It was a tight place to be working, but since the operations had to start first and confirm it all, it was how it needed to be.  Grass came next along with ground cover.  


Ballasting track is delicate but switches are extremely delicate - moving parts don't do well with ballast granules in the wrong spots.  So it is slow, slow progress.  Ballasting the interlocking limits at 294 ended up about 11 hours of work over the course of a week.  


But, after all that, it really does come together well.  Here we are below with glue applied, still wet and awaiting the cure of the ballast to finalize its shape.  Some quick additional weathering and details will follow in the days to come.


The points are held on center by spare ties, so that the glue doesn't freeze the rails shut against a stock rail.  No matter how careful we are, the glue will work great on those points - so you must take action to deal with it as the cure happens.  A few times in the first hour of curing I moved the points by hand, and then again after about 7 or 8 hours, each time breaking the bond of curing glue.  

I also use graphite on the points as I move them, which helps to counteract the bond. Even if it gets mixed with glue residue, this is a helpful step as the glue dries.  Keep working the points once every 8 hours for a full two days, and you're going to have a great result.    

Next steps include foreground scenery, as well as trees and shrubs, weeds, and details.  It will be a busy and satisfying few weeks!

Thursday, September 23, 2021

Finishing Touches: Woodchuck Hill Road overpass

 It's always nice to 'finish' a scene on the layout.  Any modeler will tell you that no model is ever really finished, per se; while a scene can appear complete, there is always room for more weathering whether subtle or harsh, for more detail, and for more depth.  Many scenes are good enough for now but over time may present opportunities for change.  

Still, to bring a scene to a state of completion is satisfying and compelling.  Such is the case with Woodchuck Hill Road, which was completed recently in time for a guest operating weekend on the Onondaga Cutoff.


There is nothing like a good deadline to force my hand for progress.  I learned early in life that I am not smart or driven enough to procrastinate - if I have an idea or a vision, it requires immediate action to ensure sufficient time to finish.  So, a deadline looms on my brain from its announcement until it is past, and the announcement itself is enough to keep me pushing.  

We had finished the roadway itself in the last update, now it was time to mount it on the layout!  The deck and sidewalk were glued in place with canopy glue, after a few test fits on the layout.  I used Sculptamold to fill the area below the styrene roadway on both sides of the bridge, seen above, smoothing it to shape with a putty knife and blending it into the surrounding areas.  While that cured, I went back to the workbench to finish the scratchbuilding of the New York State DOT 'box rail' guardrails that will further help tie the scene to the locale.  


Making the railings required lots of careful measuring and selecting a scale 6"x6" cross-section strip, which was available from Evergreen Styrene.


Once cured up, I painted the whole thing silver and then gave it an overcoat of dullcoat which yields a nice silver-gray look that reminds me of the galvanized finish on the railings.  

Before setting the railings, though, I had to blend in the fresh Sculptamold with the surrounding turf.  So, I painted it mud brown mixed with black, and went over the fresh wet paint immediately with a blend of static grass, which nicely blended the two together.  


I touched up the gray fascia area as well, then added the railings carefully with canopy glue - and the result really is a big upgrade.

There is a clear CNY lineage to this bridge, now, even more than before.  I am thrilled with how it turned out and excited for the upgrade.  All we need now is a few railfans on that sidewalk waiting for westbound trains - I guess a scene really never is 'finished', right? 


Wednesday, February 28, 2018

Coming Together - Greening up the M&E

So as February comes to a close, scenery progress continues on the M&E.  Slowly and surely this side of the aisle is coming to match the level of scenery over on Conrail.


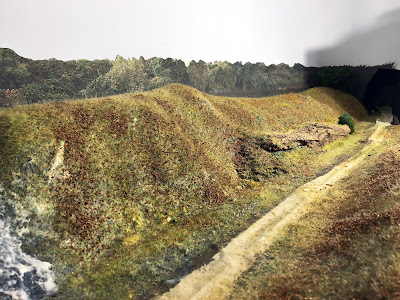
Once the paint dried, I used my mixture of diluted white glue painted over the slopes, and began to add static grass to represent the early fall.  On steeper slopes I used full strength glue to allow for better adhesion and less glue runoff.


After the grass is down I added some brown leaf flocking, as this will be forest floor area.  Everything was misted with isopropyl alcohol and a spray of diluted white glue, after which time I can remove the masking from the track areas. 


It is neat to see the track area suddenly surrounded by foliage!  


I ballasted the track with a combination of cinders, yard ballast, and some 'Northern Pacific Gray' from Arizona Rock & Mineral, and added some weeds and another light passing of the static grass to tie it all together.   Ballast was glued down with my usual mix of diluted white glue and isopropyl alcohol.  Now it's time to add trees to the forest, a final touch along with some trackside details:  the CR block limit sign, the old DLW milepost (Thanks, Al!) and old T-box.


The ditches are lined with grasses more green in color, suggesting wetter soil at the base of the rock face and along the tracks.  The trees do a nice job hiding the backdrop transitions.  

As this area greens up, progress turns to the yards at Euclid including some industries.  Stay tuned for an update on the 'new' look at Central Plastics!

~RGDave