Last night, I pulled the trigger, and finally ordered the new control system for the Onondaga Cutoff: a North Coast Engineering (NCE) PowerPro 5-amp radio-control system, with an additional 5-amp booster unit, and the associated hardware. I also ordered 6 breakers designed for this system, one for each of my power districts.
Main Unit: Visible Main Line
Short Line (not yet installed)
Booster Unit: Onondaga Yards/Engine Facility
Staging and hidden mainlines
This arrangement should keep my current draw below the 5-amp maximum, even with up to 4 or 5 units pulling long trains. Both mainline tracks are wired to the same bus. A basic 'blue box' Athearn unit that is in good shape draws about 0.6 to 0.7 amps at full throttle, and most other motors (Atlas, Kato, newer Athearn) are lower, so I can run about 6-8 units at full throttle at once on any power district - even with two big trains on the main line, I should have some spare capacity.
Spending hundreds on a one-shot deal with this hobby is unsettling, but Kristen supports it and at the least this should be the last time I do this for quite a while. My first task will be to install a decoder in a few engines, then make the big switch and hook up the new control system - and a new era will begin!
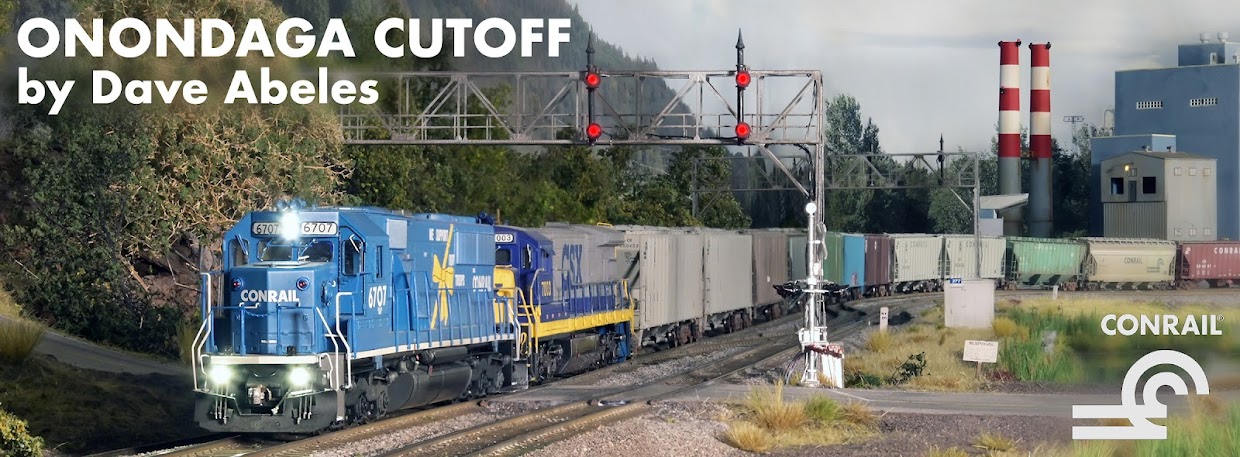
Preparation and construction of a basement-sized, HO-scale model railroad based on Conrail's operations through Central New York on the Chicago Line in 1994.
Friday, October 22, 2010


Wednesday, October 20, 2010
Fall Colors...
...give me lots of reasons to be outdoors this time of year, hence the slow updates to the blog! While I will not be modeling peak fall colors, it is without question my favorite time of year and a beautiful time to be outdoors. For instance, last weekend was spent up along the Southern Tier of New York, in the valley of the Delaware River. I was able to capture a few images of the Stourbridge Railroad's excursion, with their ex-Bangor & Aroostook BL-2. As proof, here's one! :-)

Layout progress has continued, little by little, as I align the east end yard ladder tracks with the mainline turnouts at CP 280. After putting in the west end of the yard, I did not lay more than a few feet of yard track, as the alignment of the turnouts on the east end will dictate spacing of the yard tracks as they approach the east end. Once the turnouts are in, I can line everything up and secure it.
Enjoy the fall (and fall beers!) while it lasts! Plenty of time for model railroading coming soon.

Layout progress has continued, little by little, as I align the east end yard ladder tracks with the mainline turnouts at CP 280. After putting in the west end of the yard, I did not lay more than a few feet of yard track, as the alignment of the turnouts on the east end will dictate spacing of the yard tracks as they approach the east end. Once the turnouts are in, I can line everything up and secure it.
Enjoy the fall (and fall beers!) while it lasts! Plenty of time for model railroading coming soon.
Wednesday, October 6, 2010
Layin' the Yard
The yard is growing...last week the west end ladder of the South Yard was installed including the first few feet of track on each of the yard tracks. Last night, I finished some switch modification for the north ladder, and laid that. Here's a view of the south ladder, crossovers, and weights atop the freshly-laid north ladder:
 The sharpest curves in the yard are about 24 inches, though that is an estimate. Using flextrack, it would have been a good idea to invest in some of the metal guides you can buy for handlaying track that would set the radius definitively. I'm confident that an estimate will work for yard tracks.
Then, to test my kitbashed 'insulated' (i.e. DCC-friendly) switches, I wired the entire west end of the yard to its own bus wire, just to be sure that an engine would run through the trackwork and not short out. (A post about how I modified the switches is forthcoming.) Later this fall, the yard bus will be powered by a separate DCC booster than the mainline, and will have its own power-breaker, so as not to short the whole railroad when there is a minor yard derailment. So far, so good.
Here is the west end area as it looks now, glued in place and fully wired. All that remains for new track now is the eventual shortline connection (far back left in this view) and the trackage for Niagara Mohawk Propane (the switch at far right, on the North Runner).
 In this view, from left to right: Track #2, Track #1, South Runner, North Runner. I'm excited how this whole interlocking turned out - it captures the 'look' of a major interlocking at the end of a yard, and I think it flows nicely. There are a few rough transition joints that I will use my Dremel to smooth out, but it should work well. The big curved turnout in the bottom right hand corner there is the #1 Track-to-South Runner connection, and will be wired to throw with the mainline turnout just beyond. They will function as a crossover.
I will have some time for more yard progress tonight - a few more pieces of track for tracklaying, and then wiring what I put in last night. Little by little!

Then, to test my kitbashed 'insulated' (i.e. DCC-friendly) switches, I wired the entire west end of the yard to its own bus wire, just to be sure that an engine would run through the trackwork and not short out. (A post about how I modified the switches is forthcoming.) Later this fall, the yard bus will be powered by a separate DCC booster than the mainline, and will have its own power-breaker, so as not to short the whole railroad when there is a minor yard derailment. So far, so good.
Here is the west end area as it looks now, glued in place and fully wired. All that remains for new track now is the eventual shortline connection (far back left in this view) and the trackage for Niagara Mohawk Propane (the switch at far right, on the North Runner).

I will have some time for more yard progress tonight - a few more pieces of track for tracklaying, and then wiring what I put in last night. Little by little!
Monday, September 27, 2010
Foreign Power
There aren't too many model railroaders that don't love locomotives. Each of us has different favorites, of course, but there is something about locomotives that we all enjoy. My good friend Mark, who is a big fan of railroading in New England and Eastern Canada, has built a neat collection of custom-painted and kitbashed power from that region. He doesn't have a large layout, and I figured he would get a kick out of seeing his engines on a long train. So, I invited him down with some of his power to run a few trains on the Onondaga Cutoff before I begin the change over to DCC.
First we put together a lashup of 1980's/90's Guilford power - an ex-N&W SD45, an ex-AT&SF SD26, and an ex-Illinois Terminal SD39. Three specific designs of locomotive that never wore Conrail paint cross the Nine-Mile Creek bridge eastbound on what we called a 'WAME' (Waterville, Maine to Mechanicville Yard, NY):

Following that, Mark pulled out a few units that he'd painted up in Boston & Maine schemes, and we built lashup of those for the same train:
 GP38-2, GP40-2, GP38-2, GP-9. The units are eastbound through CP277 in this photo. Conrail had all of these, but they wore a different shade of blue :-)
Sharing model experiences like this is always fun, and I hope to continue the trend from time to time even after DCC!
First we put together a lashup of 1980's/90's Guilford power - an ex-N&W SD45, an ex-AT&SF SD26, and an ex-Illinois Terminal SD39. Three specific designs of locomotive that never wore Conrail paint cross the Nine-Mile Creek bridge eastbound on what we called a 'WAME' (Waterville, Maine to Mechanicville Yard, NY):

Following that, Mark pulled out a few units that he'd painted up in Boston & Maine schemes, and we built lashup of those for the same train:

Sharing model experiences like this is always fun, and I hope to continue the trend from time to time even after DCC!
Thursday, September 23, 2010
Slow...But Still, Progress
With some major capital improments on our home - major foundation work on our stand-alone garage, fieldstone wall reconstruction and repointing, and finally pouring a concrete floor in the garage basment, and a structural slab and apron outside - coming to fruition this weekend, time has been cramped for major work sessions on the Onondaga Cutoff, even cramped for sitting down with Photoshop for the next photo update to the blog!
However, when I have 20 mintues or so to spare, I can get in the basement and lay a few feet of yard track, or solder a few feeder cables. Every little bit counts. I think that one of the keys with modeling like this is to make the most of whatever time you can get, and to try and do at least one little thing each day. Currently that is all work in the yard. I now have the west end, south yard ladder in place, and even installed the Caboose Industries ground throws that came with my box of used track and switches.
Upcoming updates: a New England 'operating session' with my friend Mark's B&M and Guilford power, an update on modifying old non-DCC friendly switches to DCC, and yard ladder design.
It is amazing that this time last year, I was still laying track in staging, and could not even run a train around the layout. So, this year has been a year of progress - even though it feels slow sometimes.
However, when I have 20 mintues or so to spare, I can get in the basement and lay a few feet of yard track, or solder a few feeder cables. Every little bit counts. I think that one of the keys with modeling like this is to make the most of whatever time you can get, and to try and do at least one little thing each day. Currently that is all work in the yard. I now have the west end, south yard ladder in place, and even installed the Caboose Industries ground throws that came with my box of used track and switches.
Upcoming updates: a New England 'operating session' with my friend Mark's B&M and Guilford power, an update on modifying old non-DCC friendly switches to DCC, and yard ladder design.
It is amazing that this time last year, I was still laying track in staging, and could not even run a train around the layout. So, this year has been a year of progress - even though it feels slow sometimes.
Wednesday, September 8, 2010
Yard Design - II
As we touched on before, yard design is a crucial part of a functional model railroad. Especially when your mainline is more than one track, this extends to interlocking design at each end as well as the design of the yard itself - how can a train from either track access the yard and its 'ladder' tracks (the lines of switches for the yard tracks)? How can a train switch and drill the yard without fouling the main line? How many trains will work the yard at once? If more than one, how will that be managed?
My givens were the double-track main and the possibility of two trains working at once. Therefore, out at CP282 on the west end, I needed a universal interlocking, and I needed two yard leads that were both accessible from both directions. Here we see how that ended up looking, with weights holding down the first of the yard to be glued in place - the west end of the 'north runner':
 Since the yard is on the geotextile filter 'fiber cloth' it is at a lower elevation than the main lines, which are up on foam roadbed. Therefore, there needs to be a ramp of sorts between the yard and the switches on the main, which I accomplished using my table saw and carefully cutting beveled ramps using some scrap pine I had in the train room. With some trial and error, this worked out well. Everything will be secured with latex adhesive caulk.


My givens were the double-track main and the possibility of two trains working at once. Therefore, out at CP282 on the west end, I needed a universal interlocking, and I needed two yard leads that were both accessible from both directions. Here we see how that ended up looking, with weights holding down the first of the yard to be glued in place - the west end of the 'north runner':


Some of you have asked about the fiber cloth I am using for my yard base - so far, so good! I staple it in place, being careful to set the first staple and pull the cloth snugly away from that first anchor before setting the next. I work around the perimeter and it seems to work well. The cloth also readily accepts the adhesive caulk, though it requires more than the roadbed did. The track is held fast after drying under weight, and the cloth effectively kills all sound beneath it.
This brings us to another aspect of yard design - different areas of the same yard. For example, since my yard serves a multiple-track mainline in both directions, and since two trains will need to work at once, I need two separate areas next to one another, each with its own ladders and leads. You can see how this is starting to come together below, looking east towards CP280. There is a back and front area to the yard, both of which will eventually have nicknames. Here we see the southernmost yard and its west ladder next to the mainline on the right, and the northernmost yard and ladder on the left:

Each part of the yard will have 4 storage tracks. The lead to the far left is the 'north runner' out to CP282, and allows a train to work the west end of the back yard without fouling another move on the 'south runner' which leads to the front yard. The crossover between the two leads allows a train access to either yard from the south runner, or access to either main track in a west direction at CP282 - an important item for operational flexibility.
The next entry will include some photos of my first guest operator's locomotives and some more design issues. I will miss the summer, but as the days get shorter, there's more time for the railroad downstairs!
Tuesday, September 7, 2010
The Seasons Turn
...and I am trying to do 10 things at once! Some new work responsibilities are rolling in, outdoor chores are pulling me one way while indoor repairs keep me going in another direction...and what sits is the layout and the photos I have lined up for you.
I am aiming to get another update in this week, and will cover some of the recent decisions of yard design, roadbed selection, and switch modification for DCC safety, and will also have a few photos from my first guest operator - a long-time friend brought over a few of his B&M and Guilford units for an evening, and we put together a train for him and had a few beers. Model railroading is a community hobby!
More to come soon!
I am aiming to get another update in this week, and will cover some of the recent decisions of yard design, roadbed selection, and switch modification for DCC safety, and will also have a few photos from my first guest operator - a long-time friend brought over a few of his B&M and Guilford units for an evening, and we put together a train for him and had a few beers. Model railroading is a community hobby!
More to come soon!
Subscribe to:
Posts (Atom)