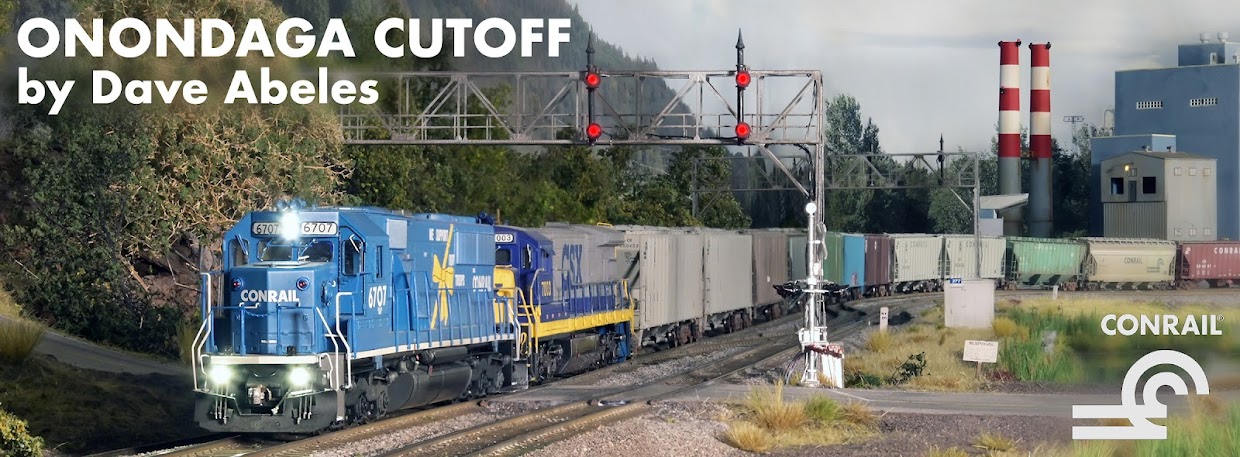
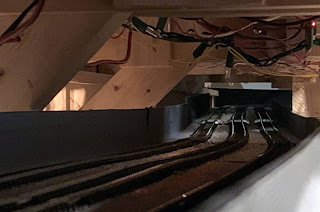
Now and again, it's nice to make a few images of the layout and of some of the longer and more sweeping views that are possible with a basement-sized layout and photo backdrops. Views are even more satisfying when you consider how much time and effort has been spend behind the scenes in the last few months with major construction projects! Here's a few recent efforts:
Monday, April 19, 2021
Sweeping Vistas
Wednesday, March 31, 2021
The Final Step: New Island Local Control Panel - Ready to Go!
After a big push in the last few weeks, it's now time to report that the installation of 'deep' staging is complete on the Onondaga Cutoff! Last time we finished up the trackwork installation, which has since been wired into the system. The final step was to replace the Island local control panel (LCP) with a new one to reflect the changes.
Thanks go to Nick Anshant on this step, as he is always willing to use his experience on the prototype to help make the Onondaga Cutoff better. We went back and forth to settle on the new layout of the lines and also the new names - these tracks will be named the 'Old Auburn Main' along with a pair of running tracks, reflecting Conrail practice in the Solvay, NY area on the prototype.
Nick had done standard artwork to reflect Conrail practice in the signal bungalows in the field and had the artwork from the previous panel that he was able to modify to reflect the new trackage and switches. One the art was set, I sent it off to a local sign shop who printed it on 1/4" thick PVC. I chose plastic here instead of aluminum because the mounting area on the masonite hardboard has a slight curve. A side benefit of PVC is that it is easy to work with. I used a 1/8" allen wrench screwdriver as a hole punch by setting the new panel on flat wood on the workbench, and tapping the back of the screwdriver with a small hammer. This allows the holes to be drilled cleanly and helps prevent the drill bit from wandering. Here's new panel ready for light installation.
It is nice to do this work at the workbench, too, before trying to mount the panel to the layout. Now it is time to carry it to the location of the install - much of the work this time around is to simply move the controls from the old panel to the new one, before installing the remaining new hardware.
Thankfully, the old panel was set with screws, and had enough extra length in the wiring to allow it to hang forward for the work. I moved the pushbuttons and LEDs over in number order, pair by pair. It was an arduous and slow task but that was to be expected for a project like this. However, I did not like putting all the tension on those soldered joints. So, it was time to build a temporary work shelf.
Using some of the leftover brackets from the benchwork construction for the deep staging and some C-clamps, I set two supports attached to the masonite and set some 1" foam insulation left over from a recent scenery effort across those to act as a work shelf. This allowed the rest of the cutover to go smoothly, along with the install of the new double-pole, double-throw (DPDT) toggles for switch control and the new LED indicator lights for the new tracks.
By the end, I was more than ready to clean up the area, put the tools away, and turn on the final installation for testing. I ran engines up and down each route, checking to make sure all was properly indicated and powered. I tested the on-off toggle as well and sure enough, it checked out!
In summary, this was a long-awaited project that in some ways I was dreading. It was tight, and operationally more tight than anything so far on this layout. But it came together thanks to working with the team - modifying the plan and the construction by discussing with others, having others help to set components in place, and finally making the decision to dive in and do it at the tail end of this pandemic before life gets hectic once again.
Now comes the exciting part - assembling the unit trains to occupy the track, and adapting our operating plan to fit the new traffic! Stay tuned as we head into an exciting spring on the Onondaga Cutoff.
Thursday, March 25, 2021
The Book Has Landed!!
It is with great pleasure that I can announce the release of my first book, Guide to Signals and Interlockings, which is in print and available for sale!
In the largest news to date on the Onondaga Cutoff, the layout is the central feature of this new publication by the editors of Model Railroader magazine. It is the culmination of the journey that the signals on the Onondaga Cutoff have been, and contains information on the process so that the reader can understand how that works.
Many nights and weekends went into it, and now it's available from booksellers, hobby shops, online, and also directly from the publisher at https://kalmbachhobbystore.com/product/book/12824
In the 'Is this really happening' department, a friend sent me a screen shot showing the book having reached '#1 Best Seller' status on Amazon. Amazing!
Thank you for all the support! I hope readers enjoy it and learn more about railroads and signaling as a result. In a hobby and in a world where there is always more to learn, it is a humbling and exciting process to go through the journey of creating something like this. I am grateful for the opportunity and excited for the future!
Monday, March 22, 2021
Deep Staging - Completing the Trackwork
The construction of your layout can tell you a lot about yourself.
Take this Onondaga Cutoff 'deep staging' project, for example. The idea started organically, without a clear path forward at first, but always in line with the vision of an exceptional operating experience. Once the idea started it was widely shared with others I trust to vet its weaknesses, and to ensure it was well thought out. It's measured, constructed and installed to stand the test of time and to provide error-free operation. And, once it started, the project hasn't stopped much for other modeling endeavors except for glue to cure or paint to dry. The progress is really settling in, a nice smooth grade down from the right, around the curve towards the new lowest level.
Taking a step back I am quite sure that most things in my life that I can control follow all those same adages. Most things I am involved in did not come from a pre-planned set of goals, but they almost all serve a central vision for life. I have learned in my 44-1/3 years so far that most things in my world are better with the influence of others that are experts in their way, or that know me well enough to give me honest feedback on how I might improve things. Once I decide to build something, I want to do it once, and do it right: taking hours and hours to create something that doesn't work well or to make a repair that can't hold does not suit me. And once I decide to jump in, it's with both feet - unfinished projects cloud the mind and the schedule, and make the satisfaction of moving on nearly impossible.
None of that, of course, is to say that it is easy, or even that I take my own advice all the time. Nope, I am routinely surprised (and sometimes frustrated) by the things I do, but I do hope to learn from each experience and carry that going forward. Life isn't lived on a shelf or on paper; it's lived by doing. The key in my view is to spend enough time planning and considering and sharing any idea first so that the act of doing is more effective, more present, and less prone to the erosion that time will inevitably bring to us all.
Some thoughts for you all on a Monday night as I reflect on progress so far on this deep staging installation.
In the past few nights, we cut in the switch to the existing track.
This process begins by selecting a location for the switch, and with an install like this that is not an easy question. It was moved back and forth a variety of times to find a location with acceptable curves to connect the diverging route of this #6 switch to the new trackage on the ramp.
And, of course, even once the location is determined, this is tough construction to do well. Here you can see how it is:
We have a fixed layer above, with wiring and lighting already installed, and the existing Island track below. It is amazing how many tools I used for this: Dremel with both cut-off disc and wire brush, putty knife, screwdrivers, drill, utility knife, adhesive caulk, pliers of several types, nippers of several sizes, bright boy eraser, several jeweler's files, just to name a few. It was a congested mess keeping things going! And after a few cuts from dealing with the sharp metal edges, I was ready to move on.
Again, measuring three times and cutting once, we were able to get all things set so that the track dropped into place perfectly. The flex track took some massaging but in the end the curves all measured out greater than 22" radius through this stretch which is enough to help things stay on the rail. Of course we would like wider radius, but that is simply not an option here. We will deal with sharp curves like the prototype does: by limiting speeds and which sorts of equipment are allowed down the hill. I spread the adhesive, and laid the track in the same manner as with the last post, but of course this was harder where we were under that top layer. Then all of the new install was weighted to allow it to cure and bond to the subroadbed.
You'll notice no cork or foam roadbed here: where clearances are critical, and where trackage is complicated, you need a minimal vertical cross section as well as a good firm bond. We have both and the results maximize clearance and rigidity, which was the goal. It comes at the expense of noise when trains roll through, but this is hidden trackage and noise is not a major concern.
While it cured, I had time then to install the Tortoise (by Circuitron) switch machines.
These went in better than expected given the location. I was glad to have made the holes bigger than advised, settling on 1/2" holes for the wire instead of 1/4". With no ballast going in down here, there is no concern about the hole being a bit larger and it will help guarantee mechanical reliability in a tight area.
Finally, we see the new track in place, with switches lined normal for now pending the wiring of the new switch machines and the full new control panel, which is currently under development. Once that is in place, I'll bring you up to date on the final pieces of getting this track in service!
Monday, March 15, 2021
Continuing the Deep Staging Process
It has been a month of expectation and waiting.
Waiting for the vaccine to be available for COVID. Waiting for the vaccines to catch hold nationally so life can start to return to normal. Waiting for some HR changes at work to take effect. Waiting for (hopefully good!) feedback on several model railroad media fronts. Waiting for the book to arrive for sale. All of these things should be great when they come to be, but as my favorite musical artist sings: "The Waiting is the hardest part."
And so, as a place to ground out the energy and the angst in the waiting, I have continued to pour efforts into completing the deep staging installation, with a goal of having it operational by April 1. It has taken each minute I have given it, and asked for more: this is without question the most difficult construction I have tried on this layout.
We left off last time laying track for the tangent. That task was completed shortly after the last post while the tangent stretch was still on the floor of the space, allowing for track to be aligned where I could see it without having to guess.
Once the track cured, I installed all feeder wires, also here on the ground. You can see the gentle bend in the middle of the tangents, required to deal with the challenging clearances once installed. I added re-railer sections, upper right above, just in case. The black steel brackets you can see in the upper left will support this installation, which needs to be close to the aisle at the left side to avoid the diagonal supports ahead to the right. But, immediately past that, the roadbed will need to curve towards the wall to the left and begin the climb up to the Island level.
Many thanks to Tom S. and Ralph H. for coming over to lift, shift, and slide this assembly into place! We made the big lift - and it went just about perfectly. Thanks to measuring three times, cutting once, and the foresight to assemble this piece on the floor, we were in good shape.
The alignment was exactly what we needed. Clearances all checked out. I however left it loose on the brackets pending the installation of the curved section - since the curve will be the link to the existing layout, it must be finalized first. Now it was time to tackle the curved section installation.
I had been thinking the curve design and install over for months, debating the approach with myself and with Scott S., a fellow civil engineer. Like the tangent section, there was no way to lay track once the roadbed was installed just 10" below the top section. Worse, the tight curves required here (20" radius in places!) made precise installation critical. The trackwork needs to be perfect at all joints and respecting all clearances for trains to handle this - there is no room for error.
The new curved benchwork too would be too long and large to be slid in from the aisle or floor. It didn't clear the adjacent parts of the layout.
The only choice left was to paint the wood ahead of time, add the guardrails ahead of time, then assemble the curved plywood in two pieces, after which track could be laid - all while the assembly was temporarily supported out from under the top level. But the only place to do that was on top of the uneven mainline ramps behind Iroquois: it is the only place I could fit the assembly where it could then be rotated into position. Putting heavy plywood over HO scale mainline track is always tough to stomach. And then, after all that, the whole thing would need to be rotated counter-clockwise over the Island tracks, along its permanent path slid between existing Island tracks and the layer above, before being set down onto the supports.
Ugh. Lots of room for mistakes and collateral damage. BUT - a clear path forward, and frankly the only possible one.
Even the clear path forward had its struggles. Here I am in one of my 'layout yoga' positions, on a ladder on an angle bent over mainline with my head against the ceiling, laying track that had to be exact. Not fun.As the track cured, I double checked clearances again, even taking several of my longest locomotives and pushing them around the curve to ensure they cleared the sides and each other while on adjacent tracks. It was tight - but it worked! I weighted the track as seen above, a view where you can see the test engines too.
The final step was the final joint between the curve and the Island staging subroadbed, which I did with steel strips for extra rigidity at this odd joint. With both routes descending, there is a lot of torsion on these bars, but they are more than up to the task.
Wednesday, March 3, 2021
New Traffic: The Case for Deep Staging
The only place where new storage can be added that has direct access to both directions would be via the Island, which currently serves as a locomotive servicing and storage yard. It is tight, but so is any expansion: we have to make due with what we have. The operational benefit here will outweigh the difficulty in installation. In the photo above, I am test fitting the new subroadbed. See that small gray tunnel ahead to the left?
The paint was allowed to cure overnight and now it is easier to see the gentle turn built into the middle of the assembly, so as to get the tracks closer to the aisle from the tight path they need to follow to reach the Island. Now, it's time for tracklaying, for the first time in several years. It takes a little getting used to!
This process will continue until all three assemblies are put together. I will also wire this track while it's on the ground so that once installed, we just need to connect the joints and go. This track was weighted and is curing overnight before the next 6 feet is laid.
Thursday, February 18, 2021
Going Back, For the Future
Winter has arrived here in New Jersey, and with it more time for modeling and for working towards getting several projects moving forward on the Onondaga Cutoff.
First among those is a new tower for CP 282, which has long been a goal of mine. The stand-in, generously constructed by Al Tillotson from foam-core and prototype photos has worked well well for several years but a permanent replacement is needed. Thanks to the internet I was able to track down the actual original New York Central (NYC) blueprints for the tower that stood at 'SJ' interlocking, on the boarder of Syracuse and Solvay, NY, until 1994. In discussing the project with Perry Squier, a gifted modeler who also lives in northwestern NJ, I mentioned how it would be years before I could have time to do it. Perry volunteered to help and build the tower so long as I did the interior detailing and lighting. I am always up for collaboration, especially from experts!
Once Perry had the building constructed, I picked up the project to test fit it on the layout. Since the prototype has a basement, installation required - gulp - cutting into finished scenery and subroadbed with a jigsaw. Yikes!
This is never a fun feeling. I used some scraps of plywood to ensure I didn't destroy the track and signals in the area, and also made sure to tie the wires underneath this spot out of the way so that the saw didn't cut those, too.
Cuts made, I could test fit the tower:
You can see the older stand-in in the back, which actually represents an abandoned version of a Hudson Division NYC tower in the 1980's. The permanent structure will be built following Conrail practice to repurpose old towers in the 70's and 80's into field offices for maintenance of way personnel - so we're installing an older structure, but one that was still used in 1994. With that in mind, the second floor office and workshop would be visible and especially at night. Therefore interior detailing was in order.
It is time-consuming work, but a printed patterned floor to represent linoleum or asphalt tiles from the early 1960's along with a variety of industrial furniture, purchased from Shapeways.com as 3-D printed items, allowed me to represent a railroad office setting. I painted and weathered all the details based on my own experience in such converted towers, and added LED lighting which will augment night operations. Now the towers go back to Perry for roof and soffit installation before final install on the Onondaga Cutoff.
As February 2021 has set in, we have a refreshing change of pace here in northwestern New Jersey in a stretch of good cold weather and regular snowfall. The kids are amazed and enjoying it, and I am too.
It's been about 5 years since we have had more than a few inches at a time down here on the piedmont, and while the mountains and hills to the north and west have fared better for snow lovers it has been quite a while for even those spots to have weeks of accumulating snowfall. This winter we have had snow on the ground now for close to three full weeks, which is a true winter feel and a pleasure to share with the kids.
Finally, we have another Facebook Live event this coming weekend, Saturday February 20 at 9 p.m. Eastern. Just head on over to the OC Facebook page to watch live with us, or to see it at a later time: https://www.facebook.com/onondagacutoff/
Enjoy the winter weather, and I will be back soon with more progress on the Onondaga Cutoff!