In light of the invitation to present at the Mid Atlantic Railroad Prototype Meet (MARPM) earlier in September, Jack asked for a few images showing different blocks of trains on the Onondaga Cutoff. I took an evening to arrange some shots and the results came back looking nice, so I thought I'd share a few here.
The RPM and our presentation went well - people were interested and it was well-received. It is such a humbling thing to see our names next to those of so many guys who we looked up to for years. I for one am glad to be able to give a little back to those that reached out to me!
The images....
First off, here is ML480, a big autorack and stack intermodal train that runs in the later evenings.
Next, here's the interchange run from NYS&W, the 'SY-1' job coming into Onondaga where the consist will terminate and return with outbound cars for Susquehanna.
A wide shot of NFSE (Niagara Falls, NY to Selkirk NY) coming through CP277. He has autoracks up front and manifest behind.
And, playing with Photoshop a bit, here's a tighter crop of NFSE at CP277. It is amazing how good these iPhones are now at shots like these.
It has been a busy time lately, with the RPM itself, work craziness, little kids at home, and all that goes with those things. This is when the layout progress may slow but enjoyment can go up: we can always run some trains, right?
Thanks for your reading this blog, and thanks for all the support!
~RGDave
Friday, September 28, 2018
Wednesday, September 26, 2018
Night Light
Recently I have installed a variety of new lighting on the Onondaga Cutoff, and I am pleased with the results.
First up are Alkem Models yard light towers. Here's YAON-20, the night yard switcher, resting at the Onondaga Yard Office between moves. New towers were assembled from kits by Phil Monat, and boy, what an upgrade!
Over at the east end, here's outbound cars for ELSE ready for their shove over to the East Lead for pickup. I love the clarity of the LED light used on the towers.
Using better light towers here made several of the others surplus, so I reinstalled them around the shop building and facility to suggest it was on its own circuit.
To add to the scene above, I did some quick view blocks and weathering on the old B&B headquarters building, then added some light to it, as well.
While the kits were difficult to build, adding lighting is a relatively simple project and makes a world of difference for night operations and night photos. Those long nights just got a little brighter!
~RGDave
First up are Alkem Models yard light towers. Here's YAON-20, the night yard switcher, resting at the Onondaga Yard Office between moves. New towers were assembled from kits by Phil Monat, and boy, what an upgrade!
Over at the east end, here's outbound cars for ELSE ready for their shove over to the East Lead for pickup. I love the clarity of the LED light used on the towers.
Using better light towers here made several of the others surplus, so I reinstalled them around the shop building and facility to suggest it was on its own circuit.
To add to the scene above, I did some quick view blocks and weathering on the old B&B headquarters building, then added some light to it, as well.
While the kits were difficult to build, adding lighting is a relatively simple project and makes a world of difference for night operations and night photos. Those long nights just got a little brighter!
~RGDave
Wednesday, August 29, 2018
Different Flavors of Railroading
All of us
like to run trains, simulating real-life train movements. However, one of the major issues in moving
real-life trains is dealing with maintenance and infrastructure that is being
worked on, either during preventive maintenance or repair. One aspect of railroading that can be
emphasized more on most layouts is maintenance of the right of way and
infrastructure that supports operations.
Here’s a
photo of an actual infrastructure issue that occurred, and the subsequent repair that we chose to
model during operations. One of the switches
on the west end ladder tracks in Onondaga Yard experienced a rod failure during
the most recent operating session.
Rather than make a quick repair during the session, we locked the switch
in one direction, simulating a ‘spike and block’ situation where crews
mechanically fix a switch to prevent derailments due to a broken
component.
Once the sun
came up, I placed one of my block truck models at the location with some
figures to simulate the repair process.
After the session I made the repair – a careful application of Walthers ‘GOO’
adhesive did the trick, reconnecting the throw bar with the ground
throw. For this session, we will have
the switch out of service for the first hour or so, allowing the track crew to
finish their work – and adding some variety to the yardmaster’s job.
Modeling
maintenance is a fun part of operations, and helps challenge operators to think
outside the usual box of the job. Where will
the next repair be needed? We will know
when it happens – and we will deal with it, like they do on the prototype.
Thursday, August 16, 2018
From White to...Dark Brown
Summer in full swing means limited layout time, but in the mantra of keeping things moving, here you go: 20 minutes painting up the bare white plaster makes a world of difference for visitors and operators until the scenery itself is installed.
A little bit of scenery installed before gluing in the foam shoulders for the canal scene makes life easier down the road, too - installing static grass beneath a low bridge is nearly impossible.
Here's a view looking west at the middle of the scene. It is going to be something else when there's a wooded hillside here, but even now the long gentle curve is a cool place to watch trains. Much more appealing than bare white plaster!
Finally here's a view of the whole scene from where the new grade crossing will be installed. This is one of the more sweeping scenes on the railroad and I aim to keep that aspect, adding lots of trees behind and some smaller ones and scrubby brush in the foreground. This is an exciting addition, one of the typical Central New York scenes that is just starting to take shape. I am set here for a major push into the fall!
~RGDave
A little bit of scenery installed before gluing in the foam shoulders for the canal scene makes life easier down the road, too - installing static grass beneath a low bridge is nearly impossible.
Here's a view looking west at the middle of the scene. It is going to be something else when there's a wooded hillside here, but even now the long gentle curve is a cool place to watch trains. Much more appealing than bare white plaster!
Finally here's a view of the whole scene from where the new grade crossing will be installed. This is one of the more sweeping scenes on the railroad and I aim to keep that aspect, adding lots of trees behind and some smaller ones and scrubby brush in the foreground. This is an exciting addition, one of the typical Central New York scenes that is just starting to take shape. I am set here for a major push into the fall!
~RGDave
Monday, July 30, 2018
Making Decisions
There is no way around it - with layout construction, sometimes you just need to make a decision, and move on. It's a leap of faith to jump in and move ahead with certain scenic elements. While some scenes make sense conceptually, others have taken longer to come to vision. One of those is the long embankment west of CP 277.
After installing the fascia here last year, the vision started to present itself, but still - how should this look? Should it slope down to a river? Should the whole thing be a river, with a retaining wall protecting the tracks? Should it slope up and be in a long cut?
Sometimes, the best answer is to start putting in the bones of the scenery to see where it takes you.
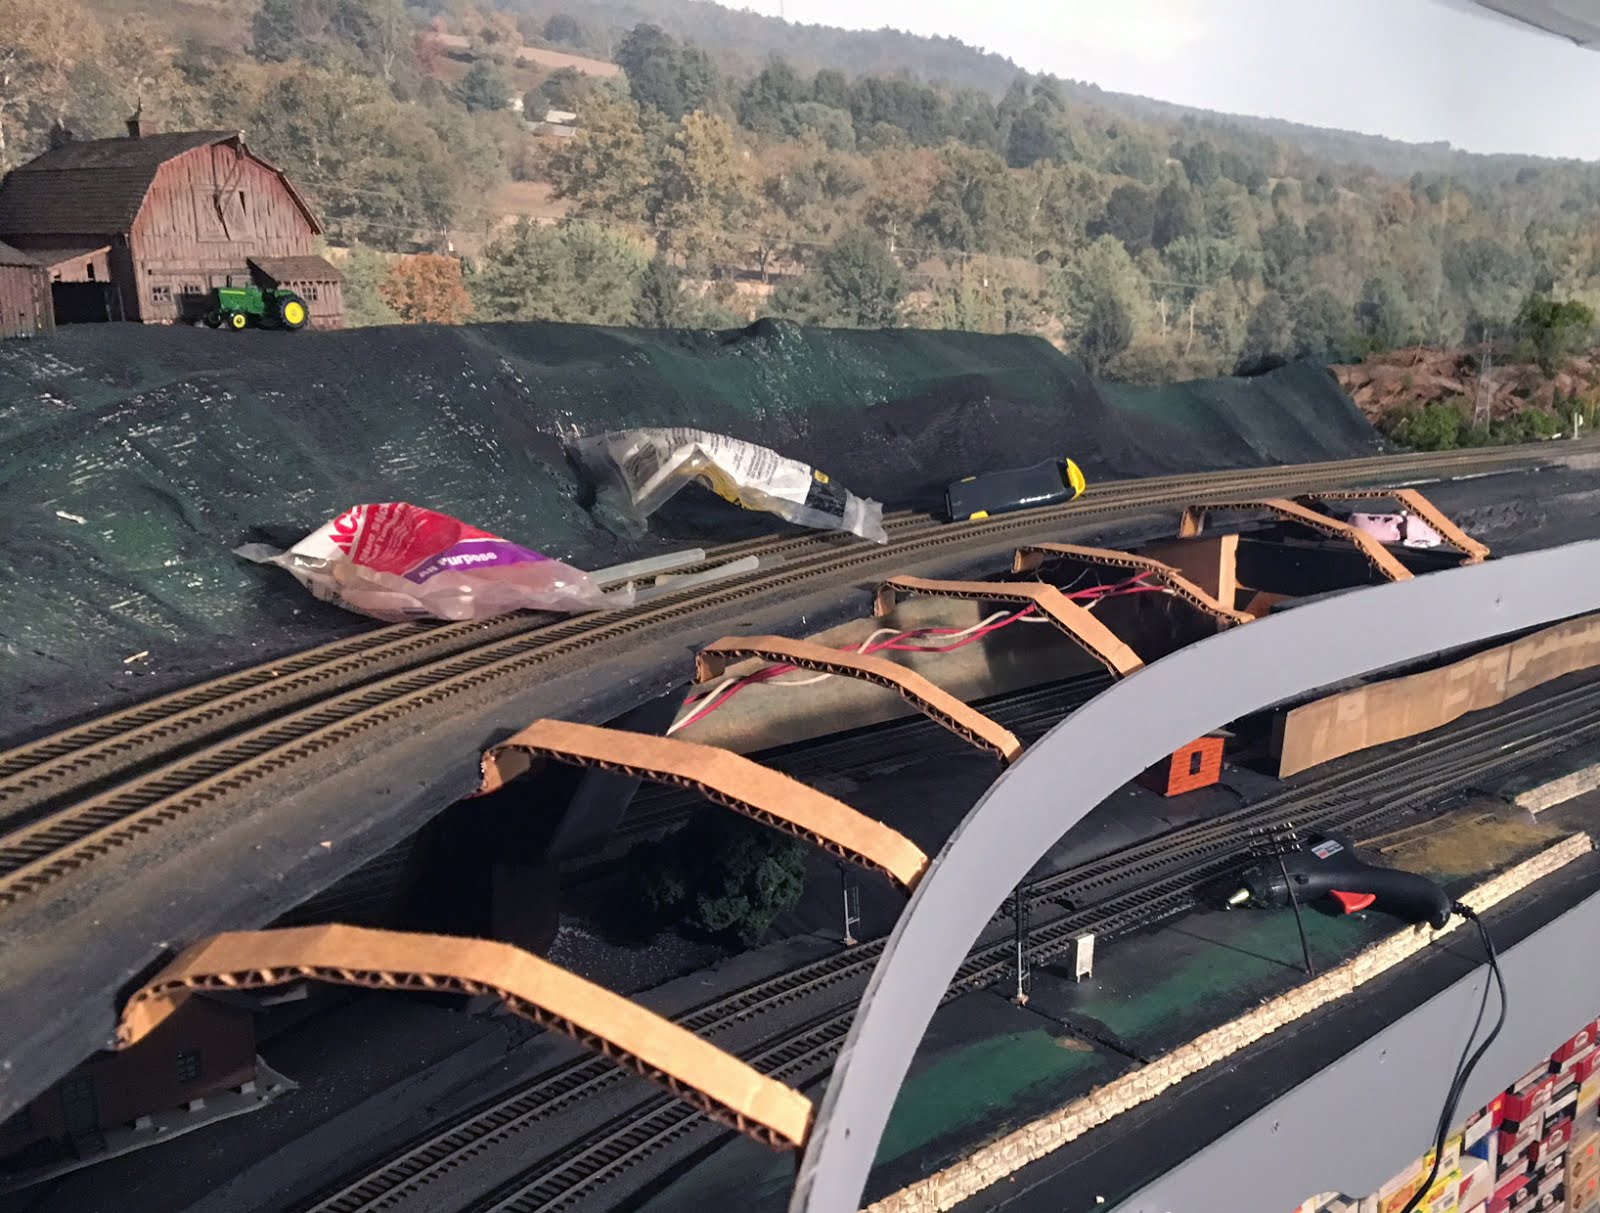
Scenery in this tough curved area begins with cardboard strips cut to about 1" width and long enough to fit with some arc. These are hot-glued into place.
After those ribs cure, it is time for webbing to be pulled through and hot-glued into place.
The nice part about hot glue is that it cools quickly, and that means that we are ready for plaster gauze landform to be installed almost immediately following the ribs.
I started out at the west end of the fill, leaving the detail at the bridge itself for later but getting started on the easier part to visualize. With plaster gauze, so long as you wet down the first layer, you can always add more. Once it was in place, the vision for the bridge area came to focus. This would be a great spot not for an overgrown former canal, but for a groomed and well-managed NY State Park System canal park. These are all over the place up in Central New York and it's another element that helps set the time and place. A tow path, a few benches, mowed grass, and a historical marker on a sign post will help this feel right.
With that now started, it was time to plaster the area behind the tracks as you can see above, allowing smoother surfaces that can be painted and fully covered with scenery. This will be a forest area with some swampy grass in the lower spots in front of the tracks.
After installing the fascia here last year, the vision started to present itself, but still - how should this look? Should it slope down to a river? Should the whole thing be a river, with a retaining wall protecting the tracks? Should it slope up and be in a long cut?
Sometimes, the best answer is to start putting in the bones of the scenery to see where it takes you.
Scenery in this tough curved area begins with cardboard strips cut to about 1" width and long enough to fit with some arc. These are hot-glued into place.
After those ribs cure, it is time for webbing to be pulled through and hot-glued into place.
The nice part about hot glue is that it cools quickly, and that means that we are ready for plaster gauze landform to be installed almost immediately following the ribs.
I started out at the west end of the fill, leaving the detail at the bridge itself for later but getting started on the easier part to visualize. With plaster gauze, so long as you wet down the first layer, you can always add more. Once it was in place, the vision for the bridge area came to focus. This would be a great spot not for an overgrown former canal, but for a groomed and well-managed NY State Park System canal park. These are all over the place up in Central New York and it's another element that helps set the time and place. A tow path, a few benches, mowed grass, and a historical marker on a sign post will help this feel right.
With the operation of the Onondaga Cutoff fairly well-established and with several open-house events this fall, I am making a push to get more scenery done, and this was a big step in that direction. Now I need to make time to create a few hundred SuperTrees!
~RGDave
Friday, July 27, 2018
Setting a Time and Place
In many ways, model railroading has a storytelling role. Our models are set in a time, and are made to reflect reality of that time. Further, and arguably unique in model railroading, is the concept of operations and sessions dedicated to operations. Even moreso there than in other aspects of the hobby, the layout owner and the 'managers' that help with the execution of the session are storytellers.
Take for instance this image:
This car has a story. Built in the early 1970's, covered hoppers like this carried all sorts of bulk materials that needed protection from moisture. Wheat, rice, oats, flour, malted barley, sugar - these cars could be used for any of these. This one was purchased by the Chicago, Milwaukee, St. Paul & Pacific Railroad - known as the Milwaukee Road by most. The railroad was a transcontinental, one of the mighty western railroads that spanned the Great Plains, the Rocky Mountains, and crossed the Continental Divide. Dubbed "America's Resourceful Railroad" as a nickname, this one crossed other ranges too and came down to tidewater at the Pacific Ocean.
Yet, trouble brewed. One of the most difficult transcontinental routes to maintain and operate, the Milwaukee Road was less profitable than it had been by the end of the 1970's. Early in the 1980's, the railroad abandoned its westernmost operations. Soon the whole company was bankrupt and sold to competitors. It was a sad end of a fascinating railroad. Cars and locomotives were auctioned off. Some workers went on to other jobs but many retired.
This car, though, still having some useful life, was purchased and put into service by a new owner without a full paint job. Thanks to the artistry of Lenny Harlos, it has been faithfully recreated for the Onondaga Cutoff, patched for its current owner - East Erie Commerical, better known as General Electric Corporation.
The Milwaukee was long gone by 1994 but its ghost lived on in cars like this. This was no longer the glory age of railroads in the early 20th century. No way. Dirty, rusted, but with a bright patch of reporting marks and lube stencils, this car looks like a car from the 1970's did in 1994 - part of a rebirth that was just getting some traction. This car helps set a date and place, and lends a gritty, well-used appearance to the Onondaga Cutoff. As more cars are weathered for the period, the more it looks like it should - like the real thing.
~RGDave
Wednesday, July 11, 2018
Long Skirt, Short Skirt!
On the layout, that is. What did you expect?
As we continue with the 'atmosphere improvement' process on the Onondaga Cutoff, I am happy to say that all the custom skirting for the layout has been completed and delivered to the layout space. When I have a few minutes, I am hanging the pipe system to support the skirting as we saw recently and then installing the fabric itself.
Before....
...and after.
As expected, it's a major change in appearance! With scenery more or less complete now over the M&E and over the main line from CP282 all the way to the 278 automatic signals near the dairy farm scene, my goal for this part of the effort is to have all the curtains hung over that area before the end of August.
In other news, several newly-weathered freight cars were delivered by Lenny last week, in exchange for a decoder and sound installation on one of his diesels.
Also, I am making some upgrades to several switch control assemblies in the Island Yard, the locomotive facility that serves to turn power at the east and west end of the run. This panel requires quite a bit of re-wiring as part of the move but will be a major upgrade in appearance and functionality.
It's hard to believe it is mid-July already. I have been spending lots of time with the family:
Summer always seems to fly by. There are plenty of jobs to keep me busy outdoors but the railroad is always calling in the evening, after kid bedtime! Progress will continue and you'll see it here.
~RGDave
As we continue with the 'atmosphere improvement' process on the Onondaga Cutoff, I am happy to say that all the custom skirting for the layout has been completed and delivered to the layout space. When I have a few minutes, I am hanging the pipe system to support the skirting as we saw recently and then installing the fabric itself.
Before....
...and after.
As expected, it's a major change in appearance! With scenery more or less complete now over the M&E and over the main line from CP282 all the way to the 278 automatic signals near the dairy farm scene, my goal for this part of the effort is to have all the curtains hung over that area before the end of August.
In other news, several newly-weathered freight cars were delivered by Lenny last week, in exchange for a decoder and sound installation on one of his diesels.
It's hard to believe it is mid-July already. I have been spending lots of time with the family:
Summer always seems to fly by. There are plenty of jobs to keep me busy outdoors but the railroad is always calling in the evening, after kid bedtime! Progress will continue and you'll see it here.
~RGDave
Subscribe to:
Posts (Atom)