Monday, June 25, 2012

Operations

This past weekend, I hosted the most recent Operating Session (OS) on the Onondaga Cutoff, and it was a success - a crew of 6 ran approximately 30 through trains, two locals, and the M&E turn over the course of about 4 hours (and several beers).  Jack was a stellar DS, as always, and the crew was great:  Nick, Mark, Al T., and our special guest this week, none other than the Doctor, Mr. Al Werner, many thanks to you all.  Al W. drove several hours down to the OC just for this session.  Thanks, Al!

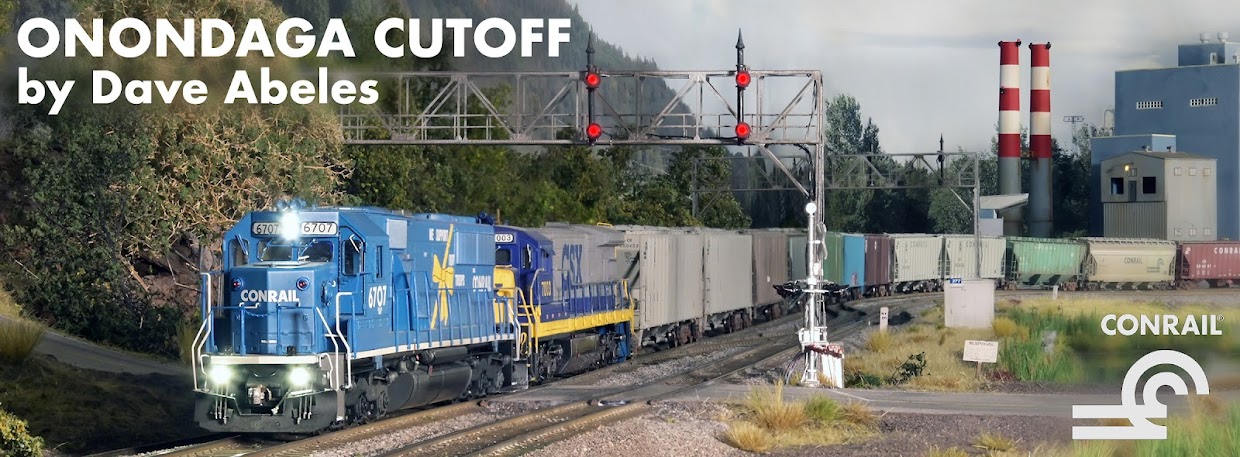
Conrail train SEBU works the North Runner at the west end of Onondaga Yard while setting out cars on 6/22/12.

With much wiring still to do for the signal system, that work is the next major push for the railroad.  As it requires re-wiring one main track as well as locating junctions for the BD-20 detectors, the railroad is out of service while each pair of blocks is wired up. 

Plenty to come here, as always.  It's a great hobby, isn't it?

~RGDave

Thursday, June 14, 2012

Action!

As work progresses on the house projects, I have squeezed some time in for the railroad.  After getting the 6807 set up for service, I have repaired several units that had minor electrical issues, set up a few new cars for service, and also worked to complete a long-time goal of adding sound to one of the B23-7's that calls Onondaga home.  I chose the 1987 to recieve my first-ever installation of a sound decoder.

I chose a Soundtraxx 'Tsunami' decoder, as they are well-recommended, and they also make one specifically for the GE FDL-series prime mover.  On their website, you can hear samples from each decoder, and it's very impressive.  So, I took the plunge, and here is the result.  The 1987 comes down the North Runner to the West End crossover, just as your videographer is surprised by westbound TV-207 meeting eastbound TV-10 right at CP282.  As Ken says - 'Safety First!!'

Turn your speakers on!


Let me know if the video works - it was filmed with an iPhone, and should come up when you click on it.  I am hoping the computer can figure out how to make it come together for you!

That TV-10 train is almost entirely recently-finished cars and UPS trailers, just like the real one was.  CR 6807 leads SD60I 5544 while the 1987 chugs away in the yard.

Sound is adding a whole new dimension to the Onondaga Cutoff!

~RGDave

Thursday, May 31, 2012

Balance

A critical thing to keep in mind when building a large layout is balance - the fact that the rest of life keeps going, too.  There is much to do around the house besides the model railroad, as all homeowners know very well!

Currently there is a major project underway at our home - finishing the attic, and adding a staircase to allow for better access to the attic space. 
The Future!

Here we see the ceiling of one of upstairs bedrooms as been removed, as has the floor of the attic above.  The big, rough-cut timber stringers and bearing wall are now exposed and will soon support a new staircase.  I've enlisted the help of a contractor for this heavy work. The attic above will have new power and light installed, then a new baseboard heating system, and finally the space will be insulated and then finished with sheet rock and painted.

All this, while the railroad takes small steps of its own.  While I'm thinking of backdrop or finishing a modeling project, it's important to step back sometimes and realize how important everything else is too!  Our hobby is a wonderful escape and helps us re-engage reality.

~RGDave

Friday, May 25, 2012

What a Difference…


While far from complete, the backdrops on the Onondaga Cutoff are now spackled, sanded, and primed – and what a difference this makes in the appearance of the layout!  The white primer at least provides a uniform background for the trains and trackage.  

Also of note here is the 6807, just finished this evening - a nice Conrail SD50.  The 6807 is from the last order of Conrail SD50's, and as such rides on the EMD 'HT-C' trucks, instead of the older 'Flexicoil' trucks (like 6495 has in this image).  Athearn did a beautiful job with the CR SD50.  I had to add some Conrail-specific details, including the 'bug-eye' classification lights and the cab signal box.  I also added a TCS T-1 decoder, installed some miscellaneous details like MU hoses, lift rings, and a snowplow, and weathered the unit - it's ready for service!

The next step for the backdrop is to paint a sky with some high-level wispy white clouds.  Following my good friend Ken’s advice, I am going to make sure the ‘sky blue’ includes plenty of light gray, since skies here in the Northeast usually contain at least some humidity!!  

In my planning for the backdrop, I spent time looking at the sky – and noticed that the sky at the horizon is almost always brighter, and more white, than the sky above.  There is a gradual but definite fade to darker blue as you look from horizon to sky.  I plan to try and replicate that as best I can.  I am no artist, but will do some experimentation to see where the project takes me.

A very important part of convincing backdrops is the lighting for the railroad.  My plan is to use LED strip lighting to fill in the general space, and to continue to use the halogen track lights to create shadows and add the yellow color that filtered sunlight generally provides.  Any suggestions are welcome!
Signal block detection is continuing, as well as some mechanical department work – building resistive wheelsets, detailing cars, and detailing/programming locomotives.   I try to fit projects into the time I have available for the model railroad – sometimes that’s 5 minutes, sometimes it’s several hours. 

One of these days, I am going to begin work on a pair of Conrail B36-7’s, beginning with the Atlas B30-7 model.  They will need minor body work and extensive additional details, plus a coat of paint and decals.  Each of these is the ‘silver series’ model and as such, they will also need after-market decoders.  My plan is to purchase sound decoders for these models, and give sound installation a try for the first time.  Stay tuned!

Thursday, April 26, 2012

Some Variety

Right now, there are two large, arduous tasks underway on the Onondaga Cutoff:  installation of block detection and the sanding (of spackle) and then painting the backdrop.  The prior involves significant wiring changes and cutting new insulation gaps into mainline track.  Both are not much fun.  The latter involves a tremendous amount of spackle dust, which is flat-out miserable.  I took a block of time last weekend and just plowed ahead with it, finished the sanding and got all the backdrop primed.  I'm really, really glad that I am done with that part of the project.  Tasks like these take hours and hours to do well, and neither will be complete any time soon.

This can get frustrating, especially with the rest of life going on, and the new summer coming soon.  My answer to the frustration is to give myself a break from those activities once I get something done, and instead focus on another project that can lend more immediate satisfaction.

One of these has been equipment upgrades, as you have seen over the last few months.  Another is putting new cars into service-and I am proud to introduce you to the first new cars for the Peter Doelger Brewing Corporation, located on the M&E.
PDBX 1201 is one of what will eventually be 7 similar cars, all for modeling the movement of finished product from the brewery to the world off the layout.  I have two cars done, a third in progress, and more to come.  A key feature here is the custom decals, made from digital photos of the actual beer bottle labels.  I used small decals, as that is more plausible for a 1990's-era car than a large logo would be.  Here's a close-up view:
Many thanks go to Mark for all his help with this project - these decals are perfect and just what I imagined they would be.

Further, I also decided it was time to upgrade the local interlocking control panels from cardboard to masonite, even though the final boards are coming soon as well.  Cardboard, while OK at first, did not stand up to the operating environment.  Masonite is much stiffer and more stable.  Here's now the new 'temporary' board looks at CP 280, screwed securely to the layout subroadbed:
It's nice to be able to accomplish side-projects that give a sense of progress while the bigger projects drag on and on.  As always, the key is to just keep working, even bit by bit.  Eventually, it all comes together!

Sunday, April 22, 2012

Block Detection

Railroad signaling, regardless if scale or size, works on one principal:  block detection.  Simply put, the signal system must be aware when a certain block is occupied.  Once that is known, the system can be designed to display signal aspects that protect movements between blocks. 

On the prototype, since trains either generate their own power or get it from a catenary wire (or third rail), the detection works by changing the status of power running to a relay, which is held open by the power.  Trains, with solid steel wheels and axles, then complete a circuit between the rails, dropping the relays (or solid-state sensors) that in turn trigger a track occupancy light (TOL) on the dispatcher/operator board (or screen). 

In model railroading, with DC power over two rails, the power in the rails is what drives the locomotives.  Therefore, another method of detection is necessary.  This topic is well-covered on other sites on the internet, so I will only discuss the one I chose to employ:  current-sensing block detection, using the BD-20 detection unit manufactured by NCE.

Essentially, the BD-20 works by detecting current flowing to a track circuit, generated by the presence of a piece of equipment that draws current.  This works immediately for locomotives, but also lit cabooses or passenger cars.   When the BD-20 senses the current drop, it activates, and sends a signal to the computer that the block is occupied.  When powered, the LED on the detector is illuminated, as seen below.  Here, Track 2 is occupied, where Track 1 is not.


The two middle terminals will be wired to the NCE input unit, which has yet to be installed.  One step at a time!

One issue is that this current-sensing detection does not work with standard freight cars, since they do not draw current.  How do we solve this?  The most expedient method is to use special wheelsets, equipped with a small resistor to allow a tiny amount of current to be drawn between rails.  These can be bought - at approximately $2.25 per axle, which adds up quickly since I have close to 400 cars - or made.  I choose the latter. 
Shown is an Atlas HO scale 33" metal 'caboose' wheelset.  Those pugs at Atlas make 'freight car' wheelsets that do not fit anyone's trucks but theirs, and 'caboose' wheelsets that just happen to fit everyone else's truck sideframes.  Yea, I figured that out the hard way.  That said, they are beautiful wheelsets for operations on a big layout - heavy and properly gauged to NMRA standards.  What I did was order 200 4.7K ohm resistors, costing 2.4 cents apiece.  Again, I learned the hard way that the 4.7K resistors were too big for my use - the detection wasn't picking up any current.  So, I changed to 3.6K ohm resistors, and the results have been much more consistent.  I glued them to the axles with CA adhesive, let that cure, and then connected both sides of the resistor to that respective wheel with silver conductive ink.  Once that cured, I tried it out, and wa-la!  Resistive wheelsets and working block detection.

So, now I am plodding along building wheelsets and installing block detection, much of the latter requiring me to add additional power bus wire and feeders for the second main track.  It's a large undertaking, and it's a bit discomforting to cut into a power bus that is working well for basic operation!  But, with eyes on the prize of a working system, it is what needs to happen.  7 blocks down, 23 to go...

Step by step!

~RGDave
Thursday, April 19, 2012

The Edge of a Dream

Ever since I was young, I have been fascinated by railroad signal systems. Of course, the trains came first, and those remain the star attraction, but the idea that an operator or dispatcher could give trains permission to move over track by controlling signals and switches from a remote location always captured my attention. So, you can imagine the first time I witnessed a working signal system on a model railroad – WOW!

A sign of things to come...medium clear!

Therefore, one of my life-long modeling goals has been to have a working, dispatcher-controlled signal system on my model railroad. For me, that means scale, functional, NYC-style searchlight signals.  Exactly like the one above, manufactured by Integrated Signal Systems.  But there were always questions: first, how does that work? Second, once that works, it needs a full-time dispatcher. How then can I have the signals work as an ‘automatic’ signal system for the times when I am running the trains myself?

These two short questions have taken more than a year to answer. And we’re still working on it. It has been a real learning process to this point trying to figure out how all these goals can be accomplished; many thanks go to the guys that have spent so much time on this so far - Nick, and Alex. Thanks also go to Jack, Mark, and Scott, all of whom have made valuable suggestions in the design.  Model railroad signaling is complicated and expensive, especially on a big layout like the Onondaga Cutoff. The signal systems themselves, especially if they are to be dispatcher-controlled, boil down to systems that must work hand-in-hand with the control system.

Digitrax users have the benefit of the fact that Digitrax has a fully functional signal system to choose from that simply couples in to the Loconet cab bus. For us NCE users, we pay for the easier interface that NCE provides by having to use other’s signal components, since NCE does not yet have a working signal control board. In fact, while I am depending on NCE for block detection and layout control, I am depending on Digitrax for future turnout control and for signal control.

The link between the two systems is provided by the Java Model Railroad Interface, or JMRI. JMRI is an open software package available online for no charge, supported by a group of modelers that use it daily. This software allows for computer control of the DCC system and model railroad. It allows a computer interface to program decoders, speed tables, consists, effects, and also provides a pathway to link NCE to Digitrax via a USB cable so that my NCE layout can use the full Digitrax signal system. Plenty to come on this amazing project!