Thursday, July 31, 2014

Some Video of the Latest Operating Session

Just a quick post tonight to share a few impromptu videos from a recent operating session - these capture a slice of the experience we have every month or two when on an evening, 8 to 12 model railroad operators converge on the Onondaga Cutoff and run it like a railroad.

Here, SEBU is finishing a setout and pickup at Onondaga Yard and is shoving back to put their train back together while TV-7, a fast Boston-to-Chicago piggyback train, comes around him on Track 2.


We take it seriously enough to keep things organized, but the point is and will continue to be having fun, while trying hard to capture the experience of mainline railroading using actual schedules, scale models, and Conrail and NORAC operating rules.  Here, train BRSE from Chicago to Selkirk comes east through CP282, passing the signal crews who are out removing the old manual signals in the interlocking.  The train is led by a pair of run-through locomotives borrowed from the AT&SF Railway.


Excuse the poor quality of the videos - I think the sound and sight of the experience is worth sharing!

~RGDave

Monday, July 21, 2014

Playing with Scenery

Scenery is the last big frontier for the Onondaga Cutoff.  While there are some expansions planned here and there, most of the trackwork is complete, and we have worked the bugs out of it.  The CTC signal system is functionally complete although we are tweaking it here and there.  As these major initiatives wind down to basic maintenance, it is - finally - time to put some serious thought and effort into permanent scenery.  This will include not only trees and landforms but also structures and, eventually, people.

Recently I ripped out the temporary foam surface along the M&E at Skaneateles Creek, replacing it with a first stab at modeling rock faces and the edge of the forest.  I need to work on blending the 3-dimensional scenery into the 2-dimensional backdrop, but when viewed along the tracks, this is a marked improvement to bare plywood and pink foam 'cliffs' - the lighting reminds me of humid summer afternoons along the tracks:


Modeling Central New York terrain and rocks means finding a way to represent the undulating, sedimentary rock that is so prevalent in that area of the country.  Once that is glued in place, we go back and add ground foam and trees to represent a forest.  The M&E wanders through the woods between Euclid and Onondaga, and I hope that operators can feel like they are in the woods with it!


The other extreme is the industrial landscape at Onondaga Yard, especially at night.  Here B23-7 1987 and a clean CN GP40-2L(w) 9549 share the fuel pad, long after dark on a humid July 21, 1994.

There's some exciting features being added to the signal system, too - namely, modeling the approach-lit signals so common throughout the Chicago Line.  These signals are only lit when a train is in the block facing the signal, so as to save power and light-bulb life.  Thanks to the CATS software, we can add this feature to the hardware already installed with some LOGIX computer programming that runs on top of JMRI and CATS during an operating session.  More on this soon!

Enjoy the long summer days!

~RGDave
Monday, June 30, 2014

More Locomotive Upgrades

As we settle in to the newly-completed signal system, testing all the aspects under regular traffic, I have turned back to the mechanical side of things.  I have a drawer full of models that I completed more than 10 years ago that were wired up for conventional DC control, and all of these are eventually going to be updated to modern DCC control and working headlights.  


Here's a 'night shot' of the latest unit to be upgraded with a working LED headlight and a DCC decoder, as well as new nickel-plated wheels - CSXT 6126, a GP40-2 I superdetailed in 1998.  A nice bonus is that the Athearn cab allows headlight glow to reach the numberboards, and when those are painted white, you get the bonus of lit numberboards!

As summer sets in, time for the layout is more limited, but progress will continue - one step at a time.

~RGDave

Thursday, June 12, 2014

Finally, More Fascia!

Now that the signal system is complete (it still makes me smile to write that!), the vast majority of the wiring is now complete on the railroad, which will allow me to move ahead with the long process of adding scenery to the layout.  For me, the first step in that process is adding the fascia panel boards on the front edge of the railroad.

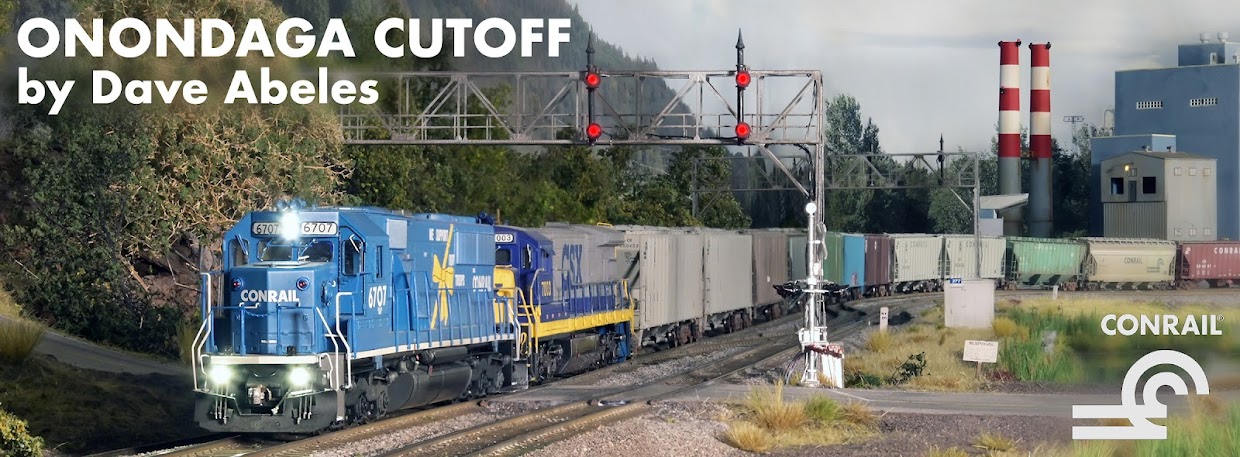
First, a quick iPhone snapshot of a late-running TV80, coming east in morning light at CP282, under the recently installed signal bridge which is also displaying approach-medium for a westbound:


If I take a few steps away from the layout, this is the overview of that same area, with the new fascia panels hung and the edge of the Yardmaster's 'Office' at the lower right:

The fascia is cut from 4'X8' sheets of simple 1/4" 'Masonite' hardboard, a wood product available at most home-supply stores and lumber yards.  It's flexible and smooth when curved in plane, but provides a nice hard surface once it is edge-mounted on the benchwork.  This will be primed and painted a darker color once scenery is further along so as to be less distracting, but even with the unpainted surface I think it lends a much more finished look to the areas where it is installed.  It forms a nice, definite edge to the railroad, which helps me visualize and construct the terrain.

Scenery will be a learning experience for me, as I have only very limited history with scenery construction.  I will share that process here!

~RGDave


Wednesday, May 28, 2014

CTC is now....C O M P L E T E

May 28, 2014, will always be remembered as an important date on the Onondaga Cutoff - the date that the CTC was completed on the main line of the railroad!  Thanks to immeasurable assistance from Nick and consulting from Jack, CP282 entered service today and the results are something I am pleased with.  Especially the long-awaited signal bridge for the westbound home signals at CP282:


Appropriately, the signal department installed black bags on the signal heads of the old manual signals so as not to confuse crews approaching CP282.  At a future operating session, a work train will be assembled to come out and remove the signals; until then, we can see past and present at the same time.  Scenery will improve the look of these locations, and now that the signals are installed and working, it's time to start scenery in earnest.


From now on, the Mohawk Dispatcher will be able to see and authorize all movements on main tracks on the entire railroad.  The signals here are all linked to each other and block detection via the computer, just as the rest have been, and so the main track on the entire railroad is now dispatcher controlled.

I must admit this is a milestone that ranks near the top of anything I have ever accomplished in this hobby - it is something I have dreamed of for more than 25 years.  Prototype operation of this railroad requires a working signal system, and now, we have it!

~RGDave


Tuesday, May 20, 2014

Ballast and Interlockings

As I continue to install some ballast along the main tracks of the Onondaga Cutoff, I am getting better at the painstaking process required when ballasting a turnout.  With small moving parts that are subject to very tight clearances, this process is difficult at best - care must be taken, as there is a good possibility that a turnout can be ruined!


Here we see some of the basic tools used in the process:  ballast, diluted white glue, isopropyl alcohol, water, and a soft brush.  While I use a large brush for most of the ballasting, the details inherent around a turnout - the frog, and points, specifically - require a smaller brush to ensure that all the granules of ballast are properly set between the ties and away from any moving parts.  This shot is at CP280, and I only ballasted the main tracks as part of this process.  But it still took me about 5 hours of work!  As we've discussed here before, every small step matters, and the persistence and patience are as much of a lesson as they are a tool.

Once the ballast is in place, I install tape over the moving end of the points to prevent glue from hitting those areas.  I also brace the points 'halfway' thrown so as to avoid gluing points shut.  The final preparation is to cover adjacent areas with paper towels, and then proceed to mist the entire freshly ballasted area with the alcohol.  Once it is wet, I dribble the diluted glue (with some alcohol mixed in already) over the areas, soaking the new ballast until you can see the white glue beginning to puddle up.  At that point, I use a damp cloth to wipe the rail heads down.  The next morning, it looks like this:


Once nice thing about the actual ballast installation process is that it yields an almost finished product right away - it's a major visual impact, and only requires a bit of weathering to become the finished piece.  Here with see the #1 crossover at CP280, ready for service.

Signal updates are forthcoming - I received word that the long-awaited final signal bridge shipped this morning.  Exciting progress coming soon!

~RGDave


Monday, May 12, 2014

A Bit of Ballast

Just a quick photo for you all of some track that has finally received ballast - this has been a long time coming, and is a first big step towards scenery construction:


This location is the curve between CP282 and CP280, with weathered Micro-Engineering flex track and HO scale ballast by Arizona Rock & Mineral Company.  As I get more experience I think this look will improve, and I think it will be an effective representation for the main line track.

The final signal bridge, also long awaited, is reported to be shipping this week.  Stay tuned!

~RGDave