Thursday, December 17, 2015

Modeling a Conrail C30-7A...

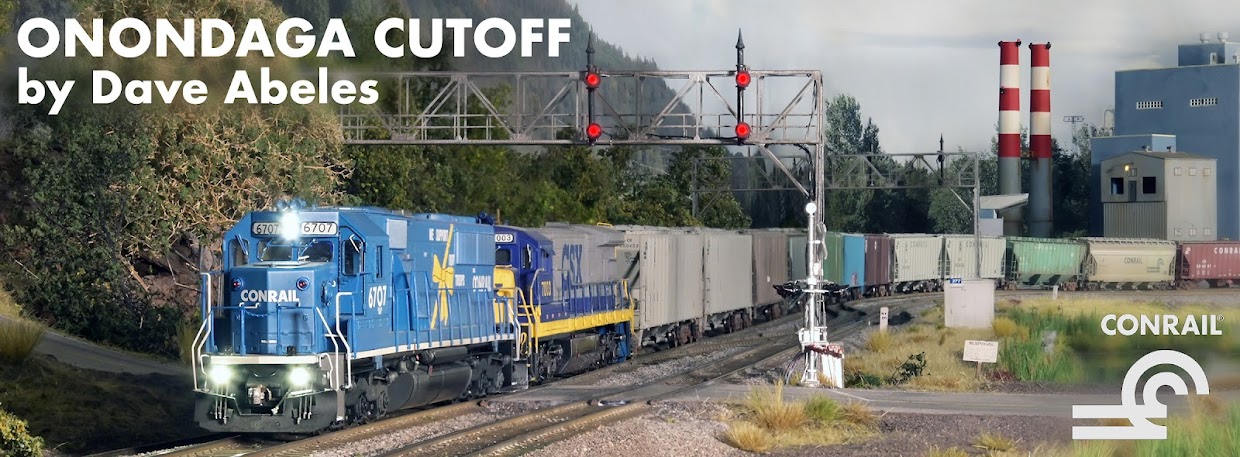
This past weekend marked the end of a 4-month long project to build an accurate General Electric C30-7A locomotive for the Conrail roster on the Onondaga Cutoff.  This post will commemorate the research and basic construction required to create a good replica of one of these unique-to-Conrail locomotives.


First, a comparison of the cab, hood, and radiator details that differ between each model.  The above photo is courtesy of ebay, and is comprised of two images copied here atop one another to show the different locations of the filter intakes, tall engine room doors, and cabinets.  While these are Overland models, I started with an Atlas C30-7, with many parts from the Atlas B23-7, which allowed me to create the C30-7A car body.


A critical resource for my modeling Conrail's fleet of locomotives in the 1990's has been Conrail Motive Power Review 1986-1990 by Bill Withers, and published by Withers Publishing.  This book is a bible for us Conrail modelers and I highly recommend it!  

The first cuts are always the hardest - I had to muster up quite a bit of courage to cut into a $75 dollar model.  Still, a nice X-acto razor saw and mitre box helped in that effort.  Cuts are made slowly and carefully, letting the tool do the work, and not trying to force things along.  


With any sort of major kitbash, I find it helpful to do periodic 'check up' loose assemblies to see how things are fitting.  Luckily, the C30-7A and the C30-7 from which it came share a common car body length, and even more luckily, the Atlas molding includes the walkway and pilot casting as a separate piece to begin with.  This allows a positive check where I can see if any issues need adjustment before assembly.  

You can see here in the splice behind the cab that I had to cut an extra sliver to lengthen the body - the first was too short!  


While the new cab and full-body cuts as seen above are the biggest changes needed, there are many other details that set apart a C30-7A.  Extra radiator grill intakes from Hi-Tech details are necessary, as is a modification to the battery box doors on the left (conductor's) side of the walkway casting. 

The first, tall door must be chiseled so that it matches the height of the door adjacent to it.  I used putty to fill the depression between the doors to create a large, continuous door, to match prototype photos.  Finally I used styrene to add the hinges below. 


Again - slow, careful work and a sharp blade is required here to get the look (and just as importantly to avoid injury!)  You can also see I removed all the cast-in steps.  Conrail GE's are built with 3 steps per step well, instead of 4. 


It required about 3 applications of putty, then carving and sanding each layer, before I was happy with the joints.  I also removed the cast-on headlight bracket on the short hood, while avoiding removal of the sand fill cap.  After all the putty cured, I scribed in new cabinets behind the cab to match prototype photos.


Yet another detail that required changing is the headlight/number board casting.  As molded by Atlas, the C30-7 headlight is in a rectangular box.  Thankfully the B23-7 cab comes with the correct rounded headlight casting and better-detailed number board boxes, and so yet another part had to be purchased from Atlas.  

Lighting was a challenge due to the cab changes.  I ended up going with the Atlas B23-7 clear plastic casting and light guard, but that required quite a bit of filing for the clear plastic casting to fit through the cab wall.  I used black art paper as a light block behind the cab an on the bottom of the light guard.


Now we are moving into some of the fine detailing, after the putty joints are acceptable and the body has been glued together and to the frame.  I added the Hi-Tech details GE anti-climber casting to the front walkway and a Details Associates cab signal box to the walkway behind the cab on the left side of the locomotive.  Thanks to the Conrail Modelers group on Facebook, I found that one of the members there used Shapeways.com to create custom GE marker light mounts in HO scale!  That made the installation of the distinctive Conrail marker lights quite simple.  Grab irons also were bent and installed at this time.

Also, I installed A-Line photo-etched brass steps on all four corners and then finished the battery box door (visible on the far right above) before installing Smokey Valley brass stanchions, and bending my own .015 brass wire (front and rear) and .015 steel wire (sides) handrails to match.  Smokey Valley stanchions needed new holes to be drilled as they did not fit the Atlas frame (they were made for Athearn GE's).  Stanchions for each railing go first, then the railing itself.  I elected to solder the stanchions to the handrails - I was nervous about that process, since that too was a first for me, but I am very VERY pleased with the result.  I used a simple pencil iron, paste flux, and electrical solder for a quick and extremely strong joint.  

The steps and Smokey Valley products were my first experience, respectively, with both.  I am very pleased with how these turned out!  

After the addition of other details including a Hi-Tech exhaust stack, a Details West Leslie RS-3L horn casting, Details Associates Sinclair antennae, and cab details including the rain gutters and flag holders that I fashioned out of styrene, we were ready for primer and paint.   I used Testors Aircraft Gray for primer and Scalecoat Conrail Blue for the finish coat.  Each spray can was warmed in hot water until the can was warm but not hot, which gives a lower viscosity paint application and ensures the details will not be hidden.  


After the primer cured for 2 days, I inspected the joints and was satisfied, so I proceeded with the blue coat - what a difference!  While the blue cured, I installed a LokSound Select Direct decoders programmed for the GE 7FDL prime mover, and then replaced the stock Atlas sideframes with new Atlas sideframes from their C40-8W, which fit perfectly and include the correct exposed roller bearings and profiles.  The underframe got a coal of Testors flat black enamel paint.  


As always, I am amazed at how the color of the blue seems to change once details are applied.  I used Microscale decals to decorate the locomotive, and then used white enamels to add the safety ends to the handrails, grabs, and coupler-lift bars.   Dull coat was applied to seal the decals and even out the appearance of the model.  


After the dull coat cured for 24 hours, I used flat black enamel for the exhaust stains, and then gave the engine and underframe a coat of airbrushed grime.  I used rust enamels for the darker stains around the battery boxes, then used chalk pastels to add localized grime and rust as applicable.  Finally, I installed window glass in the cab, and used MV Products red lenses to represent the marker lights.  I am pleased how those came out, too.


I'm excited about the results - here's a few 'finished' photos!


All in all, this was close to 80 hours of work, including some but not much corrective work that I try so hard to avoid.  Even in a perfect process this would be more than 70 hours, which is a lot to spend on one locomotive when there is an entire layout to consider!  That said, it is indispensable for this era on this railroad.  This model is a real challenge to get to a finished state, but I am excited on 'my piece' of the Chicago Line to have a well-modeled 'plain jane' like this one.  6577 will be a major contributor to moving big trains on the Onondaga Cutoff!

~RGDave
  

Sunday, November 22, 2015

Syracuse, On the Horizon

Scenery on the Onondaga Cutoff has been an organic sort of learning experience.  I am learning as I go, and the vision for how I want it to appear is changing as I learn new techniques, and indeed also as I figure out where the railroad actually would have run.

The most recent development with that has been a new addition to the scene at CP-282.  Now that I have plotted out the route on the USGS quadrant maps, the railroad can develop a more true sense of place.  The route exits Ram's Gulch south of Syracuse and makes a turn to the north, where suddenly the Syracuse skyline appears on the horizon.  I took the photo earlier this fall (special thanks to Nancy at the Brighton Tower Apartments!) and then had a large print made.  I trimmed the sky away, sprayed the remainder with dull coat, and mounted that on black art paper with a thick homemade black art-board frame. Here's the view during the afternoon - to me, this really adds an amazing depth to the scene.

Since we run operations around the clock, I wanted the skyline to be illuminated at night.  It took a lot of thinking, discussion, and trial-and-error construction, but I eventually found a combination of LEDs and incandescent bulbs that when mounted through the backdrop gave a convincing glow.  Forgive the grainy iPhone images - this is much more convincing in person!


I trimmed the black backdrop paper out from beneath the buildings, so that the entire city would have a glow to it from ambient light, as cities do to our eyes.  Here's a closer view showing the windows I cut through the photo, allowing more pointed light to show at the correct spots:


Those familiar with Syracuse will recognize the Carrier Dome on the right, and other buildings at Syracuse University including 22-story Lawrinson Hall, where I lived for the first two of  my four years at SU.  The downtown proper is further to the left (west) with the MONY Towers and Verizon buildings as key features.  

The operations on the Onondaga Cutoff, especially those at night, just got a little more prototypical!

Happy Thanksgiving to you all, and best wishes into the Holiday Season!

~RGDave

Tuesday, November 17, 2015

Another New Experience

Earlier this year I was asked to be part of the Garden State Division of the National Model Railway Association's annual meet - a Railway Prototype Meet in NMRA terms - which to me was humbling and quite an honor.  And so, thanks to my patient wife and lots of help from key figures of the crew on the Onondaga Cutoff, I presented a clinic at the RPM on block detection at the meet itself, and hosted an open house for attendees so they could come and see the layout. Here's the first slide:


In discussing the open house with Jack T. and Rich W., the two biggest contributors to the operating plan on the Onondaga Cutoff, we decided that we could operate as though this was a small operating session, which served first to show attendees how the railroad works, and also would therefore display the block detection in action.  It ended up being a great evening and a real pleasure to meet the 25 or so people that made the trip out to see the layout!

As always, for me, one of the best parts of the hobby is the social part.  There is no shortage of opportunities to bring others in and to include like-minded people in what we are trying to accomplish.  Thanks again to the Garden State Division NMRA for the opportunity!

~RGDave

Monday, October 26, 2015

Building a Fleet

We have discussed the advantages of having a long-range view when designing and building a model railroad here before.  One aspect of that approach that tends to be rewarding is building a fleet of model locomotives that accurately depict what would be seen on the prototype.  In the case of the Onondaga Cutoff, a decent fleet of B23-7's is a requirement for service on yard and local freight trains, as well as on other assignments.


Here's a few images of the recently-finished Conrail 1967, a GE B23-7 delivered in 1977 to Conrail.  Seeing as though it was about 17 years old in 1994 and in original paint, this one was due for some weathering.  I added Conrail-specific details like the cab signal box on the walkway above, as well as a Sinclair radio antenna on top of the cab.  I then checked photos of the prototype online and was reminded that 1967, and many of its sister engines, developed a heavy coat of old rust on the roof surfaces.


My 1967 came used and modified electrically from the stock model.  I found it on eBay, and knew it would be some work to get it set up.  It arrived with a charcoal-gray base wash already applied.  Thanks to the availability of weathering chalks, I was able to replicate that rust effect over the top of the wash, and developed layers of colors that really draw out the details.  (The yellow outline on the snow plow tells railroad personnel that this unit was modified to be clear for operation in 'Third Rail' territory close to New York City, where a third rail is mounted next to the track, allowing for passenger trains to draw electrical power for operation.)


Having been built in Erie, PA, and largely maintained out of the big locomotive shops at Selkirk, NY, these units were regulars on the Chicago Line.  This is the third B23-7 to join the fleet on the Onondaga Cutoff, and there will be at least one more.  With these engines moving around, it's easier to believe that we are trackside on the Onondaga Cutoff in 1994!

~RGDave

Thursday, October 15, 2015

Speaking of Remote Dispatching....

As we have discussed before, model railroading operations is a very community-oriented hobby.  It requires more than one person to pull it off realistically, and in most cases can require a group of people to come together to accomplish the goal of moving trains.

My buddy J. Alex Lang recently participated in an operating session as the Mohawk Dispatcher, and he did it from his home in Pittsburgh, PA - using the remote system described in September on this blog.  Afterwards, Alex did a nice write up of that experience on his blog, and I thought I'd share it with you all.

http://www.jalexlang.com/2015/09/24/remote-dispatching-the-onondaga-cutoff/

Enjoy!

~RGDave


Monday, September 28, 2015

Small Steps and Big Impacts

Sometimes, small steps can dramatically improve a scene.  A recent example is the scene of the bridge over Skaneateles Creek.  First, click on the link for a quick look at how it looked before - and, for comparison, here's a shot showing how it looks today:


The technique used here was simply to apply 'puff ball' trees directly to the backdrop.  While the puff ball trees have much less intricate detail than the 'Super Tree' kits, they work well as backdrop trees, mounted behind the foreground trees.  Instead of an obviously amateurish painted forest canopy, now viewers see real, three dimensional forest canopy, with a distant painted hill to appear miles away.   


This is much more pleasing to the eye than the scene in the link above, right?  I'm pleased at how this came out, and will model all additional shallow scenes in the same way.  My eye is fooled by the backdrop and my focus goes to the railroad.


I had to play with some black & white imaging in Photoshop - I'm very happy how this looks now.  


And, finally, for you locomotive fans, here's a shot of recently-finished C40-8W 6155 sitting at Onondaga Yard.  This is an Atlas model I purchased used.  I have added a DCC sound decoder and a few details, along with weathering, and now the 6155 can join the fleet.  I was never much of a fan of Quality-painted Dash-8 W's, but they do make a pleasing model of a 'plain Jane' unit that was a regular in the Syracuse area.

Here comes the autumn!

~RGDave

Thursday, September 17, 2015

"Emergency, Emergency, Emergency!"

Those three words rarely bring good news to follow!

Early in the morning of September 8, 1994, westbound train SEBU with four locomotives and 53 cars went into emergency as it passed upgrade through CP277 on the Onondaga Cutoff, just after 4 a.m. and still well before dawn.  The train notified the dispatcher and came to a stop, and the conductor then walked back to see what the issue was, only to find the following scene:


All cars were on the rail, but between the 5th and 6th car of the train, a mechanical defect caused some slack action to literally tear the coupler and its entire mounting from the frame of CN 377249, an empty covered hopper headed to Buffalo for interchange.  As the train was crossing over between tracks 1 and 2, this was a big mess, with both main tracks blocked.  Delays to priority intermodal trains started almost immediately.  


The train crew contacted the Mohawk Dispatcher, who in turn got in touch with the Trouble Desk, which immediately dispatched a mechanical crew with a boom truck to get out and clear the coupler from the railroad, as well as to assist the crew in getting the defective car set out.  With no coupler on the west end of the remaining train, locomotives from TV-5 were commandeered to push the back to the SEBU's train west up to Onondaga Yard, with the conductor protecting the head end.  The car was set out, and SEBU then started his scheduled work at Onondaga Yard, albeit with a conductor who wasn't too happy with how that run had gone!  Meanwhile TV-5's power reversed to go back to their train and continue their run west, now several hours late.  


Once the regular Mechanical Department guys came on duty at 7, they fired up their block truck and used its knuckle boom to repair the defect on CN 377249 at Onondaga Yard.  The car will be added to an outbound freight later in the day.  No injuries, just a team of railroaders working together to get the job done right.

For me, stories like this one - an actual mechanical defect leading to a very realistic emergency situation, in turn requiring a realistic response to keep the railroad open - are part of what makes Operating Sessions such a great part of the hobby.  Having an HO scale railroad that can even generate prototypical problems is just a fantastic thrill - you never know what problems will pop up during a session on the Onondaga Cutoff, but rest assured the guys running will figure out how to deal with it!

~RGDave