As planned, I went ahead and installed two new power districts over the course of the week - both of them were installed on the visible main line. Since the visible part of the layout is at the top of the grade, it requires the most current to keep trains operating. Locomotives draw more and more current as the entire consist hits the grade. Upon reach the summit at each end of the upper level, though, the locomotives must continue on level track while pulling the train up the grade, and so still draw quite a bit of current.
Installing two new power districts, each with its own EB-1 breaker set to 5 amps, I seem to have eliminated current-draw power interruptions. With two heavy trains at mostly open throttles, 3 Athearn units each, working up 2% grades with 35-40 cars, I had no issues - a nice relief, given the prospective cost of adding another booster to the system.
Soon, I will be installing headlights in my older Athearn units for the first time, and will also work to finalize the design of the engine yard. Winter is a great time for model railroading!
~RGDave
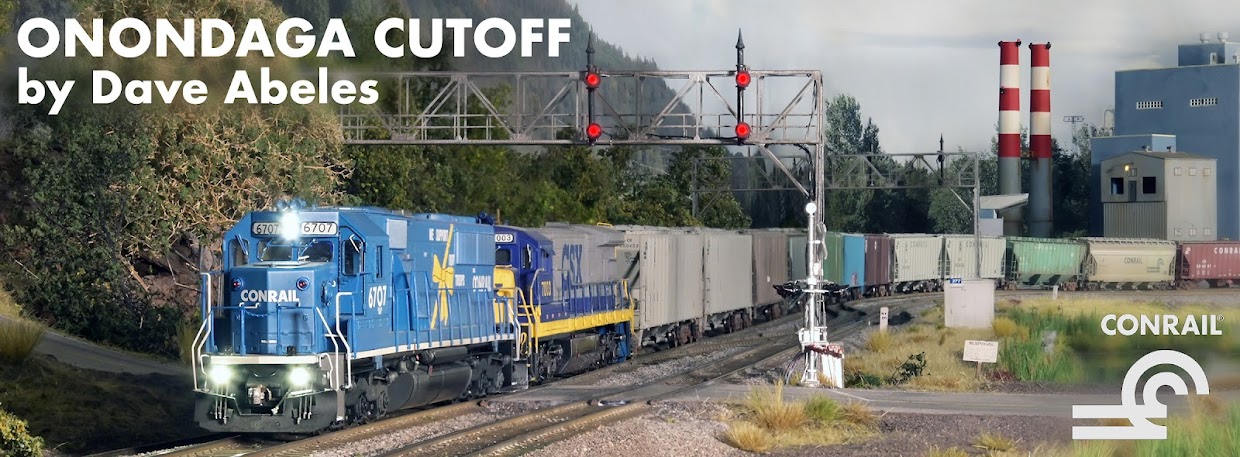
Preparation and construction of a basement-sized, HO-scale model railroad based on Conrail's operations through Central New York on the Chicago Line in 1994.
Monday, January 24, 2011


Wednesday, January 19, 2011
Learning the Hard Way
Building a railroad like this in my home means that much of what I am doing, I am learning by myself for the first time. Therefore, a good part of the fine points of construction, operation, and electronics are learned trial-by-error...figuring out problems when the happen, and hoping I don't destroy electrical components!
So far, I did toast a decoder (due to a steel tool fouling the track, which tripped the breaker, but due to the length of time that passed before I realized it, the decoder shorted out anyway). I have also had to learn the hard way with my breaker settings and power district design.
My NCE EB-1 breakers were installed as per the directions that come with the units. While the booster itself has an internal breaker, I wanted to add a layer of protection before causing that breaker to trip, to ensure that the booster would last. The additional layer includes the bank of EB-1 external breakers with a factory-set limit of 2.5 amps per breaker. While fine for a small layout or for a large layout with no grades and small trains, this limit quickly began to get in the way of my operations. Thankfully, NCE predicted this, and allows the user to adjust the trip limit of each breaker using jumpers provided with the kit. I bumped mine up in steps, per the instructions, and stopped with each breaker set to 5 amps, since if I went higher the breaker in the 5-amp booster itself would trip before the EB-1. All worked well with this idea until last night.
I was running two large trains, in different directions, when suddenly the breaker protecting the upper level tripped again. The issue here is that this load is going to be standard for me: two trains with more than 30 cars, 5 Athearn units total, moving upgrade on separate districts. However, I noticed the breaker only tripped when both trains were pulling uphill AND then one crossed the insulated gaps onto the same power district as the other. On separate breakers, 3 units and a big train is fine, even upgrade.
This leaves one solution: time for another power district.
Fortunately, I purchased a total of six EB-1 breakers, one of which is reserved for the short line. Therefore I have two remaining breakers. My plan now is to add another insulated gap just east of CP280, and a new power district, allowing trains in different directions to pull over the top of the grade on DIFFERENT breakers, instead of the same breaker. It is my belief that this will solve the issues of overdraw on the district. But...time will tell.
Stay tuned!
So far, I did toast a decoder (due to a steel tool fouling the track, which tripped the breaker, but due to the length of time that passed before I realized it, the decoder shorted out anyway). I have also had to learn the hard way with my breaker settings and power district design.
My NCE EB-1 breakers were installed as per the directions that come with the units. While the booster itself has an internal breaker, I wanted to add a layer of protection before causing that breaker to trip, to ensure that the booster would last. The additional layer includes the bank of EB-1 external breakers with a factory-set limit of 2.5 amps per breaker. While fine for a small layout or for a large layout with no grades and small trains, this limit quickly began to get in the way of my operations. Thankfully, NCE predicted this, and allows the user to adjust the trip limit of each breaker using jumpers provided with the kit. I bumped mine up in steps, per the instructions, and stopped with each breaker set to 5 amps, since if I went higher the breaker in the 5-amp booster itself would trip before the EB-1. All worked well with this idea until last night.
I was running two large trains, in different directions, when suddenly the breaker protecting the upper level tripped again. The issue here is that this load is going to be standard for me: two trains with more than 30 cars, 5 Athearn units total, moving upgrade on separate districts. However, I noticed the breaker only tripped when both trains were pulling uphill AND then one crossed the insulated gaps onto the same power district as the other. On separate breakers, 3 units and a big train is fine, even upgrade.
This leaves one solution: time for another power district.
Fortunately, I purchased a total of six EB-1 breakers, one of which is reserved for the short line. Therefore I have two remaining breakers. My plan now is to add another insulated gap just east of CP280, and a new power district, allowing trains in different directions to pull over the top of the grade on DIFFERENT breakers, instead of the same breaker. It is my belief that this will solve the issues of overdraw on the district. But...time will tell.
Stay tuned!
Friday, January 14, 2011
The First Full Run
Finally, the entire railroad that is currently in place is fully under the Digital Command Control system. For those that haven't heard about it, Command Control differs from regular model train control by applying a constant voltage through the track, and using digital commands to communicate with locomotives or other powered appliances on the layout by way of a digital decoder that is installed for each locomotive or appliance. I am a late-comer to this technology, which has been around in various forms for more than 20 years.
I purchased the North Coast Engineering (NCE) Power Pro 5-amp DCC system, with an add-on booster unit, and with the radio-control option. This allows me to carry around the 'cab' without having to plug in any additional wires or cables while I operate. On a big, walk-around layout, this is a huge advantage, and makes things much more fun even at this stage - when I have just one locomotive wired for DCC with the decoder.
The first 'operation' on the DCC railroad was a simple local working Onondaga Yard - the symbols for this will be WAON-3 (the symbol that works east of the yard, down to the online industries) and WAON-10, which will be the yard job and work the propane distributor in the yard as well as any duties around the yard. So, therefore, my first train was WAON-10, with Conrail 3305 doing the honors:
 This location is a solid 20 feet from the command control units themselves, and so would have required plenty of wiring on top of all that I have done already to install plug-in locations necessary to operate this with a tethered cab. Instead, I stood with cab in hand, and was free to walk around as needed. FUN.
Some significant work was required to realign my bus wires, the heavy-gage cables that run below the tracks, for DCC. All my power bus cables are routed into terminal strips that represent power districts, and each of those then is fed through a special breaker unit that NCE manufactures, and then to the command station itself, via another terminal strip. It sounds complicated but it is well explained in the manual and when you stop and think about it, it is very linear and makes logical sense too.
System overview:


Regulating the current into the booster units are a series of 3 breakers, which can be expanded for the short line (that will be a 4th breaker) and even more if needed to run the mains. Each has a red LED which is constantly lit when all is well. When the breaker senses a short, from a derailment or otherwise, it opens, protecting the command stations and also the decoders in the locomotives from shorting out or burning up. My panel is below, with both mainline breakers (one of these includes staging) and the yard/engine facility breaker:

Once I install decoders in my locomotives, or need to reconfigure them or program a new locomotive, I use a 'program track' which is separate from the layout itself. This track does not get enough power to run a locomotive, just enough to test a decoder installation and program the address and lighting, momentum, starting voltage, etc etc into each decoder. It worked perfectly for me, according to the directions, on the first try.
 I also hooked up my old analog DC (regular cab control, not digital) transfomer to this track, via a double-pole, double-throw switch. I can use this to test the first wiring of a decoder on low voltage, separate from the DCC system, to at least make sure there are no shorts immediately.
Now, it's time to wire up more locomotives, including installing headlights where appropriate. It feels like a weight has been lifted off my shoulders - this has been a long time coming!
I purchased the North Coast Engineering (NCE) Power Pro 5-amp DCC system, with an add-on booster unit, and with the radio-control option. This allows me to carry around the 'cab' without having to plug in any additional wires or cables while I operate. On a big, walk-around layout, this is a huge advantage, and makes things much more fun even at this stage - when I have just one locomotive wired for DCC with the decoder.
The first 'operation' on the DCC railroad was a simple local working Onondaga Yard - the symbols for this will be WAON-3 (the symbol that works east of the yard, down to the online industries) and WAON-10, which will be the yard job and work the propane distributor in the yard as well as any duties around the yard. So, therefore, my first train was WAON-10, with Conrail 3305 doing the honors:

Some significant work was required to realign my bus wires, the heavy-gage cables that run below the tracks, for DCC. All my power bus cables are routed into terminal strips that represent power districts, and each of those then is fed through a special breaker unit that NCE manufactures, and then to the command station itself, via another terminal strip. It sounds complicated but it is well explained in the manual and when you stop and think about it, it is very linear and makes logical sense too.
System overview:

The command station is the black box to the right, then to the left is the booster unit. Below and to the left is the breaker panel, and above that are various terminal strips required to keep things organized. The yellow cables in front of the breaker panel are the programming track busses (more on that later).
Here is a shot showing the NCE system itself - the command station (right) and the booster unit (left). NCE's system actually has a booster contained in the command station, so I have two boosters, which is what is needed to run a layout of this size.


Once I install decoders in my locomotives, or need to reconfigure them or program a new locomotive, I use a 'program track' which is separate from the layout itself. This track does not get enough power to run a locomotive, just enough to test a decoder installation and program the address and lighting, momentum, starting voltage, etc etc into each decoder. It worked perfectly for me, according to the directions, on the first try.

Now, it's time to wire up more locomotives, including installing headlights where appropriate. It feels like a weight has been lifted off my shoulders - this has been a long time coming!
Tuesday, January 11, 2011
DAY ONE
It's official - day one for actual DCC functionality on the Onondaga Cutoff was January 10, 2011. I installed a decoder in just one unit over the weekend, my custom-painted and detailed model of Conrail GP40-2 #3305. Last night I was able to get the new 'program track' installed and running. The full DCC system was hooked up to only one of the power districts so far (more on that soon) so I could only use the 'new' engine on a portion of the railroad - but so far, so good.
What a relief. The electronics work. I didn't screw up the first installation of a decoder. And, it's FUN.
MUCH more to come on this as the winter continues!
What a relief. The electronics work. I didn't screw up the first installation of a decoder. And, it's FUN.
MUCH more to come on this as the winter continues!
Saturday, December 25, 2010
Tuesday, December 21, 2010
Modifying Switches for DCC
In this post, I want to cover a step-by-step process for modifying older 'electrofrog' or 'insulfrog' turnouts for DCC. It is my opinion that this topic has received little, if any, relevant press. Some sources say that you simply need to 'isolate the frog from the point and stock rails, and isolate the points from each other.' Some say 'be careful' or even 'buy new turnouts.' None of these offer a how-to solution on converting existing turnouts.
This project will save money for all of us building a DCC system who can find older turnouts used, or that matter, have old turnouts lying around, but not yet laid. For example, I got my 50 Shinohara electrofrog turnouts for $5 each, albeit heavily used. Regardless, this is much more cost-effective than the $25-$35 you pay for these new!
When you really sit and think about it, however, this process seems trickier than it sounds at first. I went ahead and experimented. I destroyed two turnouts in the process, but figured out a way to spend about 20 minutes work per turnout and have a good-looking, DCC-friendly machine in the end.
Turnout Basics
Frog number - anyone know how this works? There is a precise trigonometric calculation (cosecants and cotangent angles) used by American railroads, but for our modeling purposes, we can treat it like a ratio of 'rise over run' as European railroad engineers do. The 'rise' is how far the divergent track diverges per the unit length - so, therefore, the frog number is a geometric ratio of distance-to-offset. A #4 frog (or #4 turnout) therefore measures four units along the straight route, while moving one unit along the diverging route. Similarly, a #6 turnout measures 6 units along the straight for every unit diverging. So, the larger the number, the more gentle the offset, and the more gradual the turnout.
For example, a #6 turnout that is 12 inches from the points to the end of the straight route will have the diverging route be 2 inches away [(1/6)*12=2] from the straight route by the end of the turnout.
Electrically, it is no secret that 2-rail model railroads generally run on DC power, with each rail an opposite polarity. For DC railroads, then, with conventional non-DCC power, reversing the polarity reverses the current, and therefore the direction the motor spins. Turnouts complicate things because rails of opposite polarity cross at the frog. Therefore, there are two choices: a permanently-isolated frog, or a frog that changes polarity to match the direction for which the turnout is lined, with that electronic conductivity provided by the point rails closing against the stock rails. Frogs that are powered by the point rail contacts can cause problems with DCC, as a simple derailment (or out-of-gauge metal wheelset) can cause momentary contact across opposite polarity rails, which can cause quick damage to the sensitive DCC decoders. Additionally, many manufacturers made turnouts with both opposite points connected by soldered crossbars, riveted in the center to ties or the throwbar, increasing further the chance of a short.
Frog Modification
In many older turnouts, the frog is powered by way of point contact. This includes older Atlas, Peco, Shinohara (Walthers), and Micro-Engineering designs. As you can see below, there are no gaps to insulate the rails in the frog from each other - the entire frog and point rails all share the same polarity by way of point contact.


Point Modification
The key here is that the point rails need power, especially if you have insulated frogs as described above, so that there are no stalls. In some many older turnouts, the points are soldered together by means of metal crossbars, which are in turn riveted to the plastic ties or throwbar. See the photo below.

How does one isolate each rail if, by design, they are soldered together and riveted as one to the ties?
First, keeping the general alignment of the points is crucial for throw machines to align the points correctly after modification. (I screwed this up, but was able to work around it). My method was to carefully cut strips of .15" thick styrene from a sheet to fit between the ties, perpendicular to the points, and to secure these from below with small dabs of Walthers GOO adhesive on each point rail. I put two on the points, one on each end, mounting them from below, several ties from the rivets.

Once that cures overnight, I used my Dremel tool and cutting disc to cut vertically through the metal connection bars and their copper contacts beneath. This caused a mess, but thanks to the styrene strips, the points held their gauge. I used an x-acto knife to clean up the burrs caused by the cutting disc. In the photo below, see the slice in the heel-point connector bar.

Once that is complete, the addition of several more styrene strips beneath the points and two on top of the point assembly over the old connections stiffens up the modification and improves the overall look as well. Again, an overnight cure will allow all to set up well.

I test the isolation by hooking the turnout to a conventional transformer, throwing the turnout, and then checking for shorts if I bridge a point rail with the adjacent stock rail. If there are no shorts, then my isolation is complete!
Electrical Continuity
Finally, we need to make a modification to connect the now-isolated point rails to the stock rails to match their polarity, which in turn will be soldered to feeders and the bus. Since each point rail only needs to be connected to the adjacent stock rail, small 1/4" pieces of scrap brass or copper can be soldered, creating an electrical bridge (e-bridge) to the points.
Early on in this process, I invested in a resistance soldering machine, which has been nothing short of a Godsend for wiring. While a regular pencil iron works best for bus/feeder connections, the resistance machine is CRUCIAL for small, neat joints between feeders and rail, and in this case between e-bridges and point rails.
To install the e-bridges, I place the turnout upside down the work bench, then use a razor saw to remove the plastic webbing between ties. With the rail bottoms exposed, buff the nickel-silver bottom of the rails with a wire disc on your Dremel, apply a dab of flux and 1/4" piece of brass wire, then resistance-solder the wire in place. Work quickly to avoid melting and warping the nearby ties. If they do melt, use the x-acto blade or any tool to straighten them while they are soft. You can see on mine that the ties did warp a bit, but to me, that looks prototypical for a yard switch anyway. The final soldered connections are visible in the photo above with the tube of Goo above the turnout.
Paint
The bright-white styrene strips between the points will disappear if painted rail brown, and actually do a plausible job of approximating some styles of prototype throw bar. In my case, I think they even look better than the big, ugly round rivet in the turnouts as they were manufactured! Here a modified curved turnout in Onondaga Yard has been laid in place, weathered, and linked to a Caboose Industries Inc. ground throw.

All for now. Good luck, and my sincere best wishes to all through the Holidays and for a happy, healthy 2011!
~RGDave
This project will save money for all of us building a DCC system who can find older turnouts used, or that matter, have old turnouts lying around, but not yet laid. For example, I got my 50 Shinohara electrofrog turnouts for $5 each, albeit heavily used. Regardless, this is much more cost-effective than the $25-$35 you pay for these new!
When you really sit and think about it, however, this process seems trickier than it sounds at first. I went ahead and experimented. I destroyed two turnouts in the process, but figured out a way to spend about 20 minutes work per turnout and have a good-looking, DCC-friendly machine in the end.
Turnout Basics
Frog number - anyone know how this works? There is a precise trigonometric calculation (cosecants and cotangent angles) used by American railroads, but for our modeling purposes, we can treat it like a ratio of 'rise over run' as European railroad engineers do. The 'rise' is how far the divergent track diverges per the unit length - so, therefore, the frog number is a geometric ratio of distance-to-offset. A #4 frog (or #4 turnout) therefore measures four units along the straight route, while moving one unit along the diverging route. Similarly, a #6 turnout measures 6 units along the straight for every unit diverging. So, the larger the number, the more gentle the offset, and the more gradual the turnout.
For example, a #6 turnout that is 12 inches from the points to the end of the straight route will have the diverging route be 2 inches away [(1/6)*12=2] from the straight route by the end of the turnout.
Electrically, it is no secret that 2-rail model railroads generally run on DC power, with each rail an opposite polarity. For DC railroads, then, with conventional non-DCC power, reversing the polarity reverses the current, and therefore the direction the motor spins. Turnouts complicate things because rails of opposite polarity cross at the frog. Therefore, there are two choices: a permanently-isolated frog, or a frog that changes polarity to match the direction for which the turnout is lined, with that electronic conductivity provided by the point rails closing against the stock rails. Frogs that are powered by the point rail contacts can cause problems with DCC, as a simple derailment (or out-of-gauge metal wheelset) can cause momentary contact across opposite polarity rails, which can cause quick damage to the sensitive DCC decoders. Additionally, many manufacturers made turnouts with both opposite points connected by soldered crossbars, riveted in the center to ties or the throwbar, increasing further the chance of a short.
Frog Modification
In many older turnouts, the frog is powered by way of point contact. This includes older Atlas, Peco, Shinohara (Walthers), and Micro-Engineering designs. As you can see below, there are no gaps to insulate the rails in the frog from each other - the entire frog and point rails all share the same polarity by way of point contact.

To isolate the frog in any switch where the frog is not isolated, a simple cutting disc in a rotary tool (such as a Dremel) will suffice. A quick 4000-rpm slice through the 4 approach rails about 1/4" from the ends of the frog will isolate the frog.

You can then fill these gaps with styrene secured with Cyanoacrylate Adhesive, and file to the profile of the rails, or you can leave them as air gaps.
In most cases, insulated frogs do not adversely affect operation. For some extremely small-wheelbase locomotives, such as an 0-4-0 steam switcher or an industrial diesel 'critter', there may be a stall issue in higher-number (i.e., longer) frogs (#6, #8, #10, etc.), but everything else should be able to bridge the gap. In any event, most modern turnout machines (including the Circuitron (r) Tortiose machines I am using) have a power-routing double-pole, double-throw switch internal to the machine that allows for automatic power routing to the frog.
Point Modification
The key here is that the point rails need power, especially if you have insulated frogs as described above, so that there are no stalls. In some many older turnouts, the points are soldered together by means of metal crossbars, which are in turn riveted to the plastic ties or throwbar. See the photo below.

How does one isolate each rail if, by design, they are soldered together and riveted as one to the ties?
First, keeping the general alignment of the points is crucial for throw machines to align the points correctly after modification. (I screwed this up, but was able to work around it). My method was to carefully cut strips of .15" thick styrene from a sheet to fit between the ties, perpendicular to the points, and to secure these from below with small dabs of Walthers GOO adhesive on each point rail. I put two on the points, one on each end, mounting them from below, several ties from the rivets.

Once that cures overnight, I used my Dremel tool and cutting disc to cut vertically through the metal connection bars and their copper contacts beneath. This caused a mess, but thanks to the styrene strips, the points held their gauge. I used an x-acto knife to clean up the burrs caused by the cutting disc. In the photo below, see the slice in the heel-point connector bar.

Once that is complete, the addition of several more styrene strips beneath the points and two on top of the point assembly over the old connections stiffens up the modification and improves the overall look as well. Again, an overnight cure will allow all to set up well.

I test the isolation by hooking the turnout to a conventional transformer, throwing the turnout, and then checking for shorts if I bridge a point rail with the adjacent stock rail. If there are no shorts, then my isolation is complete!
Electrical Continuity
Finally, we need to make a modification to connect the now-isolated point rails to the stock rails to match their polarity, which in turn will be soldered to feeders and the bus. Since each point rail only needs to be connected to the adjacent stock rail, small 1/4" pieces of scrap brass or copper can be soldered, creating an electrical bridge (e-bridge) to the points.
Early on in this process, I invested in a resistance soldering machine, which has been nothing short of a Godsend for wiring. While a regular pencil iron works best for bus/feeder connections, the resistance machine is CRUCIAL for small, neat joints between feeders and rail, and in this case between e-bridges and point rails.
To install the e-bridges, I place the turnout upside down the work bench, then use a razor saw to remove the plastic webbing between ties. With the rail bottoms exposed, buff the nickel-silver bottom of the rails with a wire disc on your Dremel, apply a dab of flux and 1/4" piece of brass wire, then resistance-solder the wire in place. Work quickly to avoid melting and warping the nearby ties. If they do melt, use the x-acto blade or any tool to straighten them while they are soft. You can see on mine that the ties did warp a bit, but to me, that looks prototypical for a yard switch anyway. The final soldered connections are visible in the photo above with the tube of Goo above the turnout.
Paint
The bright-white styrene strips between the points will disappear if painted rail brown, and actually do a plausible job of approximating some styles of prototype throw bar. In my case, I think they even look better than the big, ugly round rivet in the turnouts as they were manufactured! Here a modified curved turnout in Onondaga Yard has been laid in place, weathered, and linked to a Caboose Industries Inc. ground throw.

All for now. Good luck, and my sincere best wishes to all through the Holidays and for a happy, healthy 2011!
~RGDave
Monday, December 20, 2010
Merry Christmas, Happy Holidays and Happy New Year!
A quick update to say that yes, I'm still alive, and all is well - the usual holiday activities are keeping me very busy and more thankful than ever for all things good in my life.
I am working on a big post regarding my turnout modification process and will have that up later this week. Best wishes to all; thanks for your patience as we come to the start of the new year!
~RGDave
I am working on a big post regarding my turnout modification process and will have that up later this week. Best wishes to all; thanks for your patience as we come to the start of the new year!
~RGDave
Subscribe to:
Posts (Atom)