Wednesday, October 24, 2018

Bringing Empire Recycling to Life

There are few things in model railroading that force progress better than hosting operating sessions.  Particularly bigger events where other serious modelers will be seeing the railroad for the first time, or for the first time in several years.   I want to put the best foot forward, and make the railroad look and run as well as possible.

The last piece of the scene where the Cazenovia Industrial Track runs beneath the Onondaga Cutoff main line was the small spur leading to the Empire Recycling Company, a small scrap dealer served by Conrail.  With the 'Interchange' session coming in November, it was time to tidy this up.


A quick overlay of black cinders and asphalt paving dust from Arizona Rock & Mineral was put in place, up to the top of the rails on the spur.  I wanted to capture the look of a beat-up spur with buried track, so I used N-scale cinders to really get a muddy look to the area.


While that dried for two days, I assembled another of the Alkem Scale Models fence kits, and soldered .022" brass wire in place as posts.   Note that you don't need posts on every vertical support on the kit - two posts per piece is sufficient.  I staggered them to provide even support.


I also used this time to take the Woodland Scenics classic excavator model to the bench.  I clipped off the bucket and scratch built a new electromagnet to hang in is place, suggesting an old machine on its second or third owner, resurrected from dead and customized for scrap loading.  


With the fence painted gray and weathered with pastel chalk powders, I carried the pieces to the site and drilled #70 holes in the surface to the depth necessary to accept my posts.  This was a careful trial & error process, but it came together well.  


Some grassy tufts were added as well as a variety of scrap materials, shown here with fresh glue drying.  Some more scrap is needed, but we are just about there in capturing the latest 'finished but not complete' scene on the railroad.   

Now my guests at Interchange will see a finished scene here, instead of one that is nearly complete.  When there is one thing not done, it becomes the focus, almost like a missing tooth is the first thing people see in a smile.   A blank area in the middle of finished scenery distracts from the rest significantly.  With Empire Recycling completed, Interchange guests will see a finished scene, and the best part is that the regular operators will, too.

~RGDave
Friday, October 12, 2018

Learning About "Photo Stacking"

As time rolls long, change is inevitable.  Some things change for the worse, and many change for the better.  One of those things that is changing for the better is digital photography.

While in years past photographers made images and had to choose the best one for a given audience or taste, that is not the case today.  With the artistic control that photographers have in post-processing for digital images, including Photoshop or other photo editing software, there is a new and exciting ability to convey a final image assembled by using multiple originals. 

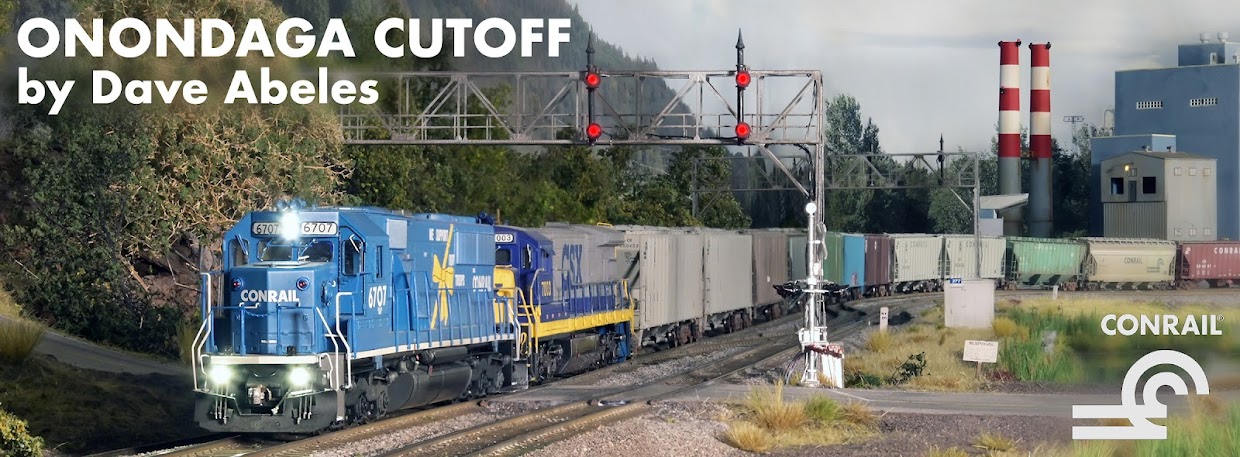
In the last few years I have become aware through the model railroading media and other blogs of "photo stacking," a newer technique that allows multiple images with the same framing but different focus points to be combined into one image with much greater depth of field.  Here's my first experience with using this technique on the Onondaga Cutoff:


Note how the track in the foreground, the signals and locomotives in the center, and the backdrop are all in reasonably sharp focus.  Amazing! 

For decades the technique was to use a tripod and long exposure with your F-stop set to the highest available aperture to maximize depth of field.  And that worked, generally - but still kept most extremes in a softer or outright blurry focus.  Photoshop can fix many things but not that.  Enter photo stacking:  separate software that combines the sharpest parts of 5, 10, 20, or more images of the same scene, stacking them and showing just the sharpest parts of each.

I used the Helicon Focus software suite for this, and have lots to learn - but this image was made with 10 base images in about 15 minutes.

Stay tuned as I learn more about this, and share with you here.  This hobby is getting to be more and more fun as time goes on!

~RGDave